


When it comes to software testing tools in the browser automation space, you’d be hard-pressed to find a tool more popular than Selenium. Selenium is a powerful tool in different versions, each one best suited to a particular end. However, all that power and flexibility comes at a price: Selenium’s learning curve is somewhat steep. In this post, we’ll give another contribution to your Selenium learning journey by teaching you how to check if an element exists in Selenium.
Why is such a check important? Well, it all boils down to the DOM (document object model) of HTML pages. When performing testing with Selenium, you’ll be interacting with elements from the page. If you try to interact with an element that doesn’t exist—or at least doesn’t exist yet— your test will end in an error. Also, the verification itself might be the test: when performing UI tests, you might need to check whether a given element exists and if it’s visible on the page.
Getting Started With Selenium WebDriver in JavaScript
Before we can actually show you how to find an element in Selenium, we need to get you up to speed with Selenium itself. So that’s what we’re doing now. Just follow the steps we’ll lay out, and you’ll have a running Selenium setup in no time.
For this quick tutorial, we assume you’re familiar with Node.js and npm and have both installed and working on your machine.
Step #1: Obtain the Correct Driver for Your Browser and Operating System
Selenium WebDriver is deployed as two separate components. The first of them is the executable you use to drive your browser. You have to download the adequate driver for your browser and operating system. We’re using Chrome on Windows, so we’ll download the web driver for the Chrome browser. You’ll also have to take your browser’s version into account.
After downloading the executable, add its location to your system’s path, so it’s accessible across your whole file system.
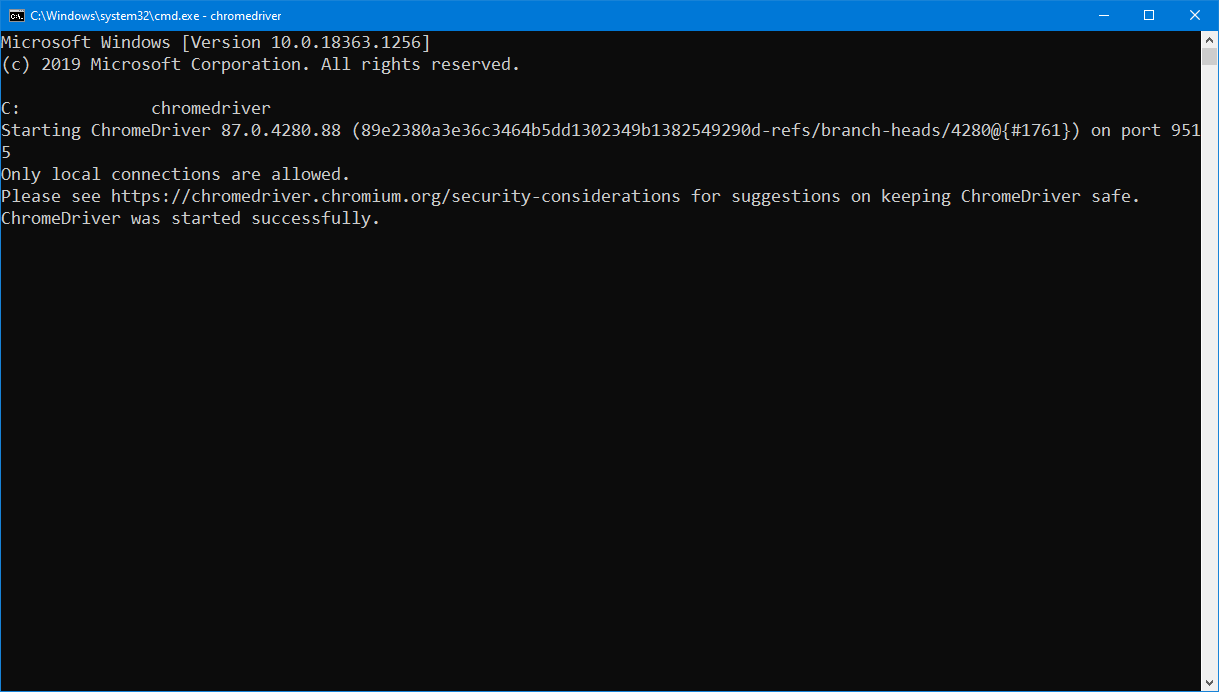
As soon as the executable is added to your OS’s path, fire up a terminal and run the executable’s name, so that you know everything went right. This is what we see on our machine:
Step #2: Start a New Node Project
The next step is to create a new Node.js project, which should be super easy if you’re already familiar with the framework. But it’s also easy even if you’re not familiar with Node. Start by creating a directory using your terminal. Then access the directory and run the following command:
npm init
You’ll be prompted with many questions to configure your project. Keep pressing enter to use the default values for everything. After you’re done, verify whether you have a package.json file inside your directory.
Step #3: Add Selenium WebDriver as a Dependency to Your Project
The next step is to add the JavaScript bindings for Selenium as a dependency to the project. While still in the same directory, run the following command:
npm install selenium-webdriver
Step #4: Test Your Selenium Setup by Creating a Simple Automation
First, create a file called index.js using your preferred text editor. Then add the following code to it:
const { Builder, By, Key, NoSuchElementError } = require("selenium-webdriver");

async function googleSomething(search)
{
    let driver = await new Builder().forBrowser("chrome").build();
    await driver.get("http://google.com");
    let element = await driver.findElement(By.name("q"));
    await element.sendKeys(search);
    await element.sendKeys(Key.RETURN);
}

googleSomething("Testim")
The code above is very simple. It consists of a single function called googleSomething, which takes a value as a parameter. Inside the function, we define a driver for a Chrome browser. Then we use the driver to access Google and find the element with the name “q” (the search text field).
After retrieving the element, we use the sendKeys function to send the value the function received as a parameter followed by the return key to the search text field.
Finally, we call the function, passing “Testim” as its argument.
To test if everything is working, go back to your terminal and run the following command:
node index.js
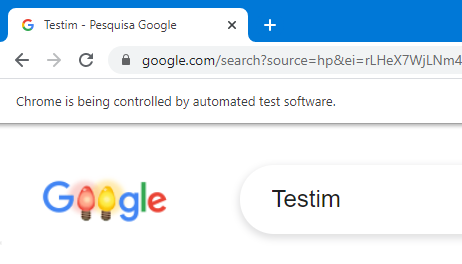
If everything is right, you should see Chrome—or your chosen browser—opening up, accessing the Google home page, and searching for “Testim” on its own. Pretty nice, huh? Notice the warning that Chrome is being controlled by automated software:
Selenium: Check If Element Exists in a Single Line of Code
Now that you have a working JavaScript Selenium setup, it’s time to learn how to check if an element exists. As you’ll see, performing such a check is really easy. You can do it with a single line:
let exists = await driver.findElements(By.name('q')).then(found => !!found.length);
The line above uses the findElements method to find elements by a given attribute—in this case, the name. As the name of the function suggests, it returns an array of the elements found. If no elements are found, the array will be empty. In other words, its length will be equal to zero. The code above uses the bang operator (!!) to convert the array’s length to boolean.
You could use the line above to check whether an element with the name “q” exists on Google’s home page, and the answer would be true. It’d probably make sense to extract this line of code into its own function to keep things more organized.
When Not To Use driver.findElement() Directly?
Even though the example above works, there’s an important reason for not doing it that way. In short, it’s very common that elements on a web page will load asynchronously. If you try to access an element before it exists on the page, you’ll get an error.
Fortunately, there’s an easy way out, since Selenium offers “waiting” functionality. Through waits, you can write test scripts so that they will wait until a given element is present—or another condition you specify—before attempting to retrieve it. That way, your test becomes more reliable.
Here are a few posts that cover those features:
How About an Alternative? Checking for Element’s Existence With Testim
As we’ve promised, we taught you how to check whether an element exists using Selenium. As you’ve seen, it’s quite easy: literally one line of code. Already we’ve mentioned, Selenium is a popular tool for web automation and testing. Despite its strengths, however, Selenium is not without its share of flaws. And one of Selenium’s main disadvantages is that it can give birth to frail tests that break too often due to changes made to the application, turning test maintenance into a heavy burden for everyone involved.
Testim is a test automation solution powered by AI and can create test cases that are much more resilient.
Start a Testim Trial Account
To follow along with this part of the tutorial, you’ll need a Testim account. So start by obtaining a trial. Remember that you’ll need a custom domain email for that; your Gmail or Outlook address won’t work.
As soon as you have your account set up, log in to Testim.
Install Testim Browser Extension
You’ll be prompted with a message asking you to install Testim’s browser extension.
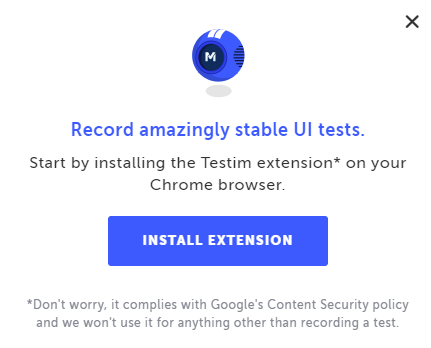
Click on “Install Extension” and follow the necessary steps to install and activate the extension.
Create Your First Test
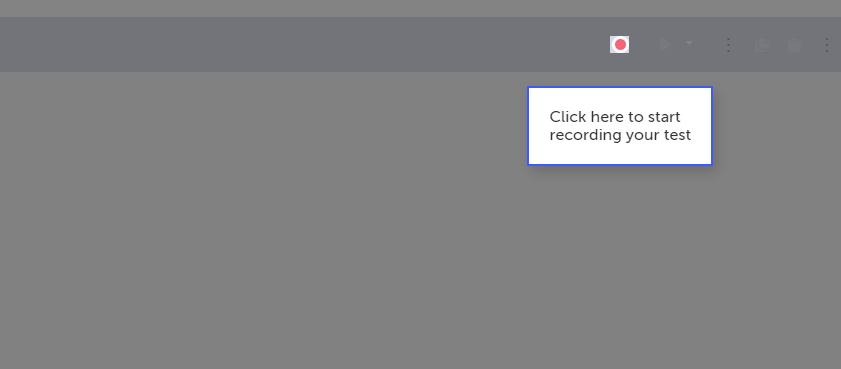
After you’re done, go back to Testim on your browser. You’ll be asked to click on the record button to start your first test:
After hitting the record button, you’ll be prompted for the URL for your test:
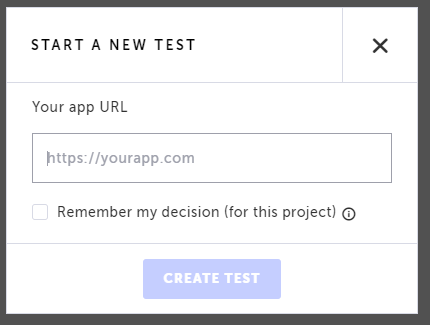
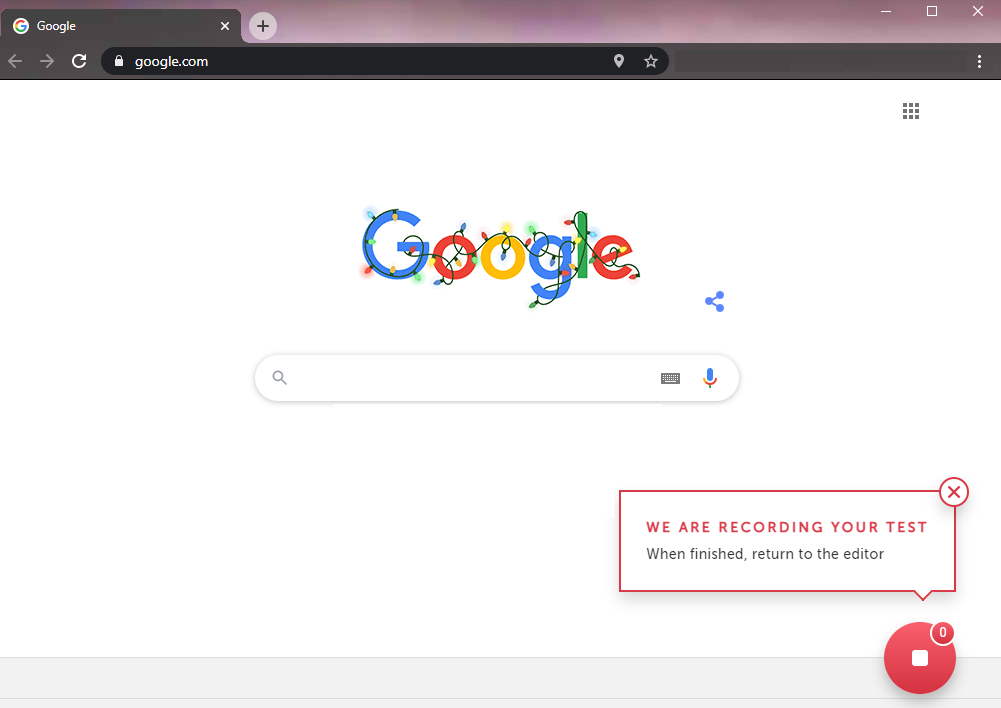
Since we’ll test the Google home page, type https://google.com and then click on “Create Test.” After that, you’ll see a new browser window with the Google home page on it, and a message indicating your actions are being recorded for the test:
Don’t do anything and close the window. Return to Testim, and you should see something like this:
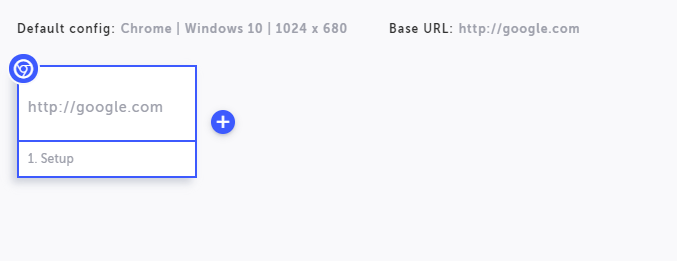
In Testim, each test can have many steps. Here we’re seeing a test case with a single step, which consists of accessing https://google.com.
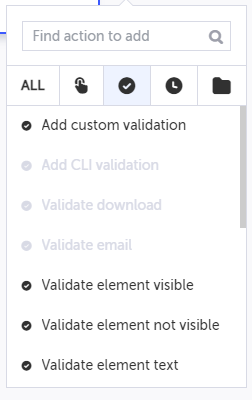
You’ll now add a new step, consisting of a validation. Testim offers several types of validations, and the one we’ll use aims to check whether an element exists and is visible.
Adding a Validation
To add a validation, click on the blue plus button after the single step of the test. A context menu will show up. Click on the validation button, as shown in the following image:
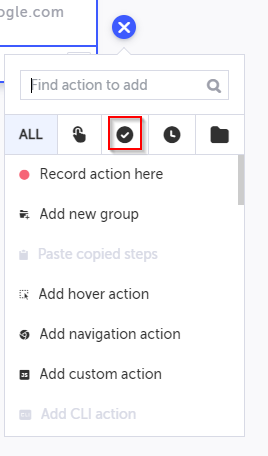
Then, click on “Validate element visible”:
You’ll then see a message saying that you need to open the base URL to choose an element. Clicking the link will open up another browser window where you’ll see the Google home page. Go back to the Testim window and repeat the process to add validation. This time, you’ll be taken back to the test Chrome window, and you’ll see you’re able to select elements from the page. Just click on the search box and close the window. Go back to Testim, and you’ll see something like this:
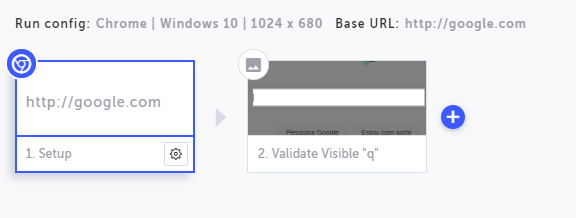
As you can see, our test now contains two steps, the second of which is a validation for the element “q” (i.e., the search text box).
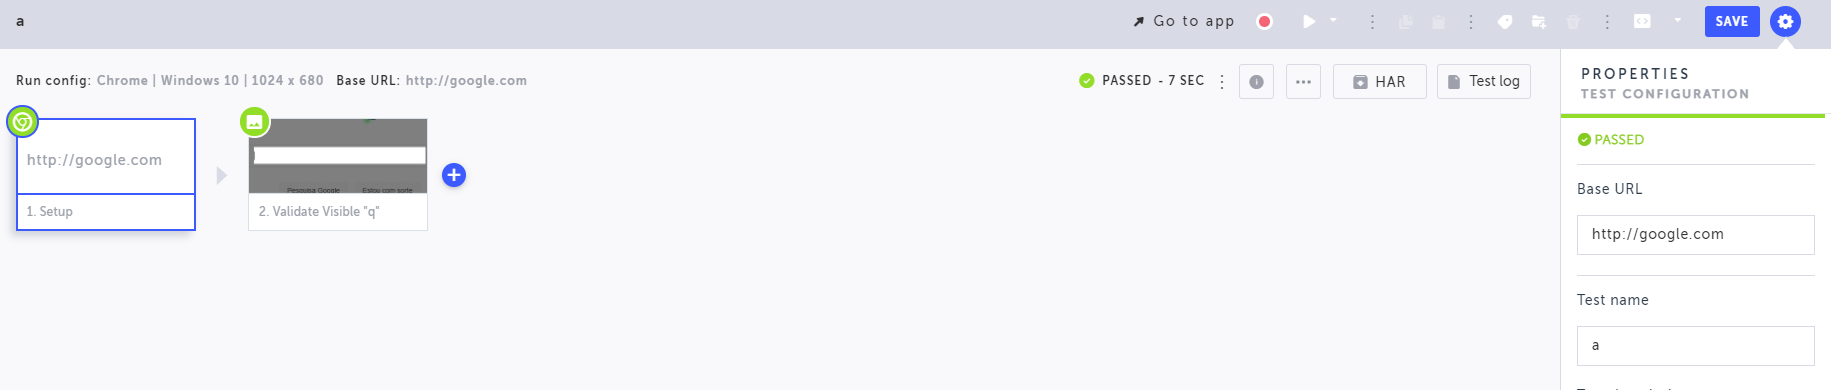
To run the test, you can click on the play button—right beside the record button—or press F8. After doing that, you should see a new Chrome window opening up, accessing the Google home page, and then doing nothing else. Over here on Testim’s window, you should see a message saying that the test was successful:
Life Beyond Selenium
Verifying the existence of an element on a page is a common use case for a browser automation tool. In this post, we’ve shown you how to do that using Selenium.
Despite Selenium being a flexible and popular tool, as mentioned, it comes with its disadvantages. Often, there are alternatives better suited for specific testing activities. Today, you’ve also learned how to use Testim to check for the existence of an element.
Testim is a test automation tool that uses machine learning to define smarter locators for elements on a web page, giving birth to less fragile tests and easing the burden of test maintenance on your team. Give Testim a try.


")