


Selenium Wait for Page to Load: A How-to Guide
Selenium has proven to be a good framework for automated testing. Automated testing speeds up the whole testing process. Though speed is a good thing while testing an application, sometimes you have to slow down and wait for page to load selenium. Speed and slowing down are contradictory, but if you want quality and accuracy, it’s okay to wait when required.
Are you confused? I’m talking about the concept of “waits” in Selenium. With most of the web applications being dynamic these days, you will have to use waits before running your tests to make sure you get accurate results. In this post, I will talk about what Selenium waits are. Then I will explain different types of waits and how to use them. Finally, I will tell you how you can make the process easy using Testim.
What are waits in Selenium?
Selenium provides a lot of functions and methods to make sure you get everything you need to test an application. Every developer today wants their application to be of high quality. To improve quality and to make the application attractive, many complex elements are used. Also, a lot of websites show user-specific data. This means that the information on the website is dynamic, not static.
To sum it up, web applications are increasingly complex and user-specific. To test such applications and to get accurate results on the application’s behavior, you need to wait until the elements are loaded. That’s why you use waits.
Selenium waits are used to pause the execution of the code for a while. This is done to wait for elements of the application to load so that actions can be performed on them.
Common Issues with page load and Selenium
When working with Selenium for web automation, users often encounter various issues related to page load. Some of the common problems include:
- Slow Page Load Times: Some web applications take longer than expected to load due to heavy JavaScript execution, slow server responses, or large media files.
- Elements Not Found: Dynamic content loading can cause Selenium to search for an element before it is available, resulting in NoSuchElementException errors.
- Stale Element Reference: If a web page updates dynamically, Selenium might attempt to interact with an element that has been refreshed or replaced. This causes StaleElementReferenceException.
- Timeout Issues: Setting an inappropriate wait time can cause tests to fail either because they timeout too early or waste time waiting longer than necessary.
- JavaScript Execution Delays: Some elements may depend on JavaScript execution, and if JavaScript takes longer to load, interactions may fail.
To mitigate these issues, Selenium provides different wait mechanisms, such as implicit waits, explicit waits, and fluent waits. They help in synchronizing test execution with web application behavior.
Types of waits in Selenium
There are three primary types of waits in Selenium:
- Implicit Wait
- Explicit Wait
- Fluent Wait
Implicit wait
An implicit wait is a straightforward way of telling Selenium to wait. If you are testing an application that takes time to load certain elements, you can use implicit wait. Implicit wait is useful when you have an idea of the approximate time the element takes to load.
Consider an example where you are testing an application that takes ten seconds to load an element. In this case, you know you have to make the code wait for at least ten seconds. You can use implicit wait in such a case where you know you have to wait for a particular amount of time for an element.
Python code
from selenium import webdriver

driver = webdriver.Firefox()
driver.get("http://www.example.com") #This is a dummy website URL
driver.implicitly_wait(10)
elem = driver.find_element_by_name("Element_to_be_found") #This is a dummy element
I’ve used a dummy website URL and a dummy element name in the code above. You can obviously replace that with an actual website URL and element name. The above code will load a website and then wait for ten seconds. After that, it will search for a particular element by ID.
Explicit wait
An explicit wait is an advanced form of an implicit wait. However, when you use explicit wait, you specify a condition the code should wait for.
Consider an example where you are testing an application that displays an alert box. The application is designed in such a way that when you enter some text in a text box and click on the submit button, a prompt or an alert box is displayed. The time taken for the alert to be displayed depends on different factors such as user input, server response time, network, etc.
An explicit wait is an advanced form of an implicit wait.
You can use an explicit wait in cases where you know you have to wait for the alert box to be displayed but you don’t know how much time it will take for the alert box to be displayed.
Python code
from selenium import webdriver
from selenium.webdriver.common.by import By
from selenium.webdriver.support.ui import WebDriverWait
from selenium.webdriver.support import expected_conditions as EC

driver = webdriver.Firefox()
driver.get("http://www.example.com") #This is a dummy website URL
try:
    elem = WebDriverWait(driver, 10).until(
        EC.presence_of_element_located((By.ID, "Element_to_be_found")) #This is a dummy element
    )
finally:
    driver.quit()
The above will open a website and then wait for ten seconds. If the code finds the element within ten seconds, an object is created. If the element is not found, an exception is raised.
Explicit wait can’t be used for every purpose. Some of the cases where you can use explicit wait are:
- visibility_of
- frame_to_be_available_and_switch_to_it
- element_to_be_clickable
- staleness_of
- element_to_be_selected
- element_selection_state_to_be
- alert_is_present
Fluent wait
You can consider fluent wait the advanced version of an explicit wait. Using the fluent wait, you can define a condition. You can also define the frequency with which you want to check for the specified condition.
Consider an example where you are testing an application where you know that elements are loading dynamically. You know that an element takes a maximum of fifty seconds to load. But the element can load any time between zero to fifty seconds.
In such cases, it is more efficient to keep checking for the element at regular intervals than to wait for fifty seconds. You can use fluent wait in such cases.
You can consider fluent wait the advanced version of an explicit wait.
Python doesn’t have a built-in method for a fluent wait. But you can pass various parameters to the WebDriverWait method to achieve a fluent wait.
Python Code
from selenium import webdriver
from selenium.webdriver.common.by import By
from selenium.webdriver.support.ui import WebDriverWait
from selenium.webdriver.support import expected_conditions as EC
from selenium.common.exceptions import *

driver = webdriver.Firefox()
driver.get("http://www.example.com") #This is a dummy website URL
wait = WebDriverWait(driver, 10, poll_frequency=1, ignored_exceptions=[ElementNotVisibleException, ElementNotSelectableException])
elem = wait.until(EC.element_to_be_clickable((By.XPATH, "//div")))
A major part of this code is similar to the example used for explicit wait. The part we need to focus on here is the line
wait = WebDriverWait(driver, 10, poll_frequency=1, ignored_exceptions=[ElementNotVisibleException, ElementNotSelectableException])
Here we’re setting the wait time as usual. But we have to new fields. The first is poll_frequency which is used to specify how frequently to check for a particular condition (which is mentioned in the next line). The second field ignored_exceptions is used to mention the exceptions to ignore. Because the element could be found any time between zero to fifty seconds, some exceptions occur until the element is found. We can add those exceptions here that the code would encounter if the element if not found.
The above code will open a website and wait for ten seconds before throwing an exception. The code will check for the element at the frequency of one second.
The challenge with using Selenium waits is choosing the type of wait that best suits your use-case. You can avoid this challenge by using an automated testing tool that can build in waits to match the element. Let’s have a look at how that can be done.
Handling asynchronous page loads
Many modern web applications use asynchronous JavaScript (AJAX) to load content dynamically. This can cause Selenium to attempt interactions before elements are available. To handle asynchronous page loads effectively, consider the following strategies:
- Explicit Wait with Expected Conditions: Using explicit waits with conditions such as element_to_be_clickable or visibility_of_element_located can help ensure elements are ready before interaction.
- Monitor network requests: Tools like Selenium’s WebDriverWait combined with JavaScript execution can help track when all network calls have completed.
- Wait for specific page events: Some applications trigger JavaScript events when content is fully loaded. Selenium can be configured to listen for these events before proceeding.
- Handle AJAX requests: Use WebDriverWait to check for the completion of AJAX requests, ensuring all dynamic content is available before interacting with elements.
- Polling Intervals: Fluent waits allow checking for element presence at intervals, reducing unnecessary waiting time.
Waits made easy using Testim
Testim is an automated testing tool in the “record and playback testing” category. To use Testim for application testing, you need to have an account. You can create a free account or log in here.
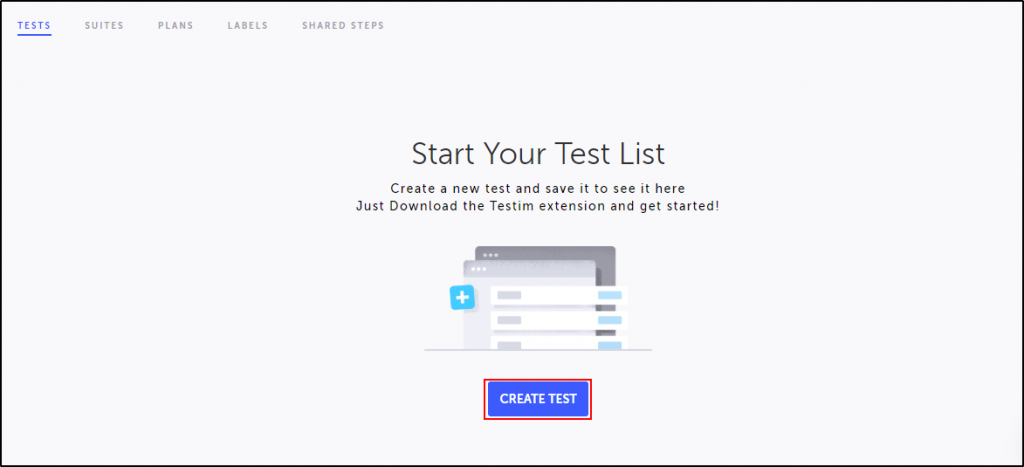
Once you log in, go to the dashboard and click on the “CREATE TEST” button and then click on the record icon.
Now, you will have to enter the URL of the website you want to test. Then you will see another browser window open where you can perform your test. I am going to perform a simple test on the Google search engine.
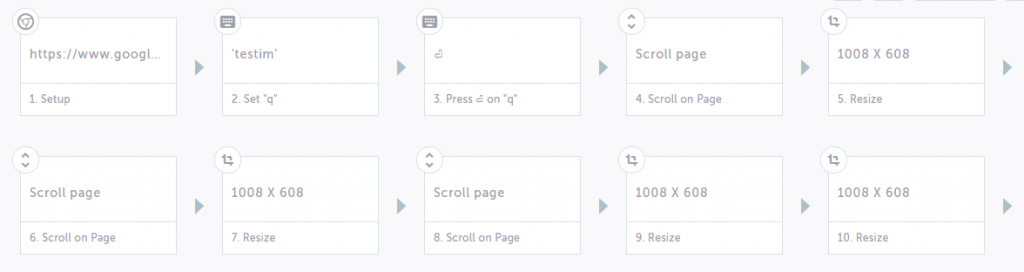
I have created a test where I’m searching for the Testim tool on the Google search engine. Then I will click on the link to open the Testim website. After performing the test on the browser, and after the actions are recorded, the test steps that were recorded in the visual editor are shown in the screenshot:
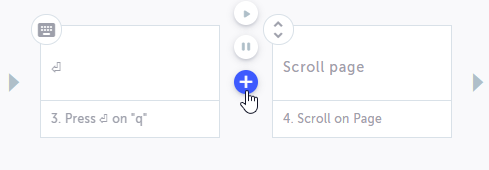
To add a wait, you just have to hover after the action that you want to add the wait for. You will see a “+” sign. Click on it.
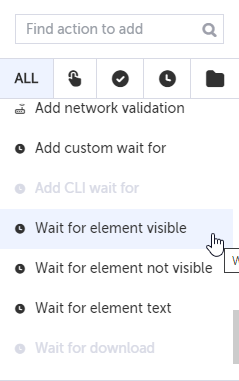
Now you’ll see a menu. Scroll down to find the “Wait for element visible” option and click on it.
It’s that easy. The next time you run the test, it will wait for the element to be visible before acting. There are additional waits that can be added in a similar way to provide more flexibility to handle today’s dynamic web applications.
Conclusion
Now you understand that while testing a dynamic application, it is important to use waits to get accurate results. While Selenium can help you do this, you can do it more easily using automated testing tools like Testim. The wait for element visible is just a simple example of how Testim can easily add waits. To learn more about the wait options that Testim provides, check out the docs, or get a free account and explore the tool.


")