


Selenium is a tool you can use to automate testing actions in a browser. Unsurprisingly, the main use case for Selenium is creating automated tests for web applications. And though there are different ways to use this technology, we’re here today to cover just one of them: Selenium WebDriver. Specifically, we’re covering one feature of WebDriver known as “WebDriverWait.”
Given how many web applications work nowadays, you often have to wait for some time before interacting with their elements during tests. Otherwise, you get errors, and your tests don’t work. Today’s post is a guide on WebDriverWait.
Here are the topic we’ll cover:
- What Is The Use of WebDriverWait?
- The Types of Waits
- Which Selenium Wait Is Better?
- Selenium WebDriverWait in Practice: A JavaScript Tutorial
Why Wait in Selenium WebDriver?
As you’ll soon see, trying to interact with elements that don’t exist on a page results in error. Parts of a page might load at different times. There’s no way to test those types of pages using WebDriver unless we can make it wait until the elements we need to interact with are ready.
The Types of Waits
Let’s briefly cover the different types of waits that Selenium WebDriver offers.
Implicit Waits
When you use an implicit wait, you can define the amount of time the driver should wait for an element to become available before throwing an exception. The default time is 0.
Explicit Waits
Explicit waits are more sophisticated. Instead of waiting for a set amount of time, they allow you to wait until a certain condition is met. WebDriver supports many conditions; in languages such as Java, the conditions are defined in the ExpectedCondition class. When it comes to JavaScript/Node.js, the same functionality can be found in the selenium-webdriver/lib/until module.
The list of supported conditions varies among the different language bindings. Here are some of the most common expected conditions:
- alert is present
- element exists
- element is visible
- title contains
- title is
- element staleness
- visible text
Fluent Waits
Fluent waits, also called smart waits, can be considered a subtype of explicit waits. They allow for a more flexible approach to waiting while locating elements, allowing the user to specify a maximum timeout for trying to locate an element, and also the frequency in which Selenium should try to find the element during that timeframe.
With fluent waits, you also have the ability to specify specific exceptions you want to dismiss when locating elements.
Which Selenium Wait Is Better?
The type of wait you’ll use depends on the specifics of your scenario. In general, you probably want to avoid implicit waits. Despite them being easy to understand and their code being simple, implicit waits introduce slowness to the testing scripts since the script will always pause for the defined duration.
Explicit waits using expected conditions mitigate that problem since execution can resume as soon as the condition is met.
Selenium WebDriverWait in Practice: A JavaScript Tutorial
Time to roll up your sleeves and learn how to create tests that make use of waits in Selenium. There are three steps: First, we install the tools we’re going to need. Then, we obtain the application we’re going to test. Finally, we write and run our tests. Here are the topics we’ll cover:
- Installing the Requirements
- Getting the Sample Application to Test
- Writing Tests
- Testing Without Waits
- Testing With Implicit Waits
- Testing With Fluent Wait
Installing the Requirements
The first tool we have to install is Node.js. That’s because our Selenium tests will live inside a Node.js application and also because we’ll need Node package manager (npm) to install a few tools. Go to the Node.js download page, download the adequate installer for your platform, and install it.
After you’ve installed Node.js, you’ll use npm to install the packages we’ll need. As we’ve mentioned, Selenium provides versions of the WebDriver for the main browsers. For this tutorial, we’re going to use the driver for the Chrome browser. You can install it globally by running this command:
npm install -g chromedriver
Let’s also install HTTP-server, which is—you guessed it!—a handy and light HTTP server we can start via command line. We’ll need it to serve the sample application we’ll obtain in the next step. Let’s install the server globally:
npm install -g http-server
Now, let’s create the structure for our test. Follow the steps below to create a folder, initiate a new Node.js project inside it, and add the WebDriver JavaScript library as a dependency to it:
mkdir webdriverwait-demo
cd webdriverwait-demo
npm init -y
npm install --save-dev selenium-webdriver
The first two lines create a new directory and change to it. In the third line, we create a project, passing the -y argument so that Node.js doesn’t ask questions and goes with the defaults. The fourth and final line installs the selenium-webdriver package as a development dependency (that’s what the –save-dev option means).
We’re done! At least with regards to installation. Let’s now get our sample application.
Getting the Sample Application to Test
Our sample application will be a simple issue tracker written in plain, vanilla JavaScript. You can find it on this GitHub repo. Clone it using Git or download it as a zip. No matter how you get it, put it in an easy-to-find folder. Then, access that folder by the command line and run HTTP-server. You should see a message letting you know that the server was successfully initialized.
Now, go to http://localhost:8080. You should see something like this:
![]()
Now you’re all set up and ready to start writing your tests. Before we get to that, though, let’s manually test the app. Write a description of an issue and choose a severity and an assignee. Then, click on “Add.”
If everything went right, you should see a loading gif for a few seconds and, after that, the issue listed below the form:
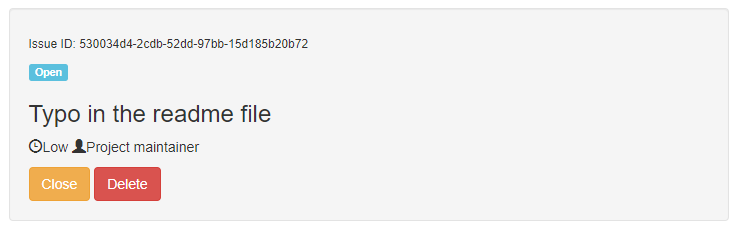
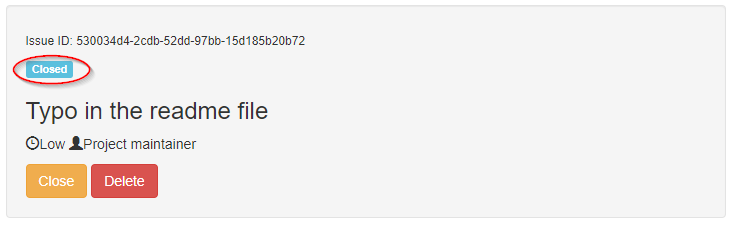
Now, click on “Close.” You’ll see the loading again, and after it’s gone, you’ll see the issue labeled as closed:
Finally, click on “Delete.” You’ll experience the loading again, and after that, the issue should no longer be listed.
The loading you’ve experienced wasn’t originally part of the app; it was added so we could see WebDriverWait in action. Anyway, now you’re all set up and ready to write tests and learn how to wait in Selenium.
Writing Tests
We’ll write our tests in three stages. First, we’ll write a test without waiting so you can see what happens when we try to interact with an element that’s not there. Then, we’ll fix the problem twice, using a different type of wait for each. Let’s get started.
Testing Without Waits
Inside your webdriverwait-demo folder, create a new text file and call it nowait.js. Using your favorite text editor—I’m using Visual Studio Code—add the following content to the file:
const {Builder, By} = require("selenium-webdriver");

async function test() {
	let driver = await new Builder().forBrowser("chrome").build();
	await driver.get("http://localhost:8080");
	await driver.findElement(By.id("issueDescInput")).sendKeys("Typo in README file");
	await driver.findElement(By.id("issueAssignedToInput")).sendKeys("Project Maintainer");
        await driver.findElement(By.className("btn-primary")).click();
}

test();
The code starts by requiring the selenium-webdriver library and importing the functions we’ll need from it. Then, we define an async function to store our test code. In it, we create a new driver for Chrome. After creating the driver, we use it to go to our app’s URL.
Then, we interact with three elements on the page:
- add the text “Typo in README file” to the input for the issue description
- add “Project Maintainer” to the input for the assignee
- click the button
It’s now time to run our file. Go back to our terminal and run node nowait.js. If everything went right, you should see a Chrome window opening and a new issue being created automatically:

Delete the issue that was created and close the Chrome window.
Well, that was interesting, but it didn’t really test anything. For instance, we could check whether the new issue is listed with the status “Open.” Let’s do just that by adding the following line to our test() function:
await driver.findElement(By.className("label-info")).getText().then(x => console.log(x));
The line uses the driver to find the element which has the class “label-info,” which is the label containing the issue status. Let’s attempt to retrieve the element’s text and log it to the console. Will that work? Let’s find out by running node nowait.js again.
After running that, you should see a lengthy error message. Here’s the really key part:
NoSuchElementError: no such element: Unable to locate element: {"method":"css selector","selector":".label-info"}
Selenium isn’t able to find the status label, which is no surprise at all since it’s added to the page a few seconds after we click on the button. This looks like a job for WebDriverWait!
Testing With Implicit Wait
Fortunately, we can easily resolve the error by adding an implicit wait to the code. Add the following line of code immediately before accessing the app’s URL:
await driver.manage().setTimeouts( { implicit: 5000 } );
Here, we define a timeout of five seconds. Considering we added an artificial loading period of just three seconds to our app, things should work as expected now. Rerun the app, and now you should see “Open” being printed to your terminal.
Testing With Explicit Wait
For the explicit wait, we’re going to use the until element located condition. First, let’s add the function to our list of imports as the first line of the file:
const {Builder, By, until} = require("selenium-webdriver");
Then, as the last line in the test() function, add the following line:
await driver.wait(until.elementLocated(By.className("label-info"))).then(el => el.getText().then(x => console.log(x)));
Here, we’re instructing WebDriver to wait until the element with the desired class name is located. Only then will we proceed to extract and log its text.
Testing With Fluent Wait
Finally, let’s see an example of testing using fluent waits.
This last example will only require a small change to the line you used in the previous example. Replace the following line:
await driver.wait(until.elementLocated(By.className("label-info"))).then(el => el.getText().then(x => console.log(x)));
with this one:
await driver.wait(until.elementLocated(By.className("label-info")), 20000, 'Timed out after 20 seconds', 4000).then(el => el.getText().then(x => console.log(x)));
As you can see, we continue to wait until the element is located; however, this time we pass three additional parameters to the elementLocated method:
- A timeout. In this case, we’re waiting 20 seconds (or 20000 miliseconds) before giving up
- The message for the timeout error.
- A value indicating how often we should poll for the element (we’re saying Selenium should try again every 4 seconds.)
That means that our code will poll for the object 5 times before timing out. Let’s run it.
If you run the test again, you’ll see “Open” being displayed on the console. Now, let’s cause the element to not be found. Change the code so the class name is invalid, like this:
await driver.wait(until.elementLocated(By.className("sdfsdfsdf")), 20000, 'Timed out after 20 seconds', 4000).then(el => el.getText().then(x => console.log(x)));
Then, execute the file again. Now, you’ll see the message “Timed out after 20 seconds” being displayed.
Wait! Where Should You Go Now?
You’ve just learned how—and why—to wait when using Selenium WebDriver with JavaScript. Where should you go from here?
Well, ideally, you’d learn how to turn what we did today into proper tests. For instance, you can integrate WebDriver automated scenarios with tools like Mocha, Jest, or another unit test framework. That way, you can make your Selenium tests part of your overall test suite and have your CI tool run them on each build or however often you prefer.
Selenium WebDriver is an extremely popular tool for testing web apps, but that doesn’t mean it’s free of problems. One of Selenium’s most known limitations is that its tests are often frail, breaking due to minimal application changes. That’s where an AI-powered testing solution such as Testim is a great alternative since it employs machine learning to create reliable and light-maintenance test suites.


