

")
Jasmine JS: A guide to start testing from-scratch
The benefits of having automated tests are well known, but setting up any new test framework can be bewildering and time consuming. If you’re writing JavaScript, a language that lies somewhere in the middle between object-oriented and functional programming, understanding what to test can be hard too. While Jest is the dominant testing framework for Javascript, Jasmine unit testing is still a viable option, especially for legacy projects. This tutorial will explain the basics of testing with Jasmine JS and get you started writing tests before you can say “console log hello world!”
This is a high-level view of what we’ll be covering in the post:
- Jasmine JS Fundamentals
- Getting Started With Jasmine
- How To Set Up Jasmine With NPM
- The Anatomy of a Jasmine Test Suite
- Mocking External Dependencies With Jasmine’s Built-in Features
By the end of the post, you’ll have not only a solid understanding of Jasmine from a theoretical point of view. You’ll also have learned, in practical terms, how to test with the tool. And you’ll have a great starting point from which you can continue to build upon. Let’s begin.
Jasmine JS fundamentals
Before you roll-up your sleeves and start testing with Jasmine, it’s important you have a firm grasp on the fundamentals of this testing tool.
So, let’s begin by answering some common questions about the framework, so you can understand exactly what Jasmine is and what role it plays in an overall strategy for automated testing.
What is Jasmine JS?
Jasmine is a framework for unit testing JavaScript. It’s open source and has approximately 15,800 stars on GitHub at the time of this writing. Its popularity among developers means that it has a strong community and documentation available when you get stuck.
Angular developers especially favor Jasmine because Jasmine is included natively in Angular projects.
Jasmine’s value proposition is that it’s easy to set up and that it’s easy to write tests. That’s great news for us, because next we’re going to dive into setting up Jasmine!
Jasmine’s value proposition is that it’s easy to set up and that it’s easy to write tests.
What is the Jasmine framework used for?
As you’ve just seen, Jasmine is a testing tool used for unit testing, which is one of the most important types of automated testing. However, it’s far from being the only one. Especially when it comes to web apps, your testing strategy needs many types of testing, including end-to-end testing, load testing, and UI testing.
Expand Your Test Coverage
In other words: Jasmine focus at the bottom of the test automation pyramid.
Is Jasmine a BDD framework?
Jasmine describes itself as a behavior-driven development (BDD) framework for testing JavaScript. Don’t let that stop you from using it even if you don’t use BDD per se. We do have an entire post dedicated to this dilemma, but here goes the TL;DR: Jasmine is great for many testing styles, and it’s not exclusive to BDD at all.
How do I run a unit test on Jasmine?
With the fundamentals out of the way, it’s time to get our hands dirty. Let’s see how to go from zero to hero in Jasmine in no time at all!
Setting up Jasmine
Before we do the work of setup, let’s cover the principles of setting up Jasmine. This is what we’re going to do at a high level:
- Give your code access to Jasmine, downloading it manually or with a package manager
- Initialize Jasmine
- Create a spec (test) file
- Make the source code available to your spec file
Then we’re ready to test! Don’t worry—we’ll walk through the details of how to set up Jasmine first.
Download and set up Jasmine
When we use the standalone version of Jasmine, we download it and manually place it in the project. This way of starting up is great if you just want to see how it all works.
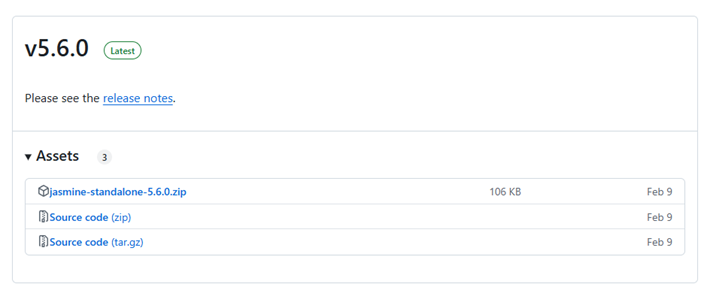
Start by downloading a distribution from the Jasmine releases page. At the time of this writing, the latest version is 5.6.0.
Then create a new directory and create a new subdirectory called Jasmine.
mkdir first-jasmine-project
cd first-jasmine-project
mkdir jasmine
Move the Jasmine release zip to first-jasmine-project/jasmine and unpack it there.
So your file structure should look like this:
- > first-jasmine-project
- > jasmine
- > jasmine-standalone-5.6.0
- > lib
- MIT.LICENSE
- > spec
- SpecRunner.html
- > src
- > jasmine-standalone-5.6.0
- > jasmine
Executing a Jasmine test for the first time
Drag SpecRunner.html to a web browser. Voila! You have Jasmine tests.
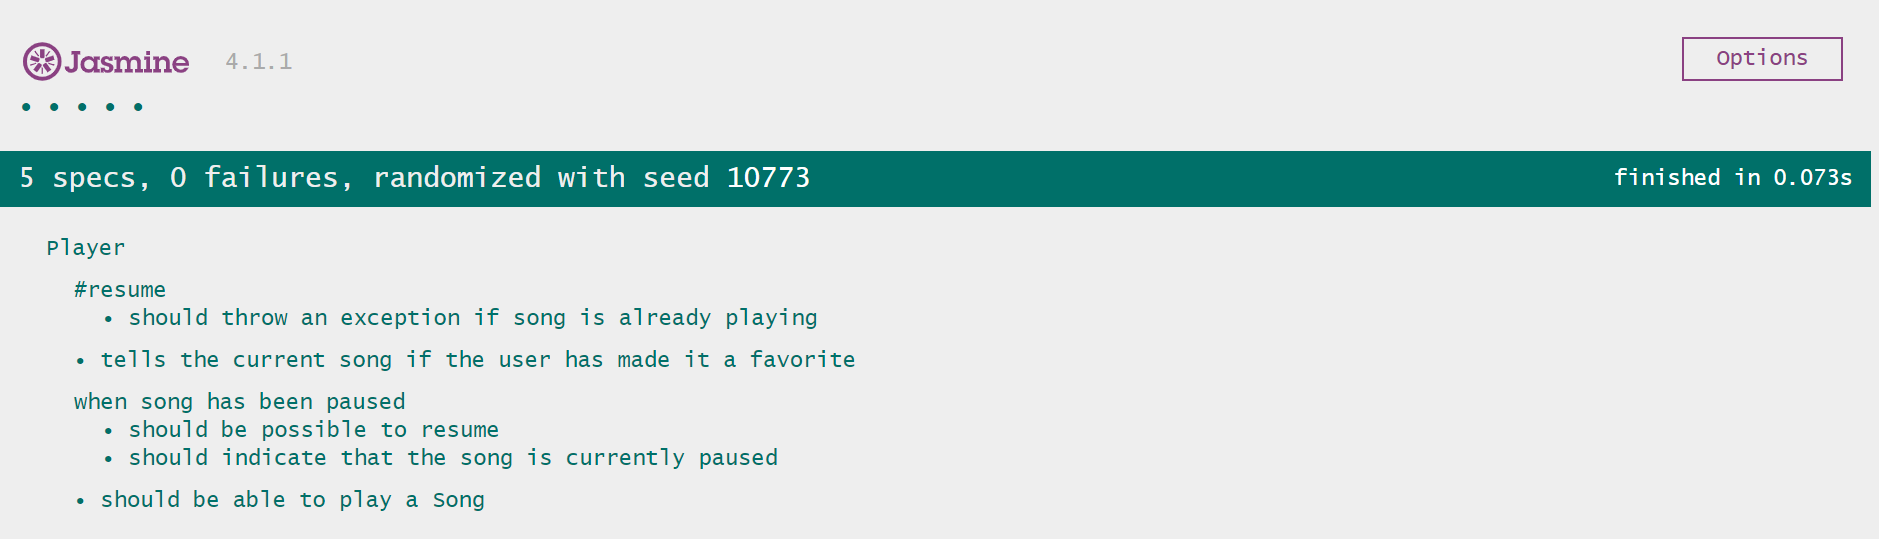
OK, they aren’t your tests, but at least they’re working.
Open up your favorite code editor (I’m using Visual Studio Code), and take a look at SpecRunner.html. There’s a section for specs (lines 21–22) and a section for source code (lines 17–18). Everything is linked here, so all we have to do to test our own code is link to our own test files and code files from here.
<!DOCTYPE html>
<html>
<head>
<meta charset="utf-8">
<title>Jasmine Spec Runner v5.6.0</title>

<link rel="shortcut icon" type="image/png" href="lib/jasmine-5.6.0/jasmine_favicon.png">
<link rel="stylesheet" href="lib/jasmine-5.6.0/jasmine.css">

<script src="lib/jasmine-5.6.0/jasmine.js"></script>
<script src="lib/jasmine-5.6.0/jasmine-html.js"></script>
<script src="lib/jasmine-5.6.0/boot0.js"></script>
<!-- optional: include a file here that configures the Jasmine env -->
<script src="lib/jasmine-5.6.0/boot1.js"></script>

<!-- include source files here... -->
<script src="src/Player.js"></script>
<script src="src/Song.js"></script>

<!-- include spec files here... -->
<script src="spec/SpecHelper.js"></script>
<script src="spec/PlayerSpec.js"></script>

</head>

<body>
</body>
</html>
Create and run your first test with Jasmine
Next, navigate back up to your project root (first-jasmine-project). Create an src folder, and create a new file called helloWorld.js with the following function:
//first_jasmine_project/src/helloWorld.js

function helloWorld() {
    return "hello world";
}
Then create a spec folder in the project root and create a new test file called helloWorldSpec.js. Put the following in the code.
//first-jasmine-project/spec/helloWorldSpec.js

describe("helloWorld", () => {
    it("returns hello world", () => {
      var actual = helloWorld();
      expect(actual).toBe("hello world");
    });
  })
Note the describe, it, and expect statements. Every Jasmine test uses these!
Now update the spec runner to have links to helloWorld.js and helloWorldSpec.js. Make sure to remove the old links.
//specRunner.html
...

<!-- include source files here... -->
<script src="../../src/helloWorld.js"></script>


<!-- include spec files here... -->
<script src="../../spec/helloWorldSpec.js"></script>
Drag the spec runner into your browser—or double-click it—to see your test run—and pass!

Now that you know how to run your own tests using the standalone Jasmine distribution, you’re really rolling. The next bit will cover another way to set up Jasmine using NPM, or you can skip ahead to learn about Jasmine tests. But before moving on to NPM setup, let’s discuss how you can debug Jasmine tests when things don’t end up as expected.
Can you debug Jasmine test cases?
Yes, you can debug Jasmine Test cases. You can add debugger; in browser-based setups in your spec or source files. After that, you can use the browser’s built-in dev tools to debug the code. While using Node.js, you can run the tests with node inspect node_modules/.bin/jasmine for starting the debugger. You can also use breakpoints in IDEs like VS Code. This will allow you to pause test case execution, inspect the variables, and find out where your code is failing.
Set up Jasmine with NPM
Instead of manually downloading the Jasmine distribution, we can use Node Package Manager (NPM). NPM handles keeping track of what version of our package we’re using and makes it really simple to install packages.
Steps to set up Jasmine with NPM
In your terminal, navigate into your project. If you’re using the same project as above, delete your entire first-jasmine-project/jasmine directory. From the root of first-jasmine-project, do the following:
Install Jasmine. NPM handles getting the most recent version of the Jasmine package and puts a copy in your node_modules folder.
npm install --save-dev jasmine
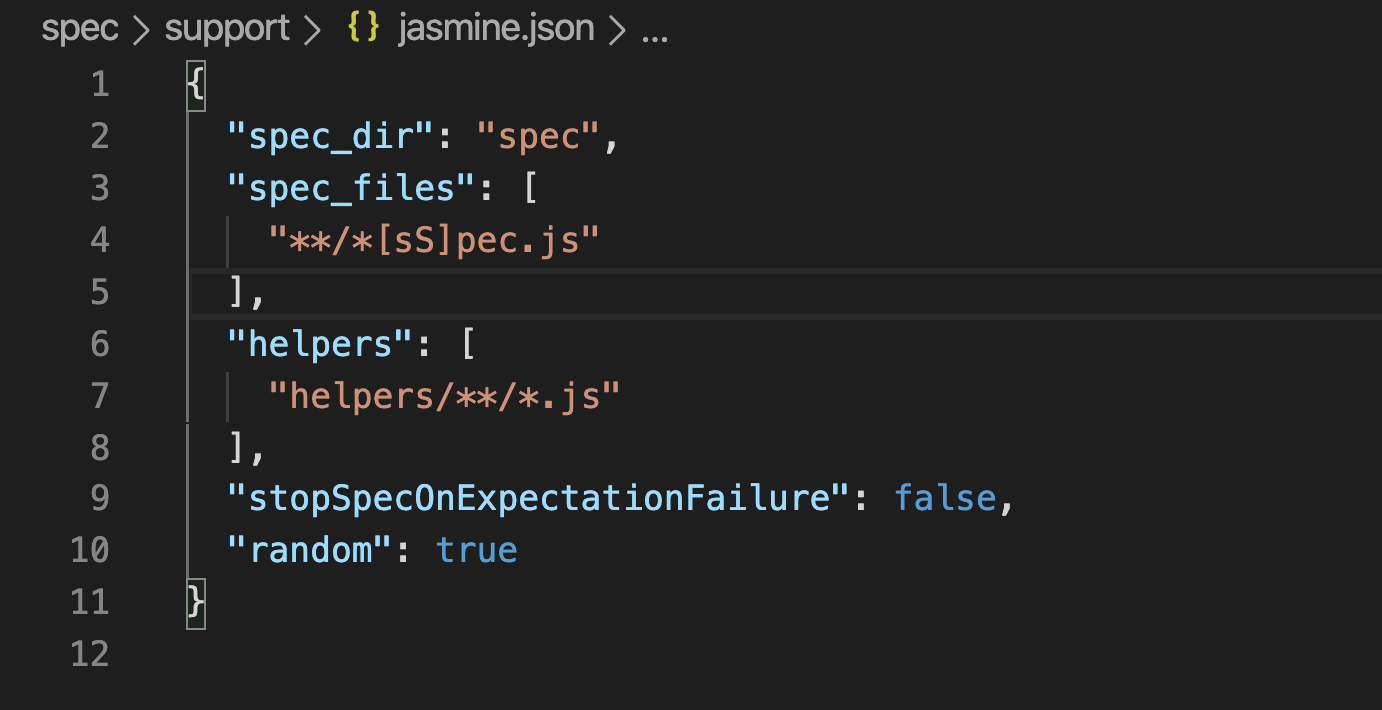
Initialize Jasmine. This will generate a support/jasmine.json within spec that lets Jasmine know where to look for tests.
jasmine init
Now run tests by simply running jasmine in the command line, instead of using the specRunner.html.
jasmine
The tests will run in the terminal. The test should fail because it can’t find the code for helloWorld().
To make the test pass, let’s export the code so we can use it in the test file. Back in src/helloWorld.js:
//first-jasmine-project/src/helloWorld.js

function helloWorld() {
    return "hello world";
};

module.exports = helloWorld;
Now, go back to the spec file and tell Jasmine where to look for the code. In helloWorld.spec.js require src/helloWorld.js.
//first-jasmine-project/spec/helloWorld.spec.js

const helloWorld = require('../src/helloWorld.js');

describe("helloWorld", () => {
    it("returns hello world", () => {
      expect(helloWorld()).toBe("hello world");
    });
  });
Now run the tests again. They should pass!
Check out the Jasmine docs to set up Jasmine for Ruby, if you’re interested.
Next we’ll explore Jasmine’s test suite.
What are Jasmine test cases? The anatomy of a tests In Jasmine
spec file____________________________
|    describe block________________  |
|    |        it statement_______  | |
|    |        |    expectation   | | |
|    |        |__________________| | |
|    |_____________________________| |
|____________________________________|
Now that we know how to set up Jasmine, let’s understand what’s in a Jasmine test.
1. Spec files
Jasmine tests are split into specs (test files). It’s up to you how to organize your test files. You can tell Jasmine where to search for the test files in spec/support/jasmine.json, which gets generated when you run jasmine init.
2. Describe blocks
Within a spec file, Jasmine uses describe blocks to help you organize your tests. A describe block is a wrapper in which you can write the subject of the current set of tests. You can nest describe blocks as much as you want.
//myService.spec.js

describe('myService', () => {
  describe('add', () => {
    ...
    }
  describe('subtract', () => {
    ...
    }
  }
)
3. It statements
It statements tell us what it (the unit being tested) should be doing. For our calculator example above, in myService, the method add should return the sum of two numbers. You can put as many it statements in each describe block as you want.
describe('myService', () => {
    describe('add', () => {
        it('should return the sum of two numbers', () => {
        ...
        })
    })
})
Sometimes, you may want to disable a test temporarily without deleting it. Jasmine helps you with that.
How do you Skip test cases in Jasmine?
You can skip a test case in Jasmine by adding a prefix x on it. For example, xit(…). This will tell Jasmine to ignore the test during execution. Similarly, you can also use xdescribe(…) to skip the entire test suite. This is useful when you are still writing a test or debugging other tests without affecting the overall test results.
You can skip a test case in Jasmine by adding a prefix x on it.
4. Expectations
Jasmine uses Expectations to set up comparisons between two things. I expect add(1,1) to be 2. If the function returns something other than 2, the test fails. You can put as many Expectations in each it statement as you want.
it('should return the sum of two numbers', () => {

    let actual = add(1,1);

    let expected = 2;

    expect(actual).toBe(expected);
})
5. Matchers
Compare a value from your code with an expected value using a boolean matcher. ToBe is one of the most common matchers. A full list of Jasmine matchers is here. You can also customize your matchers.
expect(actual).toBe(expected);
If you have previous experience with a different JavaScript testing framework—or even a test framework for a different language—you’re certainly familiar with the concept of assertions. Well, that’s pretty much the same thing as Jasmine matchers.
Some other common matches include:
- toBeTruthy(): it checks whether the actual value evaluates to true
- toBeNull(): to check the actual value is null
- toBeUndefined(): to check the actual value is undefined
- toContain(): to check whether the actual value contains a specific value—e.g. a character in a string or an item inside an array
- toBeLessThan(): to check whether the actual value is less than a specified value
- toThrow(): it verifies whether a function throws some error
- toThrowError(): it verifies whether a function throws a specific error
- toBeNaN(): it verifies whether the specified value is NaN (not a number)
In case you’re already wondering: yes, many of those have an opposite, such as toBeDefined(), toBeFalsy(), and so on.
Now that we know what makes up Jasmine tests, let’s briefly dive into Jasmine’s implementation of one of the most important unit test concepts: spies.
6. Jasmine spies
Unit testing is easy when your methods have no external dependencies. But what if they do? A potential solution would be to use a third-party mocking library, such as SinonJS.
But it’s even better if you don’t need an additional tool. Fortunately, in the case of Jasmine, you don’t.
Jasmine’s solution is spies. When you call an outside method from the function you’re testing, you can tell the test to do something else instead. This allows you to control what external methods return and to check how many times the methods are called.
An example with a spy
The method calculate calls an outside method, isAddition, which will return true or false. If it returns true, calculate will return the sum of two numbers.
function calculate(x, y) {
  if (OutsideService.isAddition() === true){
    return x+y
  }
}
The test
In the test for calculate, we tell Jasmine to spy on the outside method. That way we can control what isAddition returns during the test and test how calculate reacts to each return value.
describe('calculate, a function that calls an outside thing', () => {
it('should return sum of two numbers when isAddition is true', () => {
// arrange
spyOn(OutsideService, "isAddition").and.returnValue(true);

// act
var result = calculate(3,4);

// assert
expect(result).toBe(7);
})
})
Understanding spies will be extremely useful as you test more complicated applications.
Next steps
Now you know how to set up Jasmine, the components of a Jasmine test suite, and the basic syntax to write unit tests for your JavaScript project. Before you know it, with a little practice, writing tests will feel like second nature. In the meantime, don’t forget to explore other kinds of tests too!
Also, keep in mind that you don’t have to settle with Jasmine—or any other framework for that matter—for life. Quite the opposite: feel free to explore different tools and get used to their styles. You might discover the best test framework for you just waiting around the corner.
At the end of the day, your choice of testing framework is way less important than adhering to a testing discipline. Create automated tests, and you’ll write better software as a result.
This post was written by Jess Campbell. Jess is a software developer and consultant in Ann Arbor, MI. Jess has worked on many sides of software product development, spanning Photoshop contracting, web and mobile design, UX, front end, and full-stack development. She specializes in helping clients identify business problems that can be solved with high quality software.


