


Unit testing is a fundamental practice in React Native development. It ensures that individual components and functions work as expected. A React Native unit is the smallest testable part of a React Native app. What is considered to be the smallest testable part is debatable, and what should be tested is a personal preference, depending on the project.
You can perform React Native unit testing on an individual method, function, class, procedure, module, UI element, or object. You’ll want to validate that each unit of your React Native code performs as expected, and you’ll want to test each unit’s impact on the behavior of your system.
In the long run, React Native unit testing makes debugging easier. It will be faster to develop your app, and it’ll cost less to fix errors in your code.
React native unit testing needs to be modular
If the React Native unit tests you run are well written, and you run them every time there’s a change in the code, then you’ll have more confidence in your project performance. It will also be easier for you to maintain the code accurately.
Your unit tests need to be modular so you can reuse them. The easier your code is to reuse, the more tests you can do, and the more time you save.
Which Is the Best React Native Unit Testing Framework?
Jasmine, Enzyme, Jest, and Mocha are the most popular JavaScript frameworks. React Native unit testing is a bit more fickle than normal JavaScript frameworks. Since you aren’t building a traditional Web application, you won’t be using the Web standards from jsdom. This results in very shallow rendering, and Enzyme has no React Native adapter.
(Check out this article to learn about the differences between Enzyme and Jest.)
Have no fear! React-native-testing-library is here! This library allows you to test React Native components, and it updates itself with the latest React features. Super.
Install through yarn.
yarn add --dev react-native-testing-library
Mocha: Great Flexibility Comes With Great Configuration
Mocha is a much older and wiser framework than most testing frameworks, such as Jest. Since the community is larger, it’s easier to get support and documentation to solve issues.
Mocha allows for more flexibility and configuration. Mocha provides many options, such as assertions, spy libraries, and mocking. It uses Chai for assertions. It uses both test-driven development (TDD) and behavior-driven development (BDD). You can also run your tests on an integrated development environment, such as Webstorm.
Due to Mocha’s flexibility, it’s better for large-scale projects. However, its configuration can be trickier than Jest’s.
Jest is the best option for most React Native projects.
Jest Is the Best
Facebook developed the Jest unit testing framework. Jest was inspired by the JavaScript testing framework, Jasmine. Jest is built into React, which makes Jest a simple, out-of-the-box solution for React Native unit testing.
As a bonus, Jest not only can unit test React Native apps, but it can also unit test other JavaScript frameworks, such as Angular, Vue, Babel, TypeScript, and Node.
Jest is the best option for most React Native projects. If your project is already using Mocha, then it’s easy to migrate over to Jest. Unfortunately, since it’s a relatively new framework in comparison to Mocha, fewer JavaScript developers are using it.
Assuming you’ve got your React Native app all set up and dependencies installed, let’s get going!
Easy Configuration for Native React Unit Testing
Straight out of the box, Jest is already installed for you for most React Native apps. Simply open that package.json file, and set Jest’s preset to React Native.
"scripts": {
            "test": "jest"
},

"jest": {
         "preset": "jest-react-native"
}
Easy peasy. Now you’re ready to get started.
Run, Jest, Run!
You can run Jest in the command line.
jest
Or you can test specific files.
jest first-test --notify --config=config.json
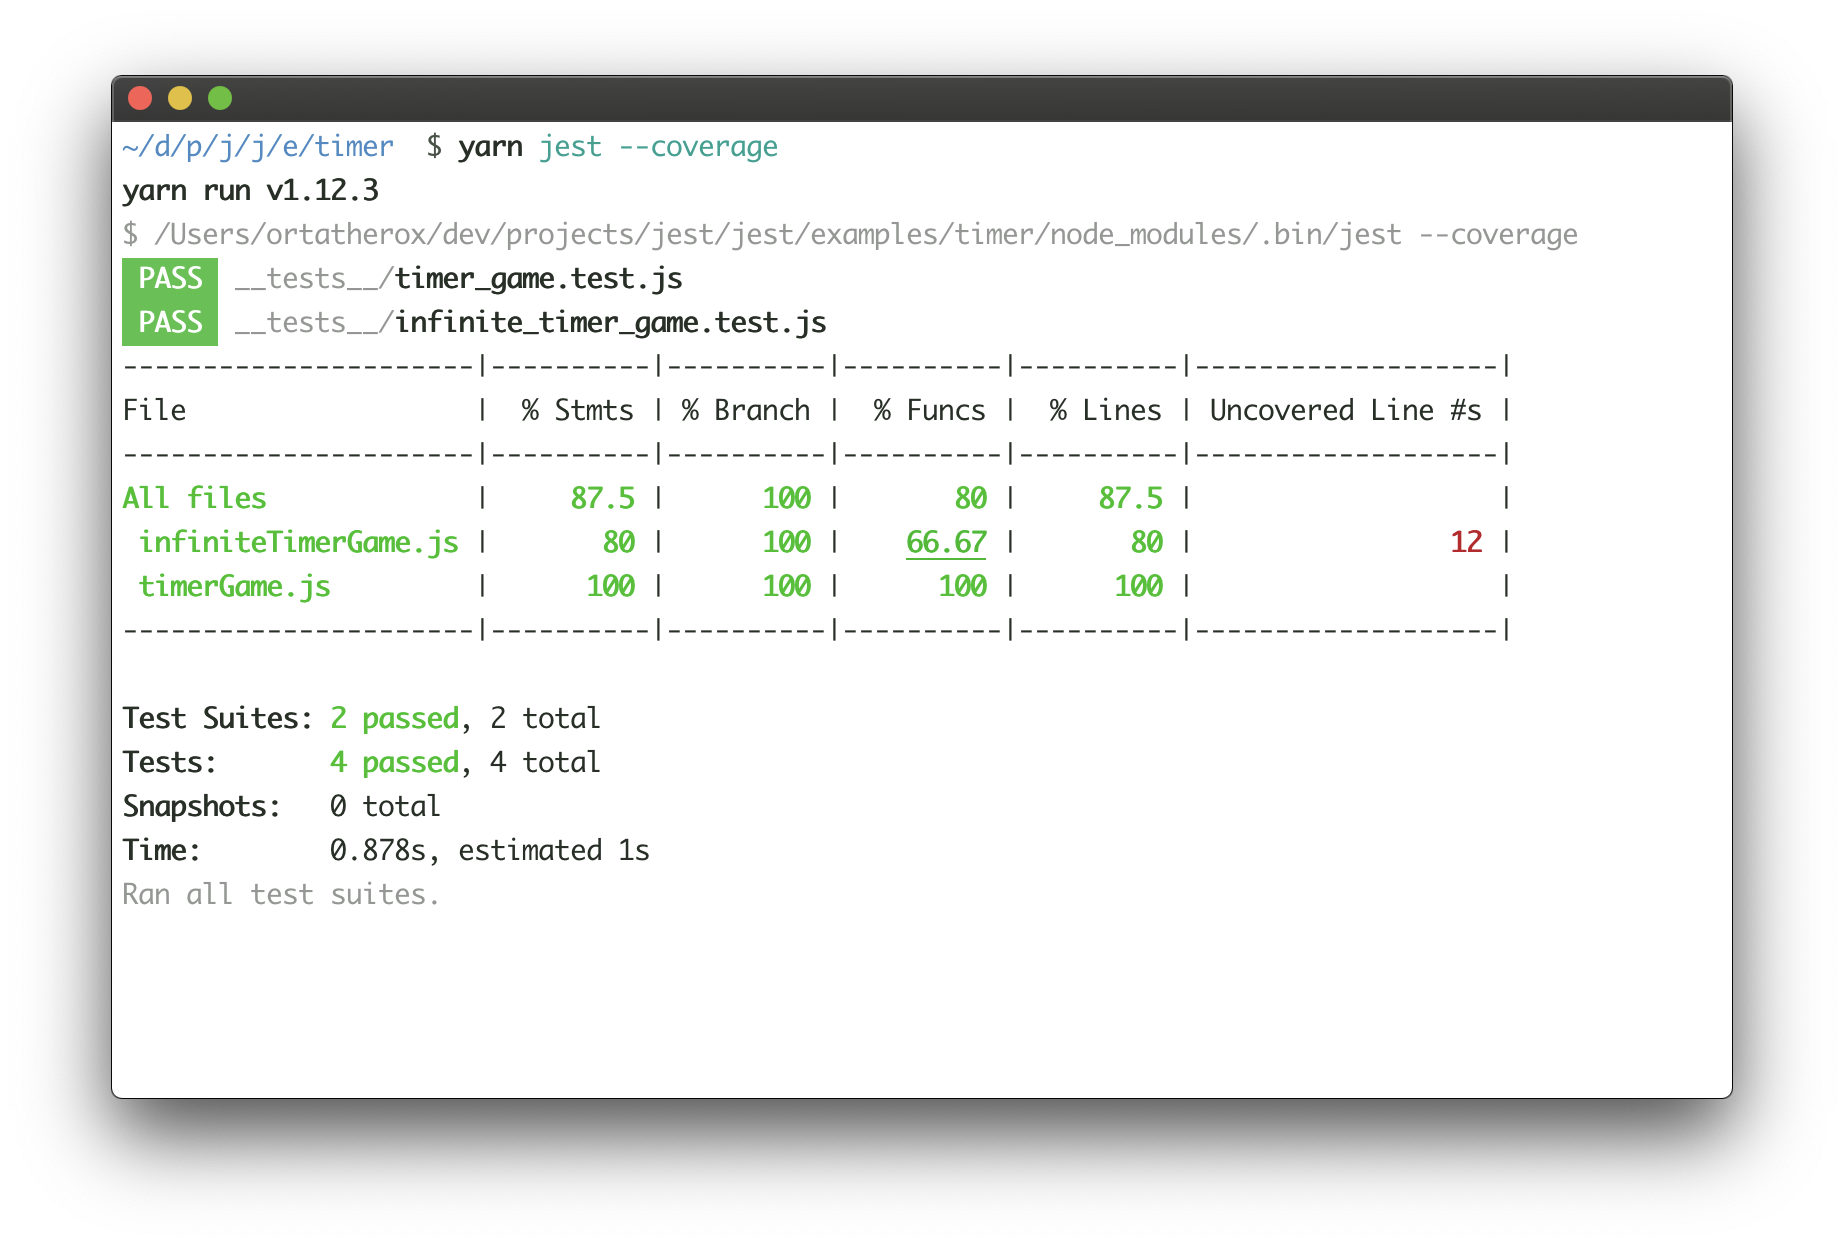
This is what Jest will look like when running in the command line. In the beginning, the most important parts to look at are the tests and snapshots.
Testing Functionality
Test suites test the functionality of your app. Typically, you’d do this by simulating a browser, but as mentioned before, things are slightly different with React Native. One test suite may have many tests within its code.
Let’s say you have a function that adds two numbers, and you already know what the result should be. Simply import that sum function into your test file, in a separate test file called SumTest.js.
import React from 'react';
import mySum from '../MySum';
import renderer from 'react-test-renderer';

const mySum = require('./MySum');

test('MySum equals 2', () => {
      expect(mySum(1, 1).toBe(2);
});
As predicted, the output of the Jest test will look something like this:
PASS ./MySumTest.js

✓ MySum equals 2 (4ms)
Testing Strings and Arrays With Jest
You can test if strings contain other strings. This is useful if you want to test passwords or text content for keywords. And then, you can also check if strings don’t contain certain strings.
test('Check for ticks.', () => {
     expect('ticks').toMatch(/tick/);
});


test('U is not in here.', () => {
     expect('here).not.toMatch(/u/);
});
You can test if an array of data contains certain data. Let’s say you want to search for an array of countries you’ve visited, and you’re looking for a mention of France.
test('List of countries with France.', () => {
     expect(countryList).toContain('France');
     expect(new Set(countryList)).toContain('France');
});
You’d use expect to inspect what you expect from your Jest test.
Snapshots for Fast Results
In Jest, snapshots are a fast way to test the user interface rendered with the associated snapshot file. This makes debugging fast and saves your engineers’ time because they no longer have to wait for the app to be built.
import React from 'react';
import Home from '../Home';
import renderer from 'react-test-renderer';

test('Renders snapshot as expected', () => {
        const tree = renderer.create(<Home />).toJSON();
        expect(tree).toMatchSnapshot();
});
To test, simply run jest in the command line. This simple example should output a file that matches your intended user interface, CSS style, and text. Snapshots can test several things, including links and items.
Automocking React Native Unit Tests
As you’re getting started, Jest can easily mock React Native modules, API calls, and functions automatically. Mocking modules emulate their predicted behavior and give you control over your external dependencies.
Simply add to your Jest configuration:
"jest": {

        "preset":"jest-react-native",

        "automock":"true"

}
Similarly, when you want to get more advanced, you can do manual mocking using jest.fn().
describe('Manually mocking functions', () => {

   it('Mock functions', () => {
      const fn = jest.fn();
      fn.mockReturnValueOnce(10);
      const result = fn(10);

      expect(result).toBe(10);
      expect(fn).toHaveBeenCalled();
   });

});
toBeTruthy or toBeFalsy?
I love the way Jest can express Boolean data. “True” and “false” become toBeTruthy and toBeFalsy. You can create various objects and test their attribute values.
const myJokes= {
      understood: false,
      funny: true,
};

describe('Testing my jokes', () => {
          test('Are they understood?', () => {
              expect(myJoke.understood).toBeFalsy();
          });

          test('How are my jokes funny?', () => {
                expect(myJoke.funny).toBeTruthy();
          });
});
React Native Unit Testing the Elements in Your App
Thanks to react-test-renderer, you can test components in your app’s view for specific elements.
Let’s say you want to check your home view for a text box that collects users’ e-mails for a newsletter. Jest will test the selected component in JSON format for your elements.
import 'react-native';
import React from 'react';
import Home from '../src/Home';
import renderer from 'react-test-renderer';

let findTextElement = function(tree, element){
    console.warn(tree)
    return true;
}

it('Find text element', ()=>{
   let tree = renderer.create(
       <Home />
   ).toJSON();

   expect(findTextElement(tree, 'email')).toBeDefined();
})
Skip Broken Code
An interesting feature in Jest involves skipping tests that have code that you know is broken. Maybe you want to hang on to this code for some reason, or you want to skip it because it isn’t necessary right now. Just add .skip to the end of the test.
test.skip('Is this needed?', () => {

        const maybe = later;

});
Integration Testing in React Native
Integration testing ensures that different parts of your React Native application work together as expected. Unlike unit tests, which focus on individual functions or components, integration tests validate interactions between components, APIs, and services.
How to Perform Integration Testing
- Use React Testing Library to render components and verify UI interactions.
- Mock external dependencies, such as API calls, using Jest mocks.
- Simulate user interactions to ensure components update correctly.
- Verify that state and props behave as expected during component interactions.
End-to-End Testing With Detox
End-to-end (E2E) testing ensures the entire application functions as intended from the user’s perspective. Detox is a popular testing framework for React Native that automates UI testing.
Setting Up Detox
- Install Detox using npm or yarn:
npm install -g detox-cli
yarn add detox react-native-testing-library
- Configure Detox for iOS and Android in your package.json.
- Write tests using Detox’s API to simulate real user interactions.
- Run the tests using:
detox test
Mocking and Stubbing in Tests
Mocking and stubbing help isolate components and prevent reliance on external services.
Common Mocking Techniques
- Jest Mock Functions: Replace actual implementations with mock functions.
- Mock API Responses: Use Jest to simulate API responses for controlled testing.
- Stub Methods: Replace specific methods with pre-defined behaviors.
Example:
jest.mock('axios');

axios.get.mockResolvedValue({ data: { message: 'Success' } });
Mocking and stubbing help isolate components and prevent reliance on external services
Testing Navigation in React Native
Navigation is a crucial part of any React Native app, and testing it ensures smooth transitions between screens.
Tools for Testing Navigation
- React Navigation’s Test Utilities: Provides helpers to test navigation behaviors.
- Mock Navigation Props: Use Jest to mock navigation props for isolated tests.
- React Testing Library: Simulate user interactions with navigation buttons.
Example Test:
it('navigates to the details screen', () => {
     const { getByText } = render(<App />);
     fireEvent.press(getByText('Go to Details'));
    expect(mockNavigate).toHaveBeenCalledWith('Details');
});
Best Practices for Writing Tests in React Native
Following best practices ensures your tests are maintainable and effective.
- Write Descriptive Test Cases: Clearly define what the test is checking.
- Mock External Dependencies: Prevent API calls and side effects in unit tests.
- Use Automation: Leverage CI/CD to run tests automatically.
- Keep Tests Isolated: Each test should focus on a single behavior.
- Maintain Code Coverage: Strive for high test coverage without redundant tests.
Debugging Tests in React Native
Debugging failing tests is essential to maintaining test reliability.
Common Debugging Techniques
- Use Jest’s–watch Mode: Runs tests interactively and provides feedback.
- Enable Logs in Tests: Use console.log or debugger statements.
- Check Mock Implementations: Ensure mocks and stubs behave as expected.
- Run Tests Individually: Isolate and execute tests separately to pinpoint failures.
Example: Running a specific test in Jest
jest myTestFile.test.js --testNamePattern='should render component'
In the End…
There are several cool aspects of Jest that you can use for React Native unit testing. When you’re just getting started, you need to understand:
- Why React unit testing needs to be modular
- Which is better for your project—Mocha or Jest?
- How to run a simple test
- Test functions, maths, strings, arrays, Booleans, and elements
- Snapshots
- Automocking and manual mocking
To learn more, check out this introductory tutorial on Jest.
This post was written by Don Roche. Don has more than 13 years of experience in software development, focused on JavaScript, Python, and blockchain technology. He’s also a daily user of audio and media production software, with teaching qualifications besides.


