


If you’re a front-end developer, you’ve probably heard a lot about the importance of testing your code. Your work is the first thing users see, so even small bugs can torpedo user trust in your brand. But for developers new to working with Angular or testing with Angular, knowing how to start testing can be tricky. This Angular testing tutorial will show you what you need and how to start testing Angular.
We’ll start by giving you a brief overview of how Angular testing works in general. As you’ll see, testing in Angular can be a somewhat complex scenario with multiple facets. So, it’s essential you have a firm grasp of what Angular testing looks like before getting started with it.
After that, we move on to the testing pyramid, which is a valuable mental model you can use to decide how to prioritize the different types of automated testing in an application.
Finally, we get to the main portion of the post, in which we’ll show you how to get started with Angular testing in practice.
Angular Testing: How It Works?
Angular is a modern framework. As such, testability is a first-class citizen in the Angular ecosystem. As soon as you create a new project using the Angular CLI, you already have the necessary requirements you need to start testing. However, you also have the flexibility of not using the frameworks and tools included by default with Angular, preferring different ones.
In a nutshell, you can divide Angular tests into two main types: unit tests and end-to-end tests. Unit tests are laser-focused tests or specifications that aim to verify whether small pieces—in other words, units—of an application work as intended, in complete isolation. End-to-end testing, on the other hand, means to test the application as a user would interact with it, driving the app through its UI and exercising each layer below it, until the database and then back.
However, we can include a third category of tests in our list: integration tests. One could argue that integration tests are a subtype of unit tests since they mainly use the same tools and a similar approach—i.e. using code to exercise functions and compare the obtained results with the expected ones. However, there are important differences between these two approaches to testing.
To understand the different roles each of these types of resting plays, let’s take a look at an important concept in testing called the testing pyramid.
The Testing Pyramid
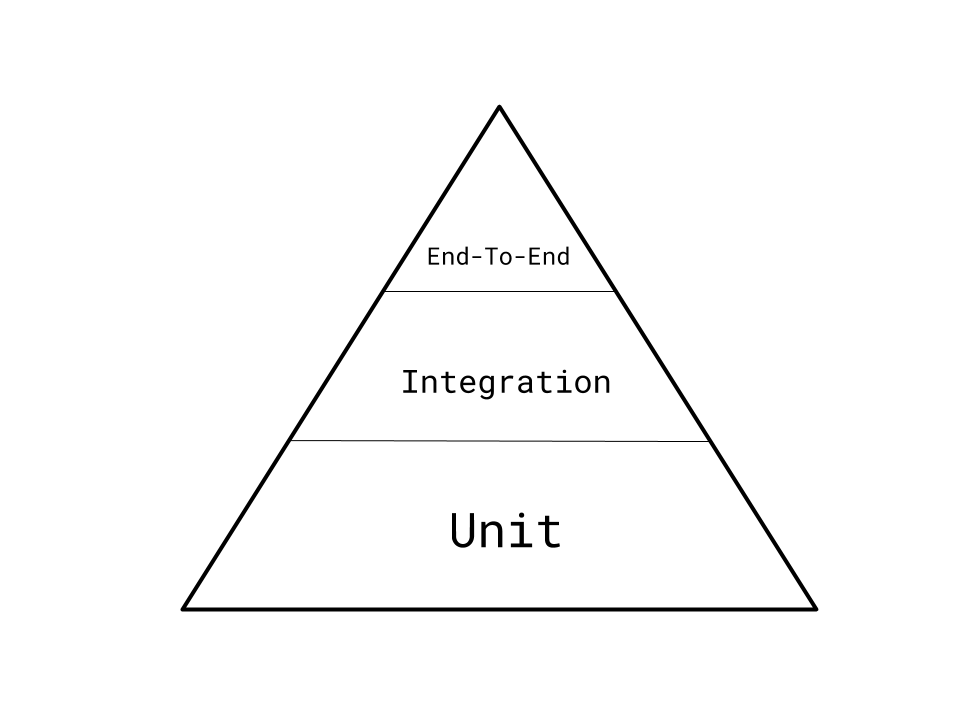
The testing pyramid comes up pretty often. But what is the testing pyramid?
The pyramid is a handy visual that represents the ideal proportions of unit, integration, and end-to-end tests in an application.
Unit Tests
Unit tests are at the base of the pyramid because there should be more unit tests than any other kind of test. Each unit test should make sure that each unit of work is doing what it should be. What constitutes a unit of work varies. It could be a class or something as small as a function.
Integration Tests
Integration tests are any tests that cover more than one unit of code. They could be the interaction of a few components, or they could test your entire front end of your application. Integration tests are in the middle of the pyramid because there are fewer of them than unit tests.
End-to-End Tests
End-to-end (E2E) tests cover your entire application. The defining feature of end-to-end tests is that they use the “real thing.” There are no mocked or fake dependencies.
Now that you have a grasp on the testing pyramid, next we’ll dig into the Angular testing tutorial. Specifically, we’ll discuss how to use the testing pyramid with Angular.
How to Start Angular Testing
This is the practical part. We’ll start by covering how to do unit tests and end-to-end tests in Angular because they’re included by default when you create your Angular project. Then we’ll talk a bit about how to approach integration tests in Angular, which can be more challenging.
This is a brand-new Angular app, generated in the command line interface (CLI):
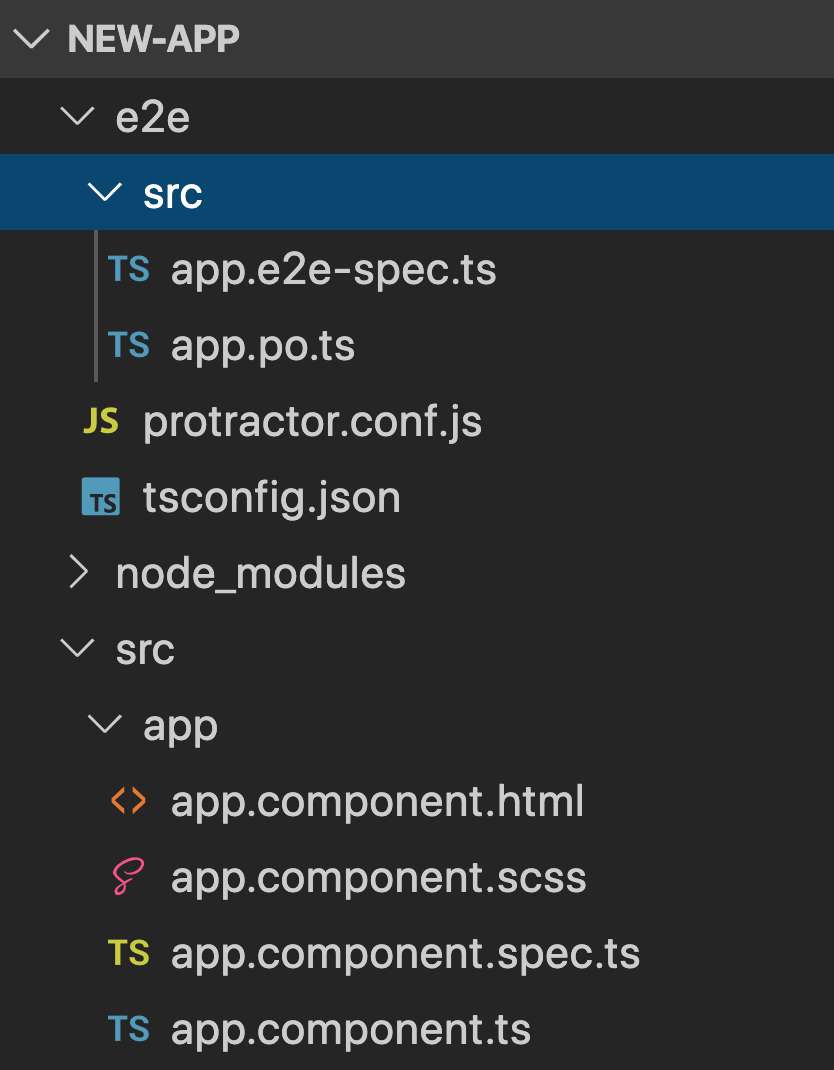
As you can see, the app.component comes with its own test file, app.component.spec.ts. The app also comes ready to go with an E2E testing folder.
Unit Tests
In Angular, unit testing is easy to start but difficult to master. Each new project in Angular comes with Jasmine and Karma ready to go.
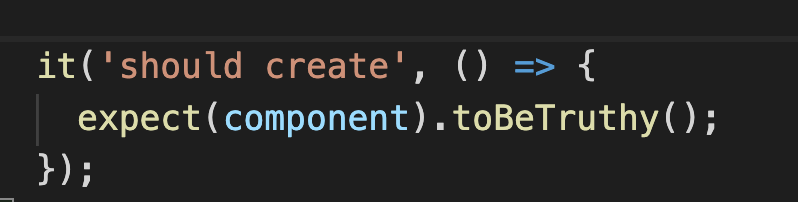
As soon as you generate a component or service in the CLI, Angular generates a spec file, complete with a unit test:
Services
One of the major building blocks of an Angular application is services. Unit tests for services verify what each public method of the service does under various conditions. The process is pretty straightforward, once you have a pattern to follow.
Here’s an example of how to test a WeatherService.getValue() method, which has a dependency on a DataService.
it('#getValue should return value from dataService', () => {
    // create `getValue` spy on an object representing the DataService
    const dataServiceSpy =
      jasmine.createSpyObj('DataService', ['getValue']);

    // set the value to return when the `getValue` spy is called.
    const stubValue = 'stub value';
    dataServiceSpy.getValue.and.returnValue(stubValue);

    weatherService = new WeatherService(dataServiceSpy);

    expect(weatherService.getValue())
      .toBe(stubValue, 'service returned stub value');
    expect(dataServiceSpy.getValue.calls.count())
      .toBe(1, 'spy method was called once');
  });
As you can see, in the example above, we make use of a spy. Spies are very useful mechanisms in Angular testing. By using spies, you can mock—that is, create fake versions—of real services for your tests to interact with. Instead of talking to the real service, your tests interact with the spy, which always returns a custom canned response. That way, your tests don’t have to make real HTTP requests, which would make the tests slower. Also, performing real HTTP requests has the potential of making your tests brittle by making them rely on real services that could stop working. So, using spies or other mechanisms to “fake” services is great not only for test speed but also for test maintenance.
However, the primary use case for using spies is—unsurprisingly—spying. That is to say, spies can track the calls made to a given method. That way, your test can ensure that a given dependency will be used as expected, down to the number of calls a given method is expected to receive. In the example above, we verify whether the getValue method is called exactly one time.
Components
Components are the other major building block of an Angular application. When you create a new Angular component, there’s just one test file created automatically. You can approach testing your component in two different ways. Depending on your needs, you may very well need to use both ways for some components.
For example, let’s say you have a simple weather app that shows the user the current weather. The weather component contains a method to get weather data from a service. The component also displays the weather data to the user. To fully test the component, we need to test both that the component calls the service and does something with the data and that the component displays the data properly.
Logic Tests for Components
Logic tests for components simply test the TypeScript in the component. For the weather app, the getWeather() method is what gets the data for the user.
getWeather(): void {
    this.weatherNow = this.weatherService.getWeather();
  }
The method stores the data in a local variable, this.weatherNow. To test the method, we’ll need to do the following:
- Arrange the test setup.
- Act or call the method that’s being tested.
- Assert or check to see if weatherNow got data.
Much of the test setup happens in beforeEach(), which runs before each test. Here, we again make use of a spy. This time, our purpose is only to return some fake weather data, though. We’ll not be tracking calls to the spy object:
beforeEach(async(() => {
    weather = of('weather');

    weatherServiceSpy = jasmine.createSpyObj('WeatherService', ['getWeather']);

    weatherServiceSpy.getWeather.and.returnValue(weather);

    TestBed.configureTestingModule({
      declarations: [ LocationSearchComponent ],
      providers:    [ {provide: WeatherService, useValue: weatherServiceSpy } ],
      schemas: [ CUSTOM_ELEMENTS_SCHEMA ]
    })
    .compileComponents();
  }));
Then in the test, we check to see that the component’s local weatherNow has been set to equal the value returned from the spy weather service.
describe('getWeather', () => {
    it('should populate the local variable weather', () => {
      expect(component.weatherNow).toEqual(weather);
    })
  })
DOM or Display Tests for Components
DOM tests ensure that the user interface displays whatever it’s supposed to. They also check that the expected things happen with the component when the user does something.
In the example weather app, the UI displays the weather in a p tag.
Here’s a test for checking that the UI displays the correct string (weather) from the mock data service:
describe('ui', () => {
    it('should display the weather', () => {
      const weatherElement: HTMLElement = fixture.nativeElement;
      const p = weatherElement.querySelector('p');
      expect(p.textContent).toEqual('weather');
    })
  })
You can check out more about unit testing components here.
End-To-End Tests
The next thing we’ll discuss in this Angular testing tutorial is E2E tests. In Angular, E2E tests are written in Jasmine and run using Protractor. This all comes set up and ready to go when a new Angular project is created in the CLI.
Since E2E tests don’t have any mocked dependencies, good E2E tests should ask questions like “is text showing up in the weather display?” and not “is a specific string of data displaying?” because what comes back from the API may change from day to day.
This is how you run the standard end-to-end tests in Angular:
ng e2e
For the weather app, we need to make sure that the weather gets displayed.
In e2e/src/app.po.ts, the Angular app provides a class in which to put your selector methods.
export class AppPage {
  navigateTo() {
    return browser.get(browser.baseUrl) as Promise<any>;
  }

  getWeatherNow() {
    return element(by.id('weatherNow')).getText() as Promise<string>;
  }
}
The Protractor tests will live in e2e/src/app.e2e-spec.ts:
it('should display weather message', () => {
    page.navigateTo();
    expect(page.getWeatherNow()).toContain('weather');
  });
The page.navigateTo() method is from the selector methods above.
Note that the expectation checks only that the ID on the page contains a given string. We want to do enough to make sure that the data populates the page, but we don’t want to have to update the test every time the data from the API changes because every call to the API could return slightly different data.
Feeling a little rusty on your Protractor syntax? Check out this tutorial.
Integration Tests
So far in this Angular testing tutorial, we’ve seen unit tests that check each unit of code and E2E tests that cover the whole system, from the UI all the way to the data source. Integration tests technically can refer to any test that covers more than one unit.
Think of the weather app: one test we’re really missing is a test of how the service and component together respond to different types of responses from the API, like successes and errors. We want to make sure that given good data or an error from the API, we’ll see different things show up on the screen.
In order to do integration tests in Angular, you’ll need to spin up a fake server to serve test data. This is a little complicated, but it’ll allow you not only to verify how your application behaves given different server responses, but also to continue developing even if your real data source is inaccessible or temporarily unavailable.
Serving Data for Integration Tests
There are several choices for spinning up a data server for integration tests. None of them come standard with Angular.
- Back-end framework of choice
- Pros: You have lots of control.
- Cons: You need to create a whole new back-end project to serve mock data.
- ng-apimock
- Pros: You can run integration tests from within your Angular project.
- Cons: It’s tricky to set up.
- Cypress
- Pros: It’s a fully featured testing framework.
- Cons: It does a lot of other stuff too, which you may not need.
Steps for Setting up Integration Tests
The following describes the basic setup for integration tests if you choose to spin up data with a framework like Express:
- Create a local server that returns a static JSON file, and run it on localhost:3001.
- Create an integration test folder in your Angular project.
- For now, just copy the E2E tests into it.
- Configure integration tests to run with their own command.
- Set up a proxy in Angular to go to localhost:3001.
- Run the tests against the local server, using the proxy.
After the integration test setup works, you should customize the tests to verify that the UI displays the correct things given different server responses.
Conclusion
After reading this Angular testing tutorial, you now have the basics of testing Angular across the testing pyramid by using Protractor for E2E tests, Jasmine with Karma for unit tests, and a mock data server for integration tests. Put the pyramid to work in your application today, and relax tomorrow knowing that you’re fully covered. Your users will thank you!


