

")
JavaScript has come a long way since its initial release. While initially developed to be no more than a simple scripting language, it has become arguably the most important language in modern software development. Developers used to write their JavaScript code in a more or less chaotic way, but with the language being increasingly used for serious, complex interaction-rich applications, that had to change. And change it did, thanks to frameworks such as Angular and React. Such complex applications need to be tested, though, and automatically tested, preferably. We’re here to talk about that: automated testing in JavaScript. Or rather, a specific type of JavaScript automated testing—Angular unit testing.
This post will be a basic guide on how to get started with unit testing in Angular. We’re going to cover how to install the Angular CLI, proceed to show how to create a sample app, and then perform some testing with it.
Then, we’ll talk about Jasmine and Karma, which are the default tools used in Angular unit testing. Before parting ways, we’ll mention other available tools so you don’t have to use the default ones if you don’t want to.
Angular Unit Testing 101
We’re now ready to start our guide on how to get started writing unit tests for your Angular applications. So, we’re going to need an Angular application, which means we must have Angular installed. That’s where we’re going to start—Angular installation. If you already have Angular installed, feel free to skip the next section.
Installing AngularCLI
Creating and managing an Angular project might not be the easiest thing to do. There are many competing libraries, frameworks, and other tools that often try to solve the same problems. Such a scenario can create a steep learning curve and can become an obstacle to newcomers to the technology.
To solve this issue, the Angular team created Angular CLI, a command-line tool you can use to manage your Angular projects. Angular CLI is installed via npm, so you’re going to need to have Node installed.
After Node is installed, run the following command:
npm install -g @angular/cli
The time it takes for the installation to finish may vary. After it’s done, you can see Angular CLI’s version by typing the following command:
ng version
Creating a Sample Application
Now that we have Angular CLI installed, we’re ready to create an Angular sample app. Run the following command:
ng new sample-app
After executing the command, you’ll be asked whether you want to add Angular routing. Type “y” and press “enter”. You’ll then be asked to choose between several options of stylesheet formats for your application.
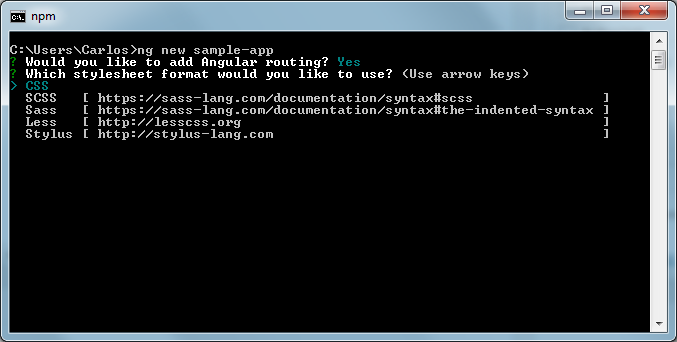
For the purposes of our toy app, you can pick CSS and hit “enter”. To test that everything went fine, you can cd into the sample-app directory and run git log. If you can see one commit listed, congratulations! Everything went well, and you’ve created your Angular app.
Testing
Now, we’re going to test our sample application with just a single command:
ng test
After waiting for a few seconds, you’ll see a new window of your web browser open in a page looking like this:
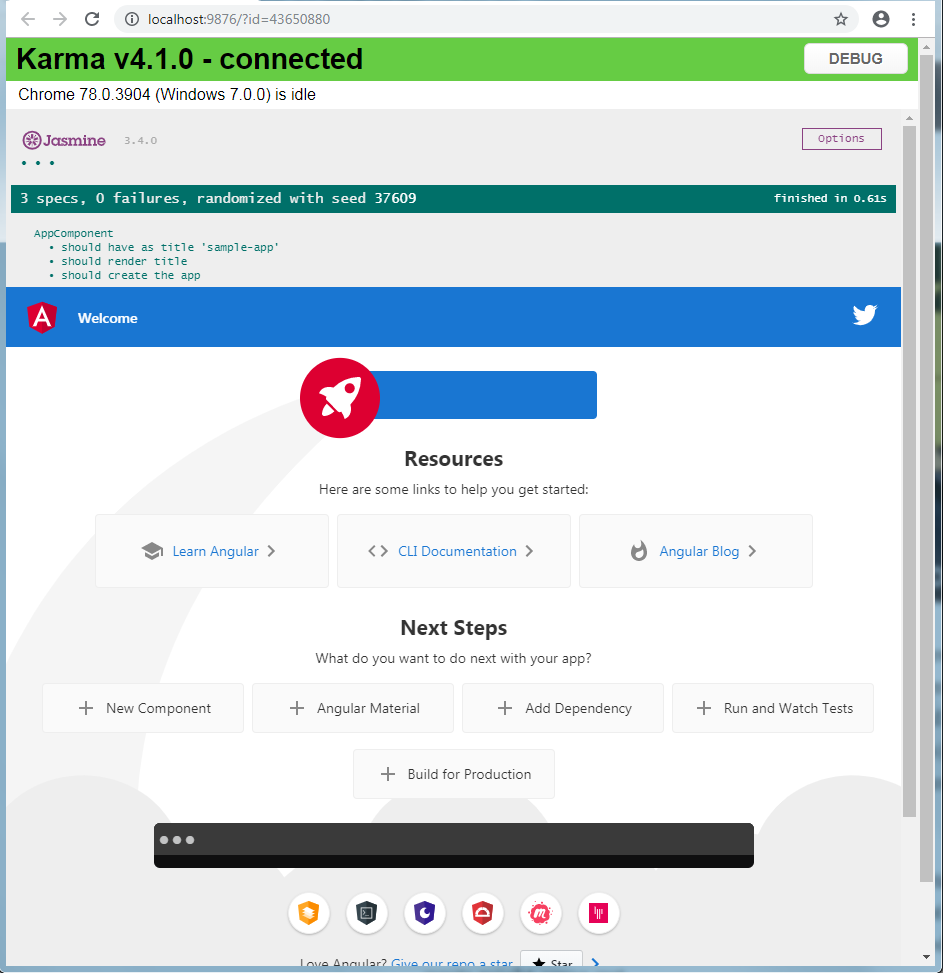
You should also see the following on your terminal:
Ok, so…what happened? What is being tested? What’s Jasmine? Keep reading to learn the answer to these questions, and more.
Understanding Karma and Jasmine’s Role in Angular Unit Testing
Let’s now turn our focus to two of the most crucial tools used for Angular unit testing—Karma and Jasmine.
Defining
Jasmine is a testing framework you can use for testing your JavaScript code. More specifically, it’s a BDD (Behavior-Driven Development) framework. Since it doesn’t require a DOM and it doesn’t depend on any other frameworks, Jasmine is easy to start using out of the box, also due to its clear syntax.
Jasmine is the default testing framework recommended by the Angular documentation. The Angular CLI sets up Jasmine for you, so you don’t have to install it separately.
Karma is the default test running for Angular. The AngularJs team created it after having difficulties testing Angular with the tools that existed at the time. Karma allows you to test your applications on real web browsers and real devices, such as tablets or phones.
It’s also very flexible since it works with several testing frameworks. The default framework used in Angular is Jasmine (which we’ll talk about in a minute), but you could replace it with Mocha, QUnit, or others. Additionally, you can easily integrate with continuous integration services, such as Travis, Jenkins, CircleCI, or Semaphore.
Despite all of the above, Karma’s biggest feature is its ease of use. For starters, you don’t usually need to install it or do anything at all to start using it. The Angular CLI downloads all you need when you create your project. You can also easily debug in your IDE or via Google Chrome. The typical way you’ll interact with Karma will be by running the “ng test” command in your terminal.
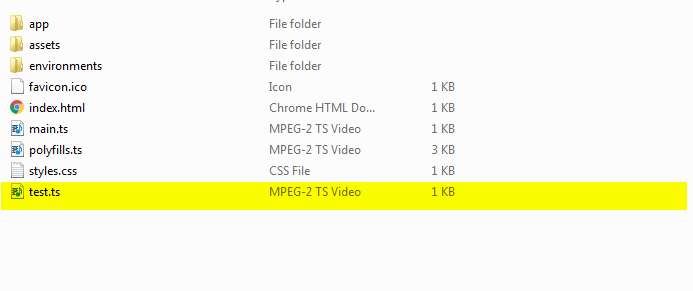
Configuration
You don’t necessarily have to configure Karma nor Jasmine since the Angular CLI takes care of that for you. However, you might want to customize some options. You can do that by editing the karma.conf.js file and the test.ts files, which are located in the root folder and inside of src, respectively:
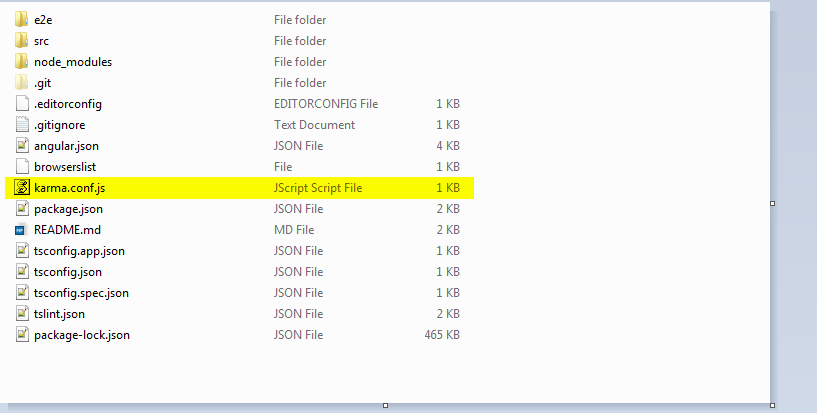
This is the content of the karma.conf.js file in my sample project:
// Karma configuration file, see link for more information
// https://karma-runner.github.io/1.0/config/configuration-file.html

module.exports = function (config) {
  config.set({
    basePath: '',
    frameworks: ['jasmine', '@angular-devkit/build-angular'],
    plugins: [
      require('karma-jasmine'),
      require('karma-chrome-launcher'),
      require('karma-jasmine-html-reporter'),
      require('karma-coverage-istanbul-reporter'),
      require('@angular-devkit/build-angular/plugins/karma')
    ],
    client: {
      clearContext: false // leave Jasmine Spec Runner output visible in browser
    },
    coverageIstanbulReporter: {
      dir: require('path').join(__dirname, './coverage/sample-app'),
      reports: ['html', 'lcovonly', 'text-summary'],
      fixWebpackSourcePaths: true
    },
    reporters: ['progress', 'kjhtml'],
    port: 9876,
    colors: true,
    logLevel: config.LOG_INFO,
    autoWatch: true,
    browsers: ['Chrome'],
    singleRun: false,
    restartOnFileChange: true
  });
};
Editing a Component Test
When unit testing in Angular, you can write tests for components, directives, pipes, and services. In this section, we’re going to briefly edit a test for a component to see it fail. Then we’ll change the app, so the test passes again.
Go to the src/app folder and look for the app.component.ts file. Open it, and you should see something like this:
import { TestBed, async } from '@angular/core/testing';
import { RouterTestingModule } from '@angular/router/testing';
import { AppComponent } from './app.component';

describe('AppComponent', () => {
  beforeEach(async(() => {
    TestBed.configureTestingModule({
      imports: [
        RouterTestingModule
      ],
      declarations: [
        AppComponent
      ],
    }).compileComponents();
  }));

  it('should create the app', () => {
    const fixture = TestBed.createComponent(AppComponent);
    const app = fixture.debugElement.componentInstance;
    expect(app).toBeTruthy();
  });

  it(`should have as title 'sample-app'`, () => {
    const fixture = TestBed.createComponent(AppComponent);
    const app = fixture.debugElement.componentInstance;
    expect(app.title).toEqual('sample-app');
  });

  it('should render title', () => {
    const fixture = TestBed.createComponent(AppComponent);
    fixture.detectChanges();
    const compiled = fixture.debugElement.nativeElement;
    expect(compiled.querySelector('.content span').textContent).toContain('sample-app app is running!');
  });
});
Let’s focus on the second test. It should be clear that it’s verifying that the application name is as expected. We’re now going to change it to make it fail. Edit the last line, replacing it with this:
expect(app.title).toEqual('sample_app');
It’s the smallest change we could’ve made, but it’s enough to make the test fail. To check whether it’s actually the case, let’s run “ng test” and see the results:

As expected, the test now fails. To make it pass again, we can either revert it back or change the production code. We’re going with the latter. Open the app.component.ts file and take a look at its content. It should look like this:
import { Component } from '@angular/core';

@Component({
  selector: 'app-root',
  templateUrl: './app.component.html',
  styleUrls: ['./app.component.css']
})
export class AppComponent {
  title = 'sample-app';
}
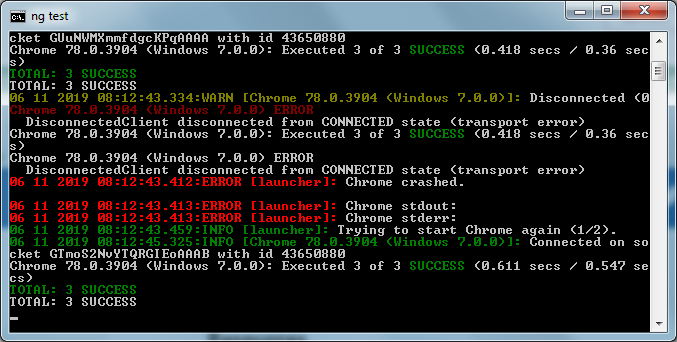
As you can see, the second-to-last line configures the title of the component. Replace it with sample_app, like in the test. Run “ng test” again and check the result:
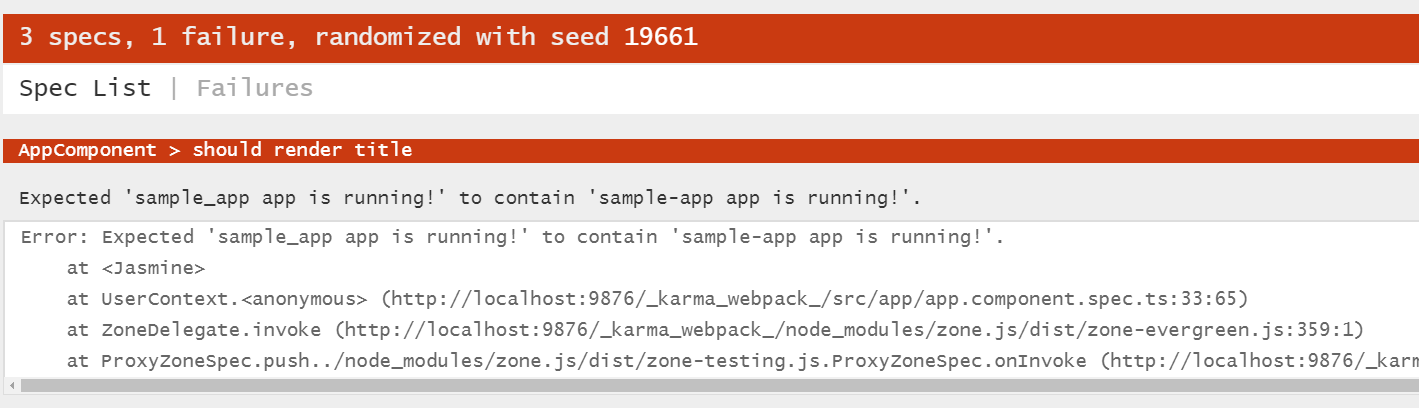
Oops…something went wrong. As you can see, the change we’ve just made to the title of our component broke another test. That should be easy to fix, though, so I’ll leave it as an exercise for the reader. Just look at the other tests in the app.component.spec.ts file, and you’ll find the failing test. Edit accordingly, and the test will pass again.
Going Beyond Karma and Jasmine: More Tools at Your Disposal
Karma and Jasmine are the default tools for Angular unit testing for a reason—they’re flexible and powerful, but still very approachable. However, they aren’t the only tools out there for testing your Angular applications.
As you’ve already seen, Jasmine can be replaced with other tools such as QUnit, Mocha, or Jest. The same is true for Karma—there are other available test runners for JavaScript, such as Jest (yep, it can double as a test runner), and TestCafé.
The Tip of The Angular Unit Testing Iceberg
Starting with unit testing can be daunting. That’s true for every language, platform, or framework—Angular is not an exception. What makes things easier is that the Angular team thought about unit testing from the start, so the framework has built-in support for this type of testing. Not only that—by using Angular CLI to create an application, you get the Karma and Jasmine tools installed and configured, out of the box.
In today’s post, we’ve offered a general overview of unit testing in Angular. We’ve covered how to create a simple Angular app and how to test it using the default tools. Then we’ve explained what those tools are and what you use them for. Finally, we’ve seen some action—we tweaked a unit test to make it fail, and then brought it up to green again.
All that we’ve seen today is just the tip of the iceberg, though. There’s a lot more to unit testing than that. Make sure to stay tuned because we’ll soon feature detailed tutorials on Kasper, Jasmine, and other tools and topics related to Angular testing. Thanks for reading and until next time!
This post was written by Carlos Schults. Carlos is a .NET software developer with experience in both desktop and web development, and he’s now trying his hand at mobile. He has a passion for writing clean and concise code, and he’s interested in practices that help you improve app health, such as code review, automated testing, and continuous build.
What to read next
Angular Integration Testing: A Practical, Introductory How-To
Angular Component Testing: A Detailed How-To With Examples


")