


We’re back with another testing-related subject. Today’s topic is pretty straightforward: We’ll show you how to implement record and playback in Selenium.
“Record and playback” refers to a specific approach to automated testing that allows people with no coding skills to create end-to-end or UI tests. Selenium is a popular browser automation tool that many people use for testing purposes. In this post, we’ll offer you a practical and easy-to-follow guide on how to use the tool and testing technique so you can start reaping their benefits in your organization ASAP.
Selenium Record and Playback: The Fundamentals
Record and playback is a method of creating automated test cases that doesn’t require coding skills—unlike, say, unit testing. That’s why this approach is also known as codeless testing or even scriptless testing.
As its name suggests, record and playback is an approach that allows people to record their actions when interacting with an application. They can then replay those steps whenever they need. Depending on the record and replay tool used, it’s possible—and very valuable—to add those tests to the CI/CD pipeline.
Which Selenium Tool Provides Record and Playback Features?
Selenium comes in three main versions: Selenium WebDriver, Selenium Grid, and Selenium IDE. How do they differ? Which one do you pick for record and playback testing?
Selenium WebDriver is probably the most popular of the three editions. More than a tool, you can think of WebDriver as an API used to automate actions with a browser. Selenium WebDriver offers bindings for several major programming languages, including Python, Java, C#, and JavaScript.
On the other hand, Selenium Grid is all about grid testing—i.e., executing automated tests across a large number of environments, operating systems, and browsers.
Last but not least, we have Selenium IDE. Formerly known as Selenium RC, this tool is a browser plugin you can quickly and easily record simple browser interactions.
Record and Playback in Selenium: How to Get Started in 6 Easy Steps
It’s time for some action! We’ll show you how to get started with Selenium IDE and record and playback in just six steps. Yep, it’s that easy! Let’s dig in.
#1. Install the Selenium IDE Browser Extension
Your first step is installing the Selenium IDE browser extension. Access the downloads page on Selenium’s site and scroll to the Selenium IDE section. There, you’ll find links to download the latest version of the Selenium IDE plugin for Firefox or Chrome—the Chrome version can also be used with any Chromium-based browser.
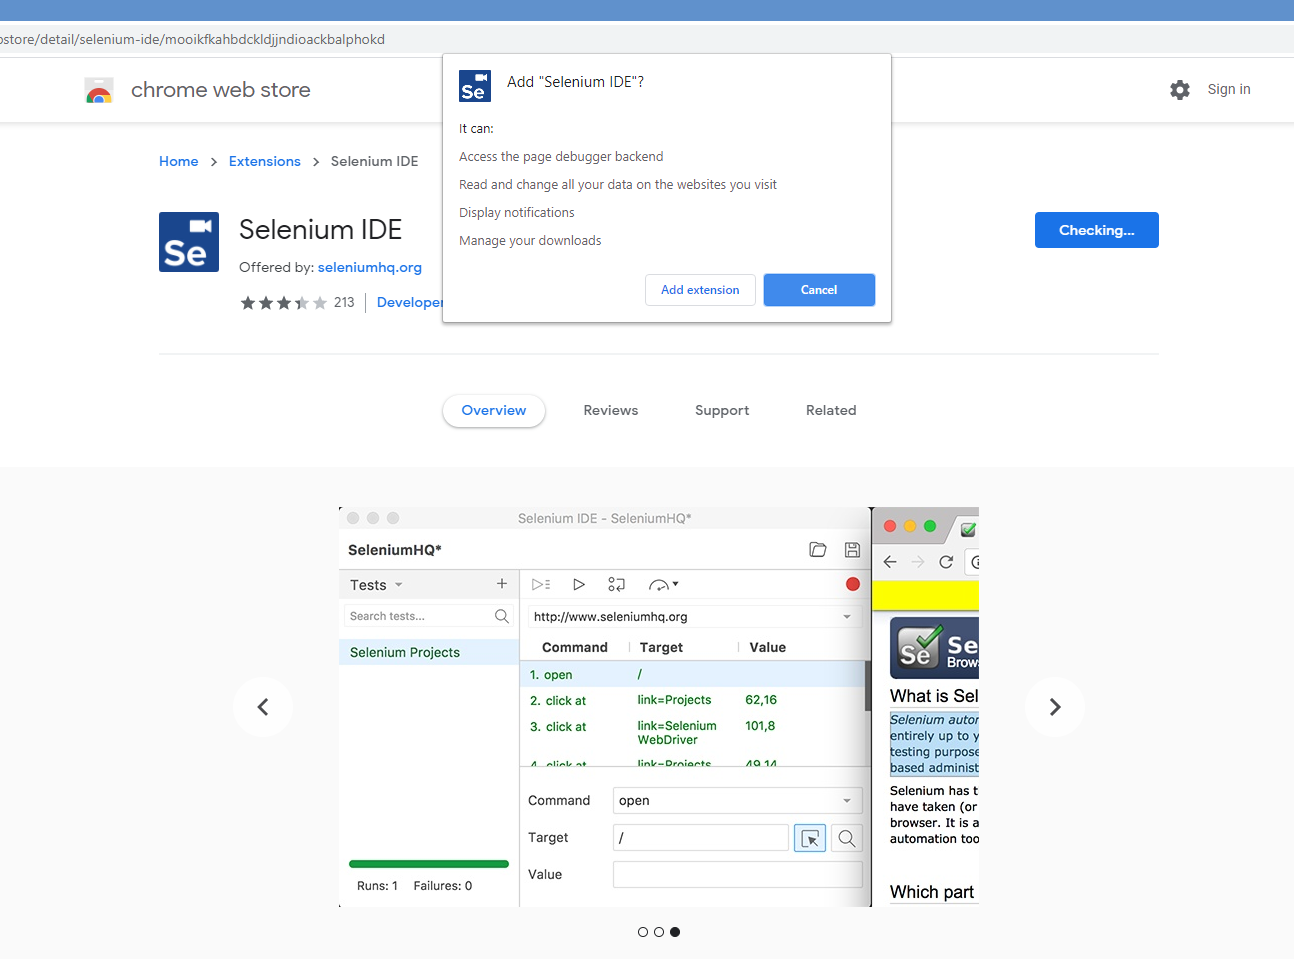
After the installation is done, make sure the extension is active and ready to be used.
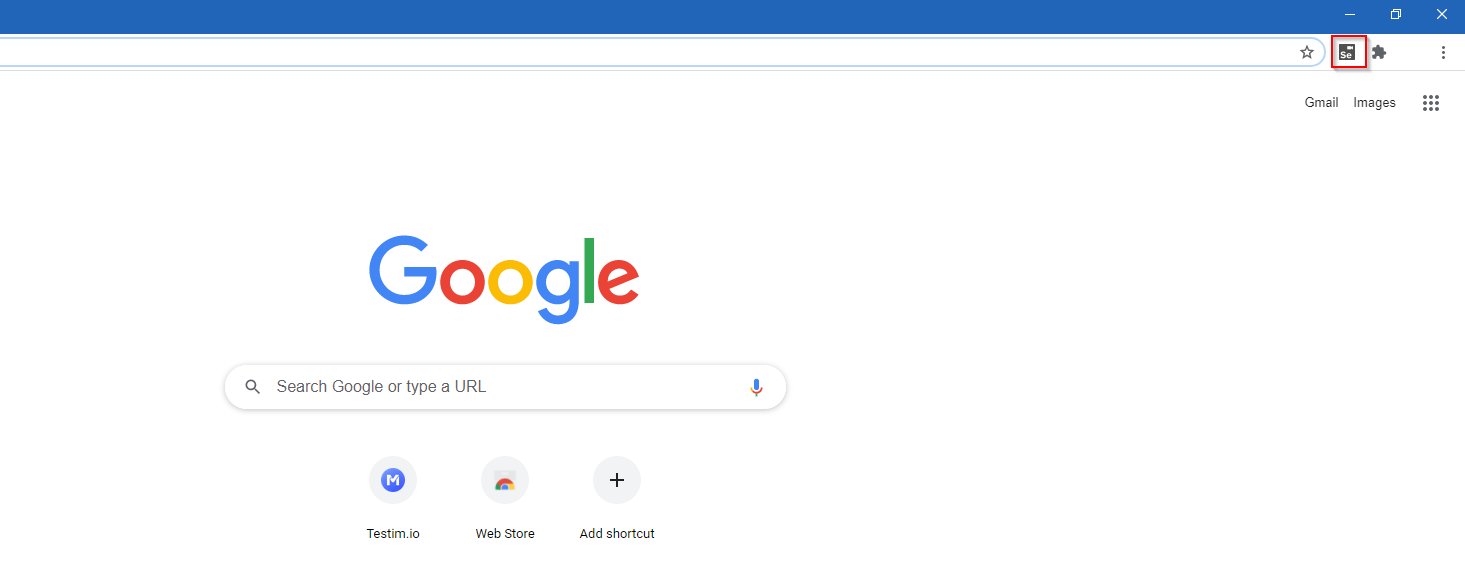
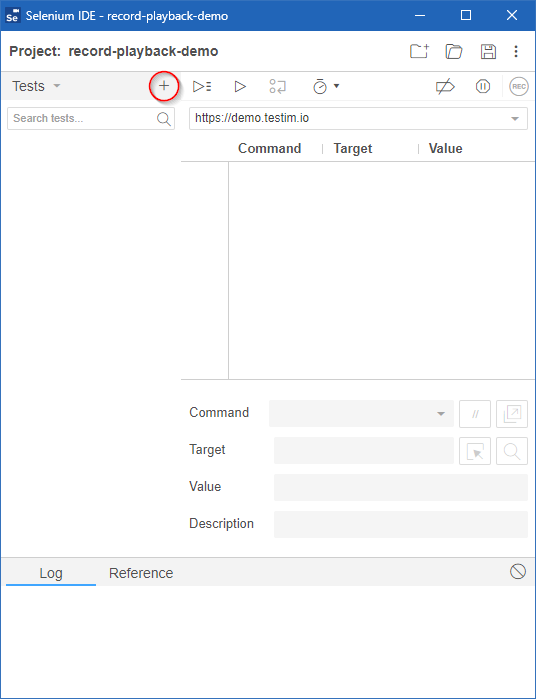
#2. Create a New Test Project
When using Selenium IDE, you can organize your tests into projects. So, let’s start by creating a new project to house the tests we’re about to create. On your browser, start by clicking on the Selenium IDE extension:
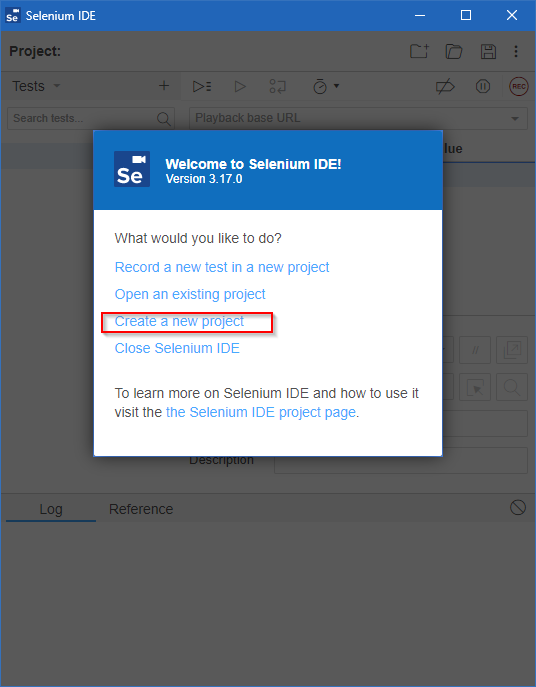
You’ll see a new window with several options. Click on Create a new project:
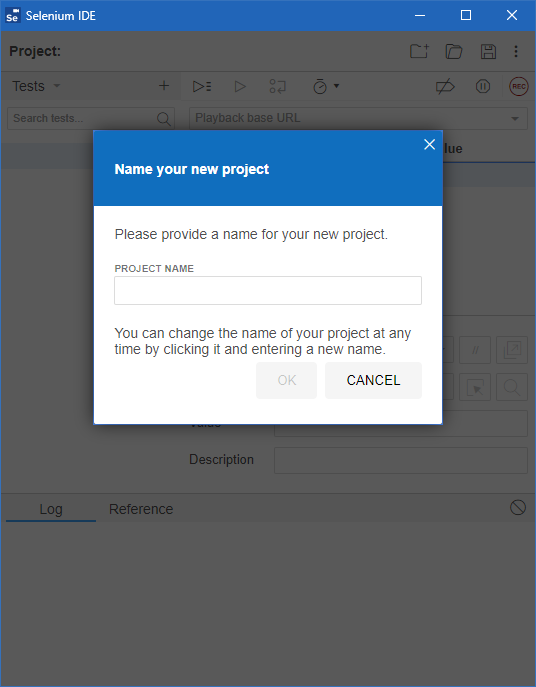
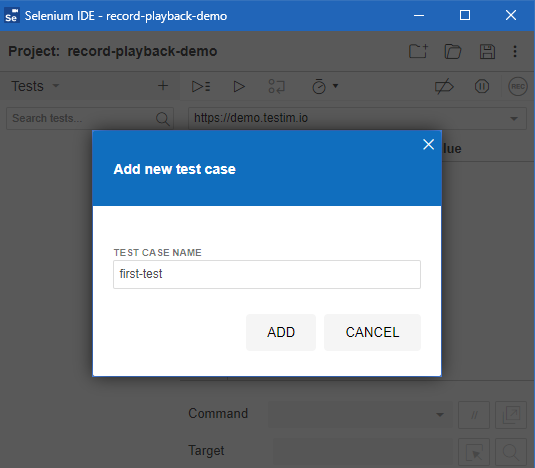
Selenium IDE will ask you to name your project. Don’t spend too much time worrying about what to call it; you can easily change this name later. Type it in and hit OK:
After naming your project, you’ll see a new window showing your recently created project with nothing in it yet:
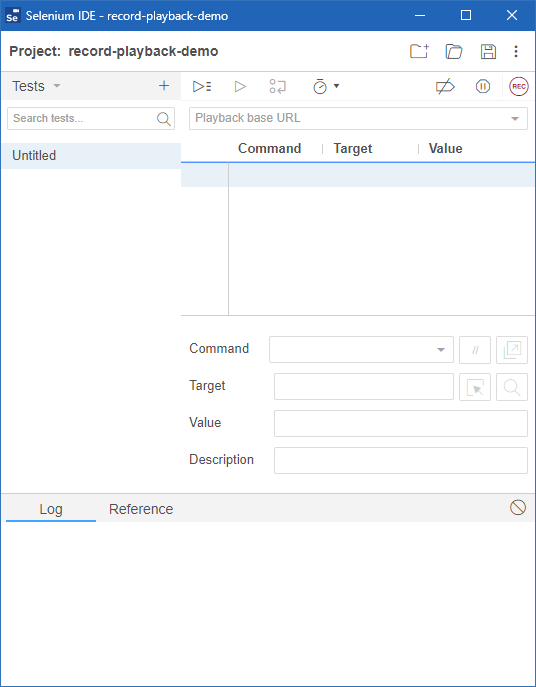
Even though we don’t have any tests yet, the project screen looks somewhat busy with elements and available options. Don’t let that overwhelm you! For now, all you need to do is save your project. Do that by clicking on the Save project button in the upper right corner. Selenium IDE will save your project as a file with a .side extension. Pick an adequate location for your project, save, and then close the Selenium IDE window.
#3. Determine What You’ll Test
The next step is actually determining what you will test.
For this tutorial, we’re going to use Space & Beyond, a demo site by Testim.
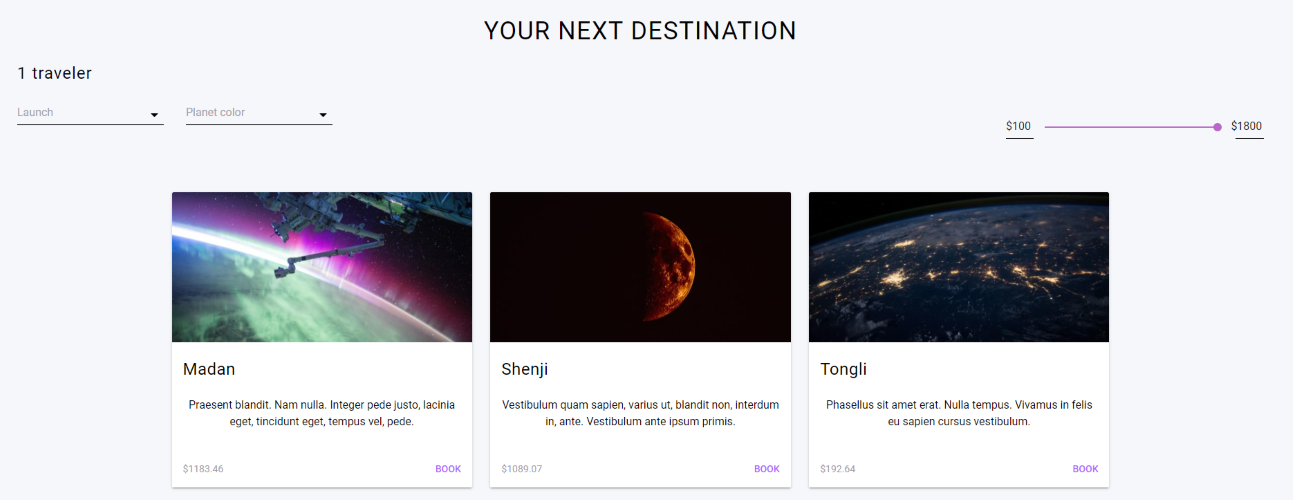
In your test, interact with the slider on the right side of the page to verify that the destinations indeed get filtered according to the selected price range.
#4. Create a New Test
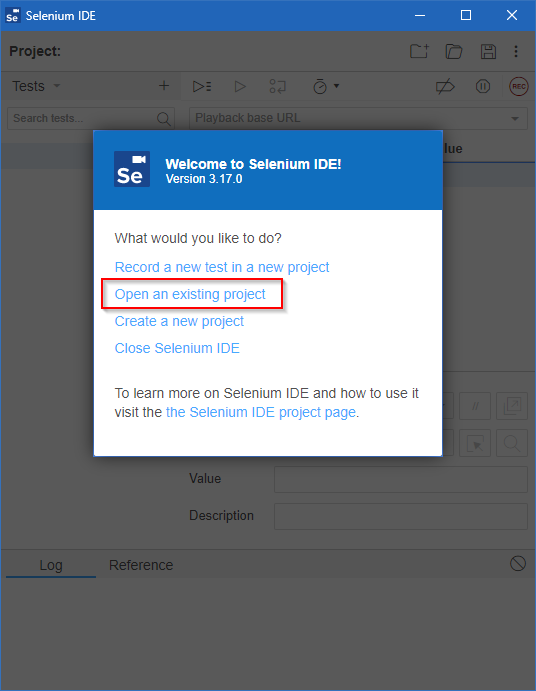
You have a testing project but no tests. Let’s create a test by firing up the browser in which you installed Selenium IDE. Then, click on the Selenium IDE extension. You’ll see the same window as before. This time, you should choose the option Open an existing project:
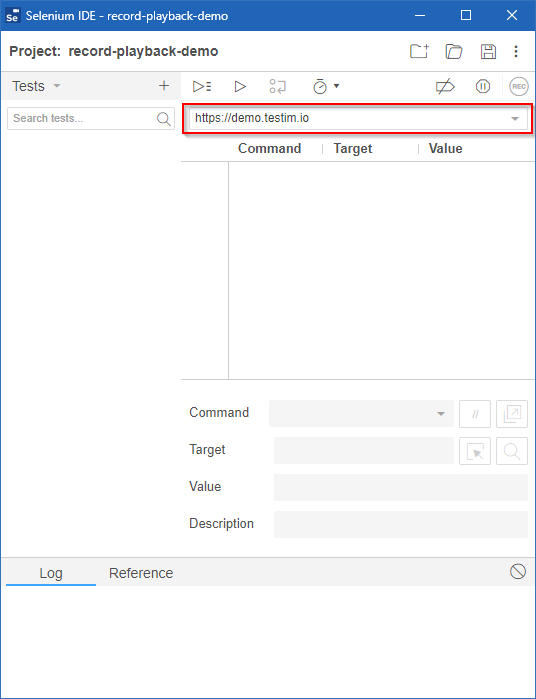
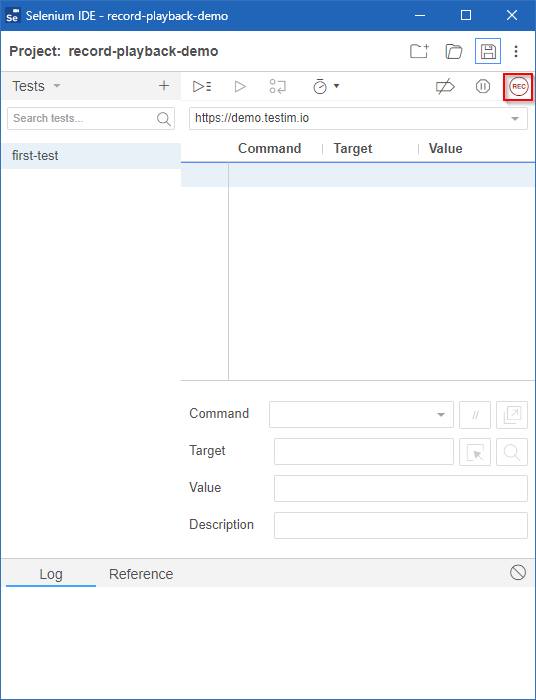
Navigate to the location you saved your project file and open it. You should see the same project window as before. Before you start recording, set the base URL for the tests. In this case, type https://demo.testim.io in the Playback base URL field:
Next, click on the Add new test button:
You’ll be prompted to pick a name for your new test.
Click on ADD, then save the project again. Now, it’s time to actually record the test.
#5. Record Your First Action
You’ve got everything you need. Click on the Start recording button:
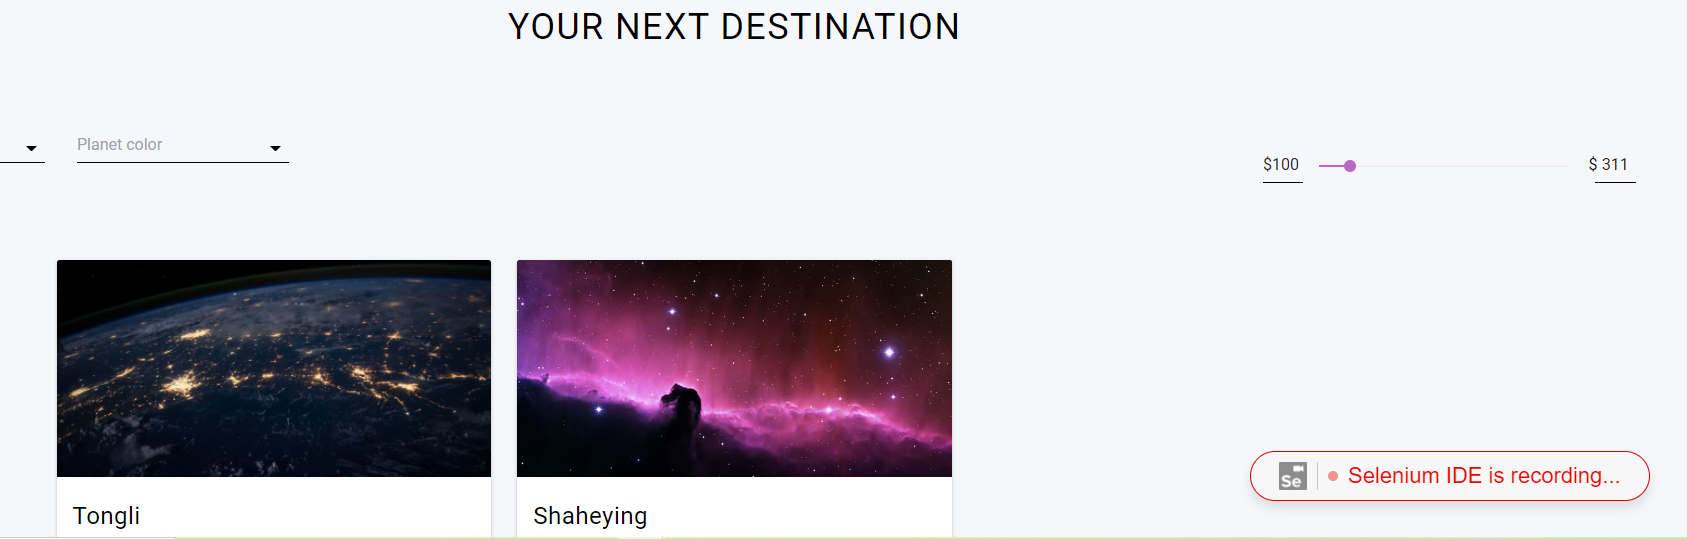
A new browser window will open, showing you the demo site. Go there and use the slider control until only two destinations are displayed:
Then, you can close this browser window. Go to Selenium IDE and click on the Stop button to finish the recording. Then, save the project again.
Congratulations! You’ve finished your first recording with Selenium IDE!
#6. Replay Your First Recorded Action
When it comes to “record and replay,” recording your interaction is just half the job. So, let’s see how to replay the action you’ve just recorded. Consider the following image:
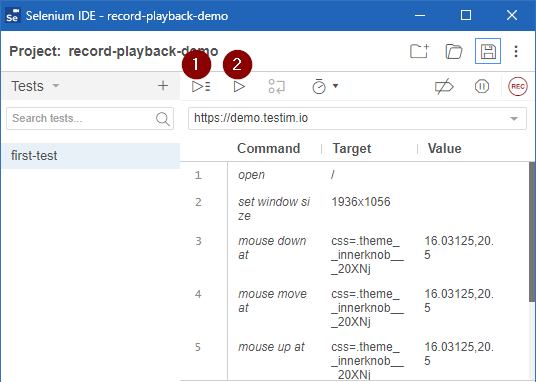
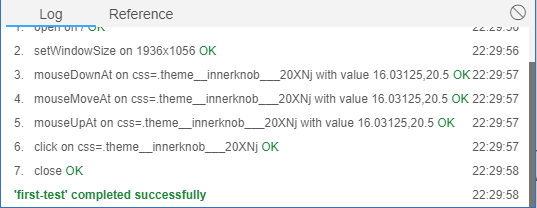
The button marked with #1 is the Run all tests button, while button #2 is called Run current test. Since your project currently has just a single test, the two buttons will have the same effect. Press the Run current test button to see the test being executed. It should finish in seconds. At the bottom of Selenium IDE’s window, you’ll see the test log showing the steps executed along with their timestamps and a message saying everything was executed successfully:
Bonus Step: Create a Test That Tests Something
You’ve already created a record and playback test. It doesn’t really test anything, though. It still passes even if the filter function doesn’t work as expected.
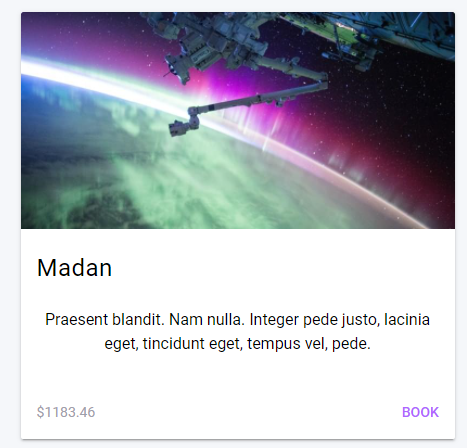
Let’s now create a second test. Just add a new test with a name that makes sense to you. Then hit the Start recording button. Then, on the demo site, scroll the page until you see the many destinations. Go to the first destination, Madan, and click on the BOOK link at the bottom right corner:
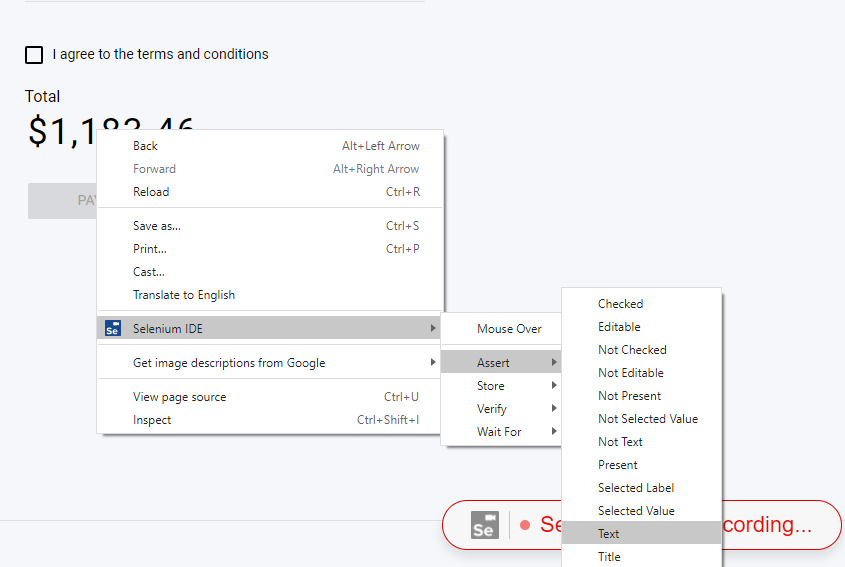
You’ll be taken to the checkout page and shown the total value. Right-click on it, and then follow Selenium IDE -> Assert -> Text:
After that, you can close the browser window, go back to Selenium IDE, and stop the recording. Your test steps should look like this:

As you can see, this new test has a step where it asserts the total value of the checkout against the expected value. Were that value to change, the test would fail.
Record and Playback in Selenium? Not the Only Alternative…
Selenium is a useful tool for test professionals to have in their toolbelt. In this post, you’ve learned how to use Selenium IDE to perform record and playback, a modality of testing that doesn’t require you to have coding knowledge. Selenium isn’t a perfect tool, though. Despite having great properties, it also has its share of disadvantages. Among them are the total cost of ownership and the likelihood of authoring frail tests as the main concerns.
Testim is an alternative to Selenium. Testim uses AI-powered element locators to help keep tests stable even when elements change. As a result, Automate can help you create a more robust test suite, reducing maintenance significantly so you deliver features faster. Testim also has tools to help you scale your automation project effectively with the data you need to make smarter decisions about your tests and team. Give Automate a try today.


")