


This blog was written by one of the Testim startup plan customers, Riccardo Vincenzo Vincelli, expert on GitHub based CI/CD and, CTO of Sharesquare.co
Sharesquare is a small startup out to change the way that companies offer equity rewards to their employees. They are using Testim for free to test their web application.
This is a technical blog on how to use Testim with GitHub CI/CD on a Selenium grid. It was originally posted on medium.
Enjoy. And, if you are a startup with fewer than 20 employees, apply here for the startup plan to get Pro features and unlimited local runs for free.
Welcome to the first part of a CI/CD Testim story, collecting some technical help and how-to guidance from our experience at Sharesquare.
Testim supports CI/CD integrations, empowering an approach where browser tests-based Q&A becomes a vital part of your software development and release process. Integrating it in your pipelines, whether you are in Azure DevOps, Jenkins, or Github is very easy: have a look at the docs, all you need to do is to grab the CLI tool and pass in your account- and project-specific keys. In this blog, we will tell you about our Testim integration at Sharesquare. The main ingredients are:
- Github Actions as our workflows environment
- Testim CLI, including some advanced switches
- Selenium grid based on Aerokube’s Moon
But first, the “why”
Our company is a startup, and like all startups, we have to be very careful about where we invest time and resources. Years of evidence in software development tell us that tests are not something you want to skip. Green tests give you confidence in the stability of your product. They are an important safety net whenever significant updates or refactorings take place. On the frontend, we are just one level higher, closer to the user, but the substance does not change: especially in a fast-paced UI world full of JavaScript stuff, we have to preserve a superb and stable experience at each release. Unit and integration tests are something we leave to the expertise of the developers, and they are written code. But when it comes to what we refer to as meaningful browser interactions, it is not the coders who are in charge. The people responsible for this are Q&A teammates with little to no coding experience. Asking them to write browser tests in JavaScript is simply not possible. We adopted Testim coming from a pure Selenium-based approach, and were immediately impressed by the platform’s possibilities. And something we wanted to get done as soon as possible, was attaching this “testy moment” at each release. This decision marked the beginning of this successful mini-journey.
On “attaching stuff” to a release
Whenever something goes wrong in the development cycle, it is very constructive if developers feel a little heat for it. A positive, blameless atmosphere is to be kept at all costs, yet should generate some discomfort and trigger the team to fix stuff asap-and get it right next time. Talking about releases specifically; if you want the browser tests to get the respect they deserve, and maximize the quality of your application, make sure they get run at every release! And now, the discomfort part. If any test fails, the release fails. And the team, with the first line being the release engineers, must do something about it. This is nothing new. A healthy CI/CD always has a unit + integration test step, we will just add browser tests step on top.
But, no bottlenecks!
Thanks to Testim, we could put together many browser tests in a relatively short time. We wanted all of them to run at release time. To get started, running them one-by-one is acceptable to make sure you first do it right. But you also have to do it fast. So, how can we run multiple tests next to each other, efficiently? There are two points that motivated us to get serious about the speed part:
- Costs. Github Actions, on which our release workflows are based, has a time-based billing (which is pretty standard for any cloud service). The more time your workflow will take, the more expensive the run will be. The plan gives you some free credits, but you better be sharp!
- Time. We cannot afford a release to take 15 to 20 minutes, especially with a CI/CD where the D stands for deployment. The team wants to see the features and fixes get onto the production environments as soon as possible. Selling the idea of a lengthy release is not wise. Starting from these premises, let’s delve into thehow part.
How we did it
Let’s have a look at the main ingredients, one-by-one.
Github Actions
A Github Action is a workflow defined in YAML. See the full syntax here. Our Testim step looks like:
- name: Run browser tests
  run: |
    testim \
    --token "${{ secrets.TESTIM_TOKEN }}" \
    --project "${{ secrets.TESTIM_PROJECT_ID }}" \
    --grid 'Custom-Grid' \
    --suite 'Q&A' \
    --base-url ${{ env.BETA_BASE_URL}} \
    --parallel ${{ env.GRID_CLUSTER_PARALLELISM }} \
    --grid-username "${{ secrets.GRID_CLUSTER_USER }}"
    --grid-password "${{ secrets.GRID_CLUSTER_PASS }}" \
    --timeout ${{ env.SELENIUM_TIMEOUT }}
    --browser-timeout ${{ env.SELENIUM_BROWSER_TIMEOUT}}
    --new-browser-wait-timeout ${{ env.SELENIUM_NEW_BROWSER_WAIT_TIMEOUT }}
    --disable-timeout-retry \
    --retries ${{ env.SELENIUM_RETRIES }}
First things first: the testim binary must be available on your workflow runner! If you are using the default runner, just add a step to install it before this one:
- name: Install Testim CLI run: npm install -g @testim/testim-cli
This, in turn, will require npm (it should be there already in the default image). If you are using your custom image, just add the install command as a RUN statement of your Dockerfile.
Live from the terminal
The Testim CLI is very rich, offering many advanced switches and parameters inherited from the Selenium nature of Testim itself. To begin with:
--token "${{ secrets.TESTIM_TOKEN }}"--project "${{ secrets.TESTIM_PROJECT_ID }}"
For these two, just copy the values from your CI page on Testim.
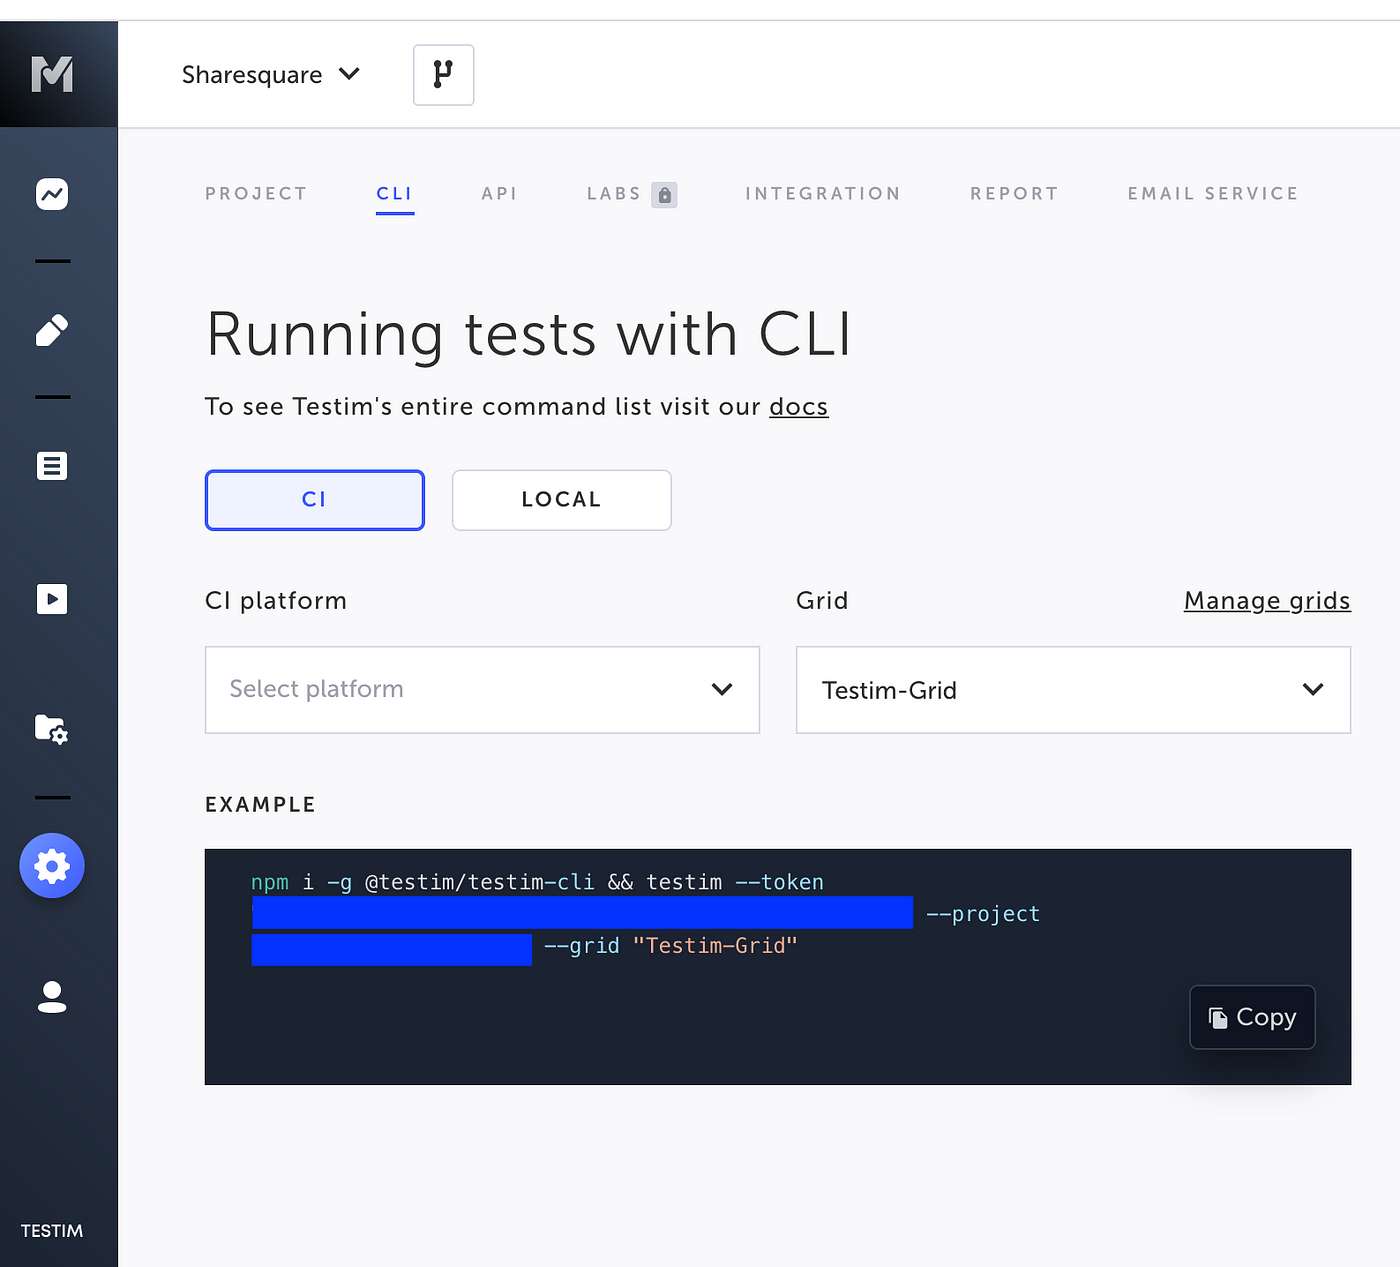
Where do you want to run the tests? This is the --grid parameter. We are using our cluster (more on this later). If you don’t specify it, the default is the basic Testim grid, with no parallelism and Chrome as the only browser – but hey, that’s for free, with many runs included! If you want to know more about the plans, get in touch with the team!
Which tests do you want to run? You can specify a tests suite with --suite , or specific tests by name with --name . Our convention is that the release workflow triggers tests suites only, with each suite representing a specific category of interactions. It goes without saying that all of the tests in each suite you run must be OK (help yourself with the Testim labels such as Active).
The base URL value, --base-url becomes the BASE_URL run argument for each test in the suite. This is useful to override any test site hardcoded into the test itself and ensure that the suite gets run on a clean and neutral Q&A environment. More on this here.
The degree of parallelism for the Selenium grid is defined with --parallel <N>, where <N> is the number of tests from the suite to be run in parallel. This number depends on the Selenium grid you are using to run your tests, so the cluster is configured at your site (we have our own with Moon, but maybe you are using Browserstack, Sauce Labs, etc.).
On the default free grid, the supported parallelism is 1: the tests in your suite will be run sequentially, so one-by-one. You might get an error if you try with a higher number.
If you are running your pipeline from somewhere in the cloud, like we do with Github, your communication with the Selenium grid will be remote. Whenever you talk to services across the internet, two things are very important:
- your connection should be encrypted; if it’s not, be well aware of the risks!
- you don’t want your resources to be used “by mistake” by others across the Internet: auth!
We will tell you more about the grid in a couple of minutes. For now, just notice that we are authenticating on our cluster with a specific user and password: --grid-username "${{ secrets.GRID_CLUSTER_USER }}", --grid-password "${{ secrets.GRID_CLUSTER_PASS }}".
Finally, some more advanced Selenium arguments:
--timeout ${{ env.SELENIUM_TIMEOUT }}--browser-timeout ${{ env.SELENIUM_BROWSER_TIMEOUT}}--new-browser-wait-timeout ${{ env.SELENIUM_NEW_BROWSER_WAIT_TIMEOUT }}--disable-timeout-retry--retries ${{ env.SELENIUM_RETRIES }}
You can read more about these, and other cool Selenium stuff, just give the testim command. We think these switches are very important, for two reasons:
- stability
- resources consumption
For the stability part, the number of retries is critical: even a perfect test might fail, sometimes, and that’s the case for a so-called transient failure. Perhaps:
- there is an issue in the CLI or Testim communication
- the grid runner dies, for some (unknown) reason
- connection timeouts, etc.
But, make sure to keep the number of retries at a minimum, no more than 3 or 4. This is because if the failures are not that intermittent anymore, that’s an alarm bell. And also because forever retrying something that’s broken and expecting a different result does not make sense, and it’s time-consuming too!
On the resources side, keep in mind that the most important resource you are using, and possibly paying for, is the number of browser slots in your grid. We have experienced instability sometimes, and very unpleasant situations where a few tests were clearly zombying and we had no easy way to get a hold of them, and kill them. So the timeout switches above actually put a cap on the maximum running time we set for a test, timeouts in waiting for a browser slot to be assigned to a test, etc.
In the second part we will dive into the technical details of a cloud-based setup. Most importantly, we will look at how many tests can be run together in parallel, and how to add advanced configuration for debug and billing purposes. Read part 2 now.
Blog by Riccardo Vincelli, riccardo@sharesquare.co


