


Automated testing. “Yeah, yeah, yeah,” you say. “I know it reduces bugs and increases code reliability and allows us to have fearless deployments.”
You might think, “I have automated unit tests of our front-end and back-end code. I have integration tests of interactions between our front end and our API and between our API and our data. I have end-to-end tests for our user stories that run with every deployment. I’m covered!”
That’s great!
But have you considered whether your team’s automated testing should include smoke tests?
Smoke tests are used to alert the development team to severe build issues. Many organizations have QA professionals who do manual smoke testing by following a set of important user stories. They look for problems like errors and pages loading incorrectly after a fresh build, and then they look again at regular intervals in the sprint cycle between deployments. What if I told you that you can have the same awesome coverage without a QA team? If you’re excited and astounded, read on, my friend!
In this post, we’ll explore how Nightmare.js can help you write quick and easy automated smoke tests for any web app.
What Is Nightmare.js?
“A high-level browser automation library.” —Nightmarejs.org
Nightmare is a browser automation library. It’s a solid choice for automating smoke tests to do all of the clicks, text inputs, and visual checking that a human can do.
Under the hood, it uses Electron as a headless browser. Nightmare works well for automated user interface (UI) testing because it uses a simple application programming interface (API), so writing tests is easy. It uses Node.js to run and can be integrated into a testing framework of your choice. It works especially well with Mocha and Chai. Because Nightmare is headless by default and doesn’t require a Selenium server like Protractor, it runs very quickly.
Let’s look at some of the pros and cons of Nightmare.
Pros:
- Every method is a simple English command
- Automates headless browsers using Electron by default
- Fast
Con:
- Doesn’t use real browsers
Now that we have an idea of what Nightmare is capable of doing for us, let’s jump in and start writing some smoke tests!
Project Introduction: Tour of Heroes
In order to write some smoke tests, we’ll test a local deployment of Angular’s Tour of Heroes tutorial.
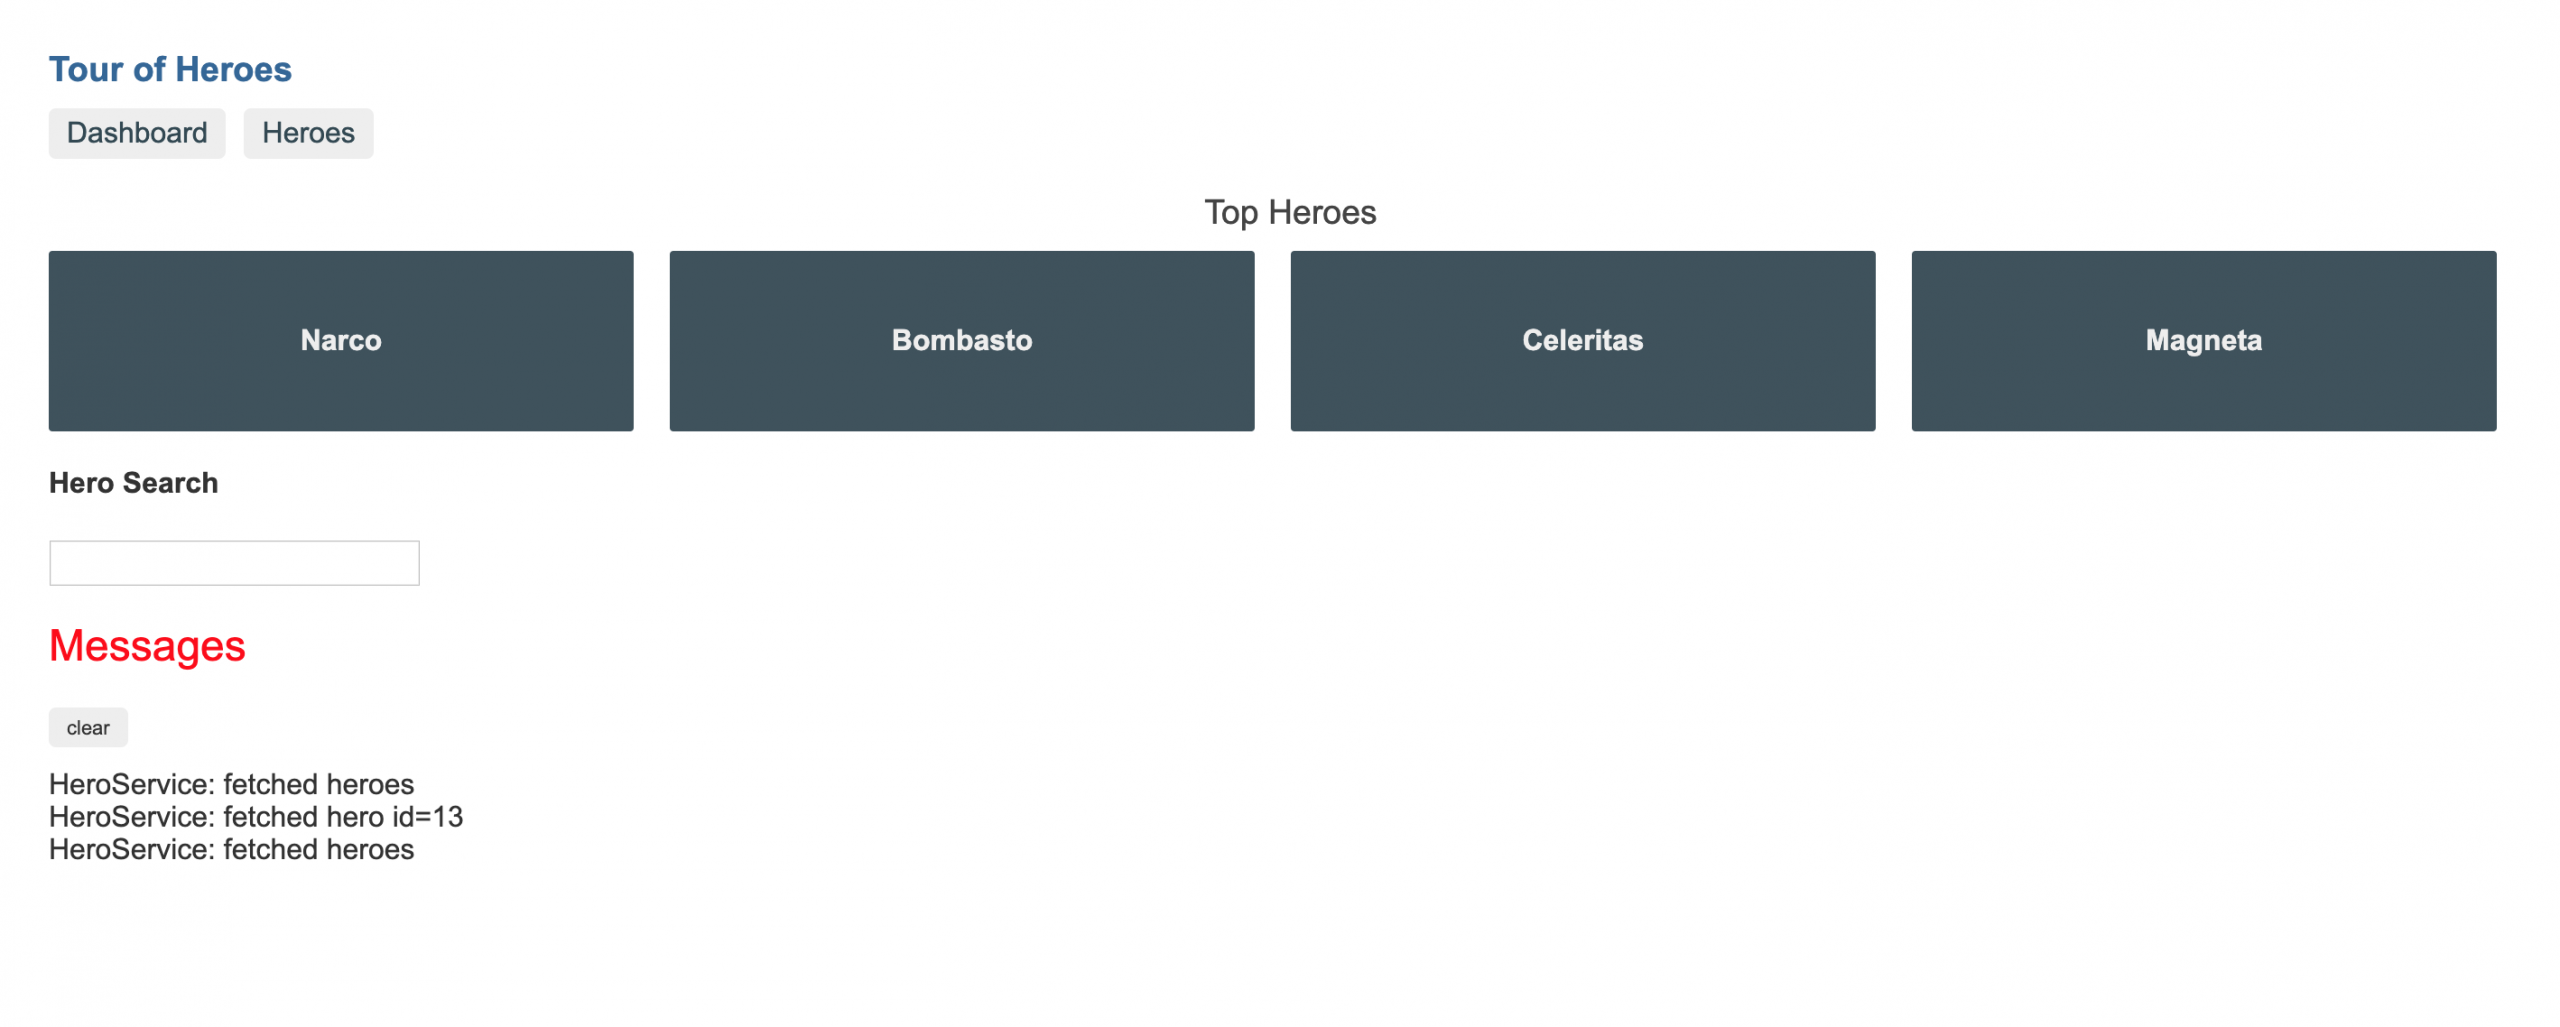
What are the things that our application will be doing? Tour of Heroes is a sample app that allows users to select a hero and see information about that hero. Besides displaying information, users can also add new heroes.
How to Concept Some Smoke Tests for Tour of Heroes
Here are some tasks that I want to smoke test:
- First, navigate to the correct web page and check the title
- Clicking a dashboard brings up top heroes
- Clicking heroes brings up my heroes
- Selecting a hero’s name brings up hero detail
- Add new hero, and see hero in list
- Delete hero
Like any other code, smoke tests should be self-descriptive. That is, anyone looking at the tests should be able to immediately understand what they’re doing and how they’re doing it. The code of each test should broadcast:
- What the task is
- How to check that the task works
Now that we know what we’re doing, let’s get started.
Set Up Smoke Tests Using Nightmare
We’ll start by preparing the test environment.
Download the finished Tour of Heroes tutorial, and open it in your integrated development environment (IDE) of choice.
Open the command line, and navigate to the folder you just downloaded:
cd [your-path]/toh-pt6
Install dependencies:
npm install
In the command line, install Nightmare.js:
npm install --save nightmare
Since Nightmare works well with Mocha (a testing framework) and Chai (an assertion library), let’s install them too:
npm install mocha
npm install chai
Add “smoke”: “mocha” to your package.json. The top of your package.json should look something like this:
{
  "name": "angular-io-example",
  "version": "1.0.0",
  "private": true,
  "description": "Example project from an angular.io guide.",
  "scripts": {
    "lint": "tslint ./src/**/*.ts -t verbose",
    "start": "ng serve",
    "test": "ng test",
    "build": "ng build --prod",
    "e2e": "ng e2e",
    "ng": "ng",
    "smoke": "mocha"
  },
Now in the command line, try the following:
npm run smoke
Create a new directory in the top level of your project called Test.
mkdir Test
Create a new file in the Test directory called test.js. Make sure you do not call it test.ts. Now we’re completely ready to begin writing tests.
Write Some Tests
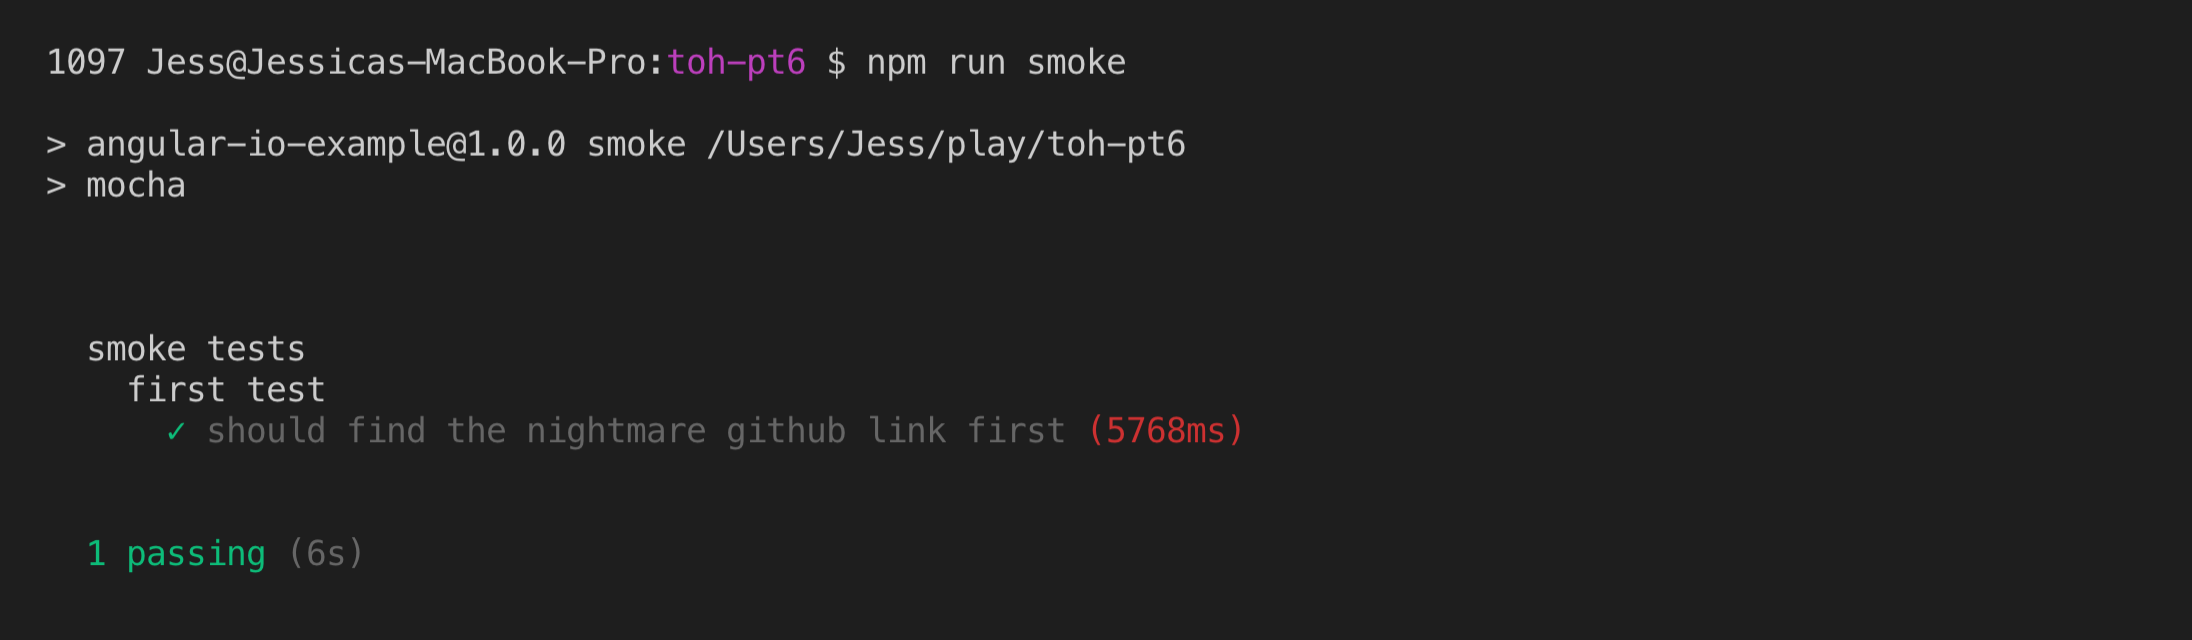
First, let’s copy a sample test from the Nightmare docs into test.js to make sure our test setup is working properly. This test performs a search on duckduckgo and makes assertions about the results.
const Nightmare = require('nightmare')
const chai = require('chai')
const expect = chai.expect

describe('test duckduckgo search results', () => {
  it('should find the nightmare github link first', function(done) {
    this.timeout('10s')

    const nightmare = Nightmare()
    nightmare
      .goto('https://duckduckgo.com')
      .type('#search_form_input_homepage', 'github nightmare')
      .click('#search_button_homepage')
      .wait('#links .result__a')
      .evaluate(() => document.querySelector('#links .result__a').href)
      .end()
      .then(link => {
        expect(link).to.equal('https://github.com/segmentio/nightmare')
        done()
      })
  })
})
To run the test, use the npm script we set up earlier:
npm run smoke
Test 1: Are We on the Same Page?
Axe the entire duckduckgo describe block in test.js. We won’t be needing it.
Create a new describe block to organize our test file.
describe('tour of heroes', () => {
Create a new it statement to describe our first Tour of Heroes test.
it('should have a page title of Tour of Heroes', function(done) {
Set the timeout. This is how long the test runner will wait to hear done() before giving up on the test.
this.timeout('10s')
Declare Nightmare.
const nightmare = Nightmare()
Start telling Nightmare what to do. The Nightmare API accepts a variety of plain English commands.
.goto('http://localhost:4200/')
One of Nightmare’s methods is evaluate. Evaluate grabs a piece of information from the page that we’ll check against our test assumptions later.
.evaluate(() => document.title)
Then stop doing stuff to the page. Your work here is done, browser.
.end()
Then is where you can test the information you gathered in evaluate.
.then(title => {
                expect(title).to.equal('Tour Of Heroes')
                done()
              })
Here it is all put together:
const Nightmare = require('nightmare')
const chai = require('chai')
const expect = chai.expect
describe('smoke tests', () => {

    describe('tour of heroes', () => {
        it('should have a page title of Tour of Heroes', function(done) {
            this.timeout('10s')

            const nightmare = Nightmare()
            nightmare
              .goto('http://localhost:4200/')
              .evaluate(() => document.title)
              .end()
              .then(title => {
                expect(title).to.equal('Tour Of Heroes')
                done()
              })
          })
    })
})
Run the application in a separate terminal:
ng serve
Finally, run the tests!
npm run smoke
Test 2: Click on the Dashboard Button
This test will make sure that the UI is loading properly and navigation is working. It’ll be our first introduction to another part of Nightmare.js’s API, click().
Copy the following into your test file, below the last test.
it('should switch to my heroes when heroes is clicked', function(done) {
          this.timeout('10s')

          const nightmare = Nightmare()
          nightmare
            .goto('http://localhost:4200/')
            .click('a[routerLink="/heroes"]')
            .evaluate(() => {
              var element = document.querySelector('h2')
              return element.innerHTML
            })
            .end()
            .then(h2 => {
              expect(h2).to.equal('My Heroes')
              done()
            })
        })
Once again, we told the browser to navigate to localhost:4200, but this time we specify something to click on. After the click happens, we evaluate the innerHTML of the h2. At the end of the test, we check to make sure the h2 text was what we expected.
Test 3: Search for a Hero
Next, we’ll use Nightmare’s .type() function to both grab a selector and enter text in it. We’ll make sure our search results come up as soon as we have a few letters typed. Then, we’ll select the result and ensure the details view is displayed.
it('should provide search results as you type', function(done) {
          this.timeout('10s')

          const nightmare = Nightmare()
          nightmare
            .goto('http://localhost:4200/')
            .type('#search-box', 'cele')
            .wait('.search-result a[href="/detail/14"]')
            .evaluate(() => {
              var element = document.querySelector('.search-result a[href="/detail/14"]')
              return element.innerHTML
            })
            .end()
            .then(searchResult => {
              expect(searchResult).to.contain('Celeritas')
              done()
            })
        })
        it('clicking on search result displays detail info', function(done) {
          this.timeout('10s')

          const nightmare = Nightmare()
          nightmare
            .goto('http://localhost:4200/')
            .type('#search-box', 'cele')
            .wait('.search-result a[href="/detail/14"]')
            .click('.search-result a[href="/detail/14"]')
            .wait('app-hero-detail h2')
            .evaluate(() => {
              var element = document.querySelector('app-hero-detail h2')
              return element.innerHTML
            })
            .end()
            .then(searchResult => {
              expect(searchResult).to.contain('Celeritas'.toUpperCase())
              done()
            })
        })
Remember, these tests don’t need to cover every possible combination of inputs. We just want a quick check to make sure things are running smoothly.
Next Steps
Now that you know how to write smoke tests using Nightmare.js, you’re ready to use them in your project!
One great thing about Nightmare.js is that it’s easy to add to your continuous integration/continuous deployment (CI/CD) pipeline. Once you have smoke tests as part of your deployment process, you’re free to schedule your tests to automatically run daily to verify that your app is still up and running.
Nightmare.js is a great tool for creating simple, fast smoke tests, which can help alert you to problems during initial deployment and as they arise later on. Knowing about problems and fixing them when they happen will not only make your job easier, but it will make your product better. So make a little investment in test automation now and watch your brand reap the benefits!


