


When it comes to the automated testing and browser automation space, Selenium is a popular name. Selenium, rather than being a single tool, comes in different versions that solve different problems. One of these needs is grid testing, and Selenium Grid is Selenium’s answer to that.
This post is an introductory guide to Selenium Grid 4. You’ll learn what Selenium Grid is, how it differs from other versions of Selenium, and what the benefits in using it are. After all of that, you’ll learn how to get started with Selenium Grid 4 in practice. Let’s dig in.
Table of Contents
- Selenium Grid: The Basics
- What is Selenium Grid
- Selenium Grid vs. Selenium
- The Benefits of Selenium Grid 4
- The Components of Selenium Grid 4
- Selenium Grid 4: A Step-by-Step Guide
- Selenium Grid: Learn It, But Explore Alternatives
Selenium Grid: The Basics
As promised, let’s begin by getting some fundamentals out of the way.

What Is Selenium Grid?
Selenium Grid is the edition of Selenium you use to perform grid testing. The question then becomes: What is grid testing? To understand that, let’s take a step back to understand the problem it solves.
There are many different browsers. Though nowadays Google Chrome is undoubtedly the choice for most consumers, a large number of people still use other browsers. Ensuring your web application works across many different browsers is called cross-browser testing. Though it’s important, it’s often costly and time-intensive.
Now, add operating systems to the table. On the computer, we have Windows, macOS X, and the innumerable Linux distributions. What about mobile devices? Add iOS and the many different Android versions to the mix.
Imagine manually testing your web app across all of the environments resulting from the combinations between operating systems and browsers. That’d be sheer madness. And that’s where grid testing comes in handy: It allows you to run your tests simultaneously on a grid—a combination of different OSs and browsers.
Selenium Grid vs. Selenium
How does Selenium Grid compare with the other editions of Selenium? Let’s see:
- Selenium IDE. This is the most basic version of Selenium, consisting of a browser extension you can use to create simple codeless, record-and-playback tests.
- Selenium WebDriver. WebDriver is an API you can use, along with the binding for your favorite programming language, to drive a browser using code.
- Selenium Grid. This is what allows you to run tests at scale across a large number of environments.
The Benefits of Selenium Grid 4
Here are some of the benefits of Selenium Grid:
- Support for various programming languages, thus reducing the learning curve
- Enables testing across different browsers and different browsers versions
- Enables testing across different operating systems
- It’s an open-source solution
To top it off, the main benefit of Selenium Grid is that it allows you to run concurrent tests on several different machines in an easy way.
The Components of Selenium Grid 4
Selenium Grid 4 is a complete rewrite of Selenium Grid and, as such, it’s very different from its predecessors. In short, Grid 4 is made up of several components, and you can use these components in simpler or more sophisticated ways, depending on your needs. Let’s now quickly review all of the Grid 4 components.
Router
The router is the component that receives the requests and dispatches them to the appropriate place:
- requests for an existing session are sent to the session map, where the id for the node is retrieved and then the request is sent to the node
- requests for a new session are sent to the new session queue, where they wait to be picked up
Distributor
The distributor registers and manages the nodes. It also queries the new session queue for requests for new sessions, then finds a suitable node for it.
Session Map
The session map maps the relationship between a given node and the session in which it’s running.
New Session Queue
It’s the queue where requests for new sessions wait until they get picked by the distributor.
Node
Nodes are the “agents” that run on the given machines.
Event Bus
The event bus is the communication channel between all of the other components. That way, expensive HTTP calls are prevented.
Selenium Grid 4: A Step-by-Step Guide
Now it’s time to roll up your sleeves and jump in with our tutorial.
Step #1: Install Java
The first step is preparing a Java environment. You’ll need it to execute some JAR files to get your grid up and running.
If you don’t already have Java installed, go to the Java JDK download page, download it, and install it. Make sure you add the path to the Java executable to your PATH system variable.
When you’re done, go to your terminal and type java –version. If everything went well, you should see the Java version displayed on your terminal.
Step #2: Install .NET
Selenium has bindings to several major programming languages, including Python, Java, and JavaScript. For this post, I’ll be using C#. If you don’t have it, go get the .NET SDK. You can either get the 7.0 version—which, at the time of this writing, is the latest version—or the 6.0, which is the LTS (long-term support) version.
Step #3: Download ChromeDriver
The next step is downloading the executable responsible for actually driving your browser. You have to download the executable according to your browser and operating system. For this tutorial, we’ll drive Chrome. Go to the downloads page and get the adequate version depending on your operating system and Chrome version.
After downloading the executable, place it in a convenient folder and add its location to the PATH variable.
Step #4: Download Selenium Server
Now, it’s time to actually download Selenium Grid in the form of a JAR file. Go to the Selenium downloads page, locate “Selenium Server,” and click on the download link, like in the following image:
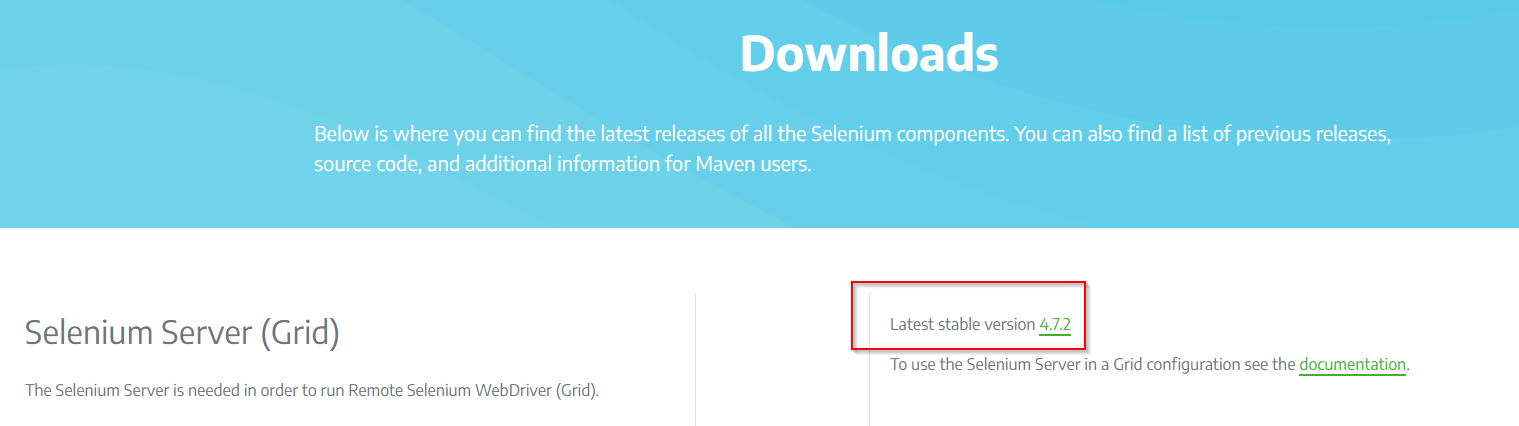
At the time of this writing, the latest version of Selenium Grid is 4.7.2. Keep in mind that your browser might warn you about the file and try to prevent you from opening it:
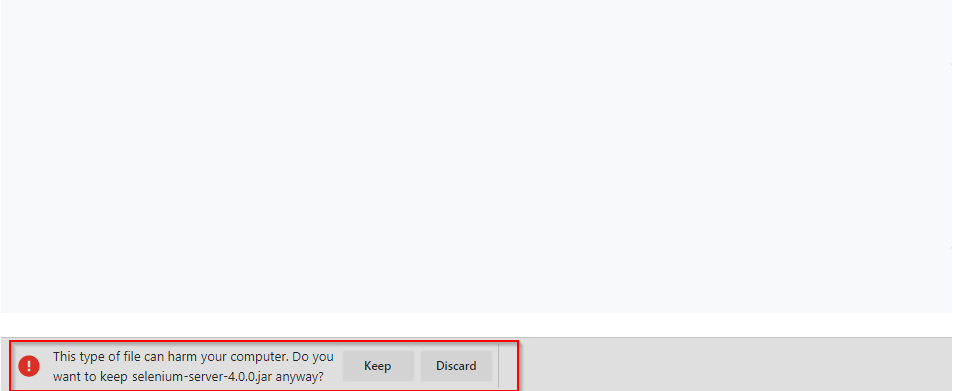
The wording of the message will probably vary from browser to browser—or not be shown at all—so be careful not to discard the file accidentally.
Step #5: Starting Selenium Server
Using your terminal, navigate to the directory where the downloaded JAR file is and run the following command:
java -jar selenium-server-4.7.2.jar standalone
You can implement a Selenium grid in three modes:
- Standalone: With this model, you can execute a fully-functional grid within a single machine.
- Classical: The classical mode is recommended for small and medium grids, and consists of setting up a server (a hub) and then one or more agents (the nodes) as needed.
- Fully distributed: This mode is the most complex and powerful model, recommended for very large grids.
The command above starts Selenium server in the standalone mode. As I said, at the time of this writing, the latest version is 4.7.2. It’s possible that by the time you’re reading this post there’s a newer version out there. If that’s the case, update the command accordingly.
After running the command, you can go to http://localhost:4444 and you’ll see something like this:
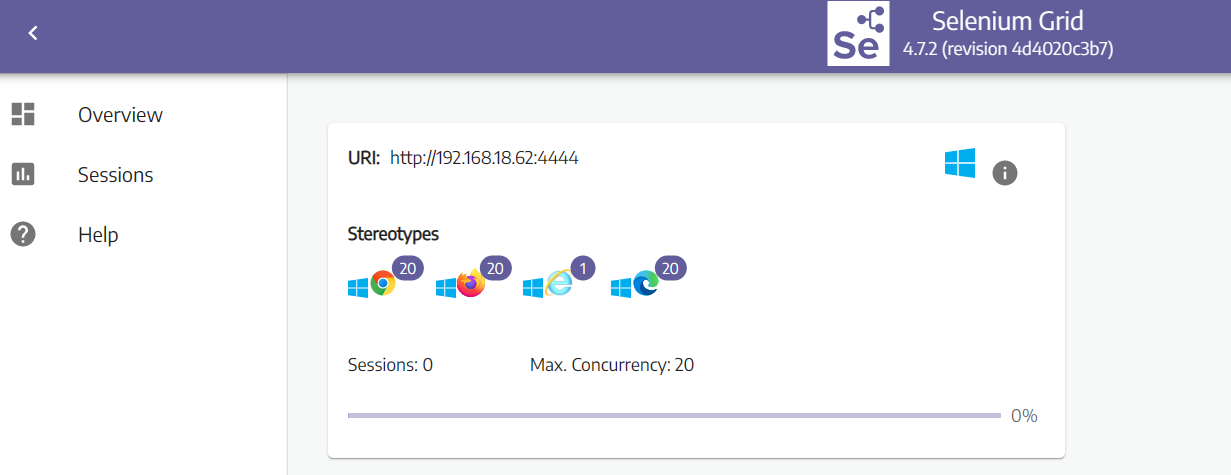
Congrats! Your Selenium server is up and running. Now, it’s time to start testing.
Step #6: Creating a Test .NET App
Let’s create a .NET app to store our Selenium tests. Back in your terminal, run the following commands:
dotnet new console -o sel4demo
cd sel4demo
dotnet add package Selenium.WebDriver
The commands above:
- Create a new .NET console app
- Access the created directory
- Add the necessary NuGet package for Selenium
Step #7: Writing and Running the Test
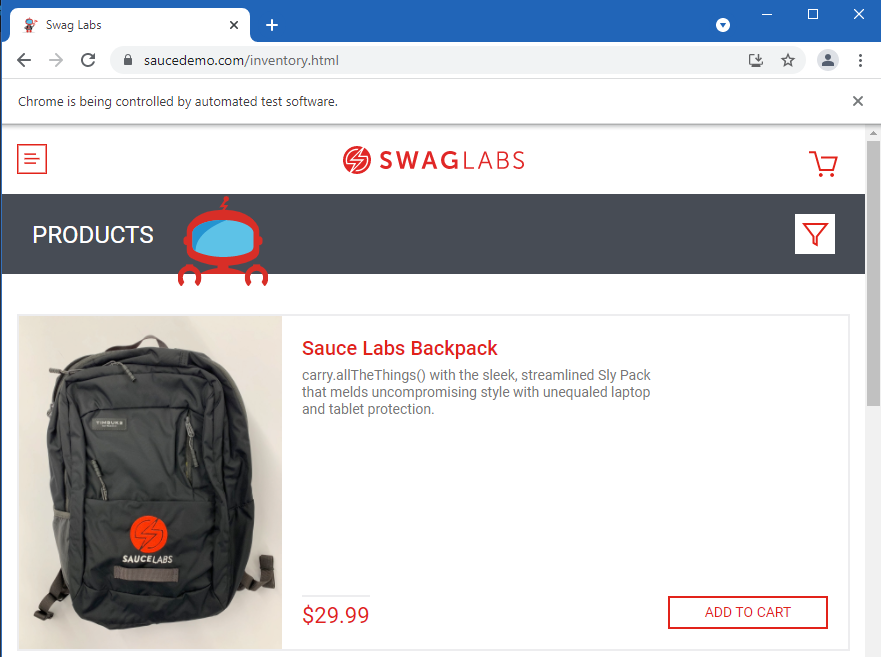
This is the website we’ll use for this example:
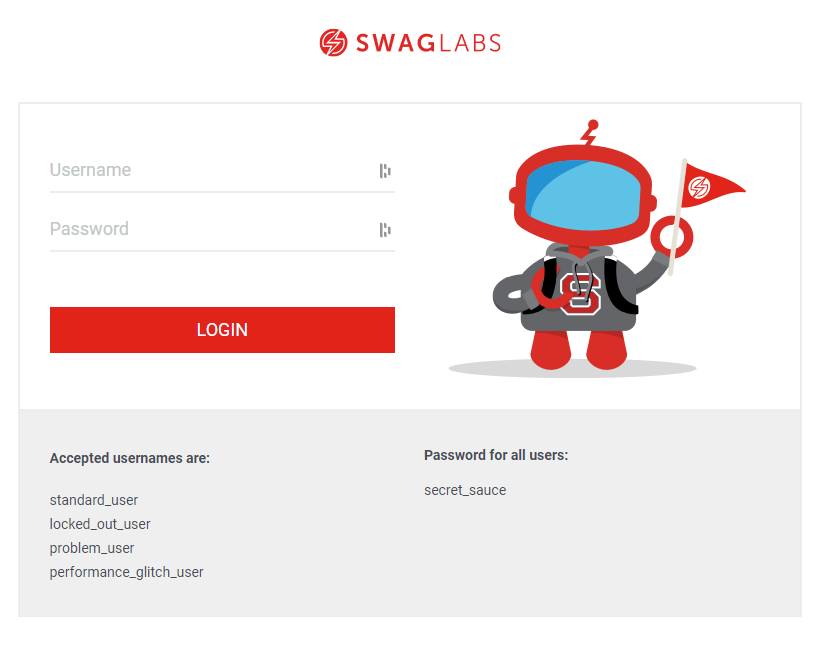
You can find it on www.saucedemo.com. Using Selenium, we’ll navigate to the site, enter standard_user and secret_sauce as the username and password respectively, and click on the LOGIN button.
So, let’s do it! Using your favorite code editor, edit the Program.cs file inside your project folder. Replace its contents with this:
using OpenQA.Selenium;
using OpenQA.Selenium.Chrome;
using OpenQA.Selenium.Remote;
var options = new ChromeOptions();
var driver = new RemoteWebDriver(
                new Uri("http://localhost:4444"),
                options);
driver.Manage().Cookies.DeleteAllCookies();
driver.Manage().Window.Maximize();
driver.Navigate().GoToUrl("https://www.saucedemo.com/");
IWebElement usernameInput = driver.FindElementById("user-name");
IWebElement passwordInput = driver.FindElementById("password");
IWebElement button = driver.FindElementById("login-button");
usernameInput.SendKeys("standard_user");
passwordInput.SendKeys("secret_sauce");
button.Click();
Finally, go back to your terminal and execute dotnet run. You should see a new Chrome window opening without your intervention, navigating to the target URL and logging in using the specified credentials:
Selenium Grid: Learn It, But Explore Alternatives
The landscape of browsers and operating systems grows more complex with each passing year. That’s why grid testing is a great technique that should be part of your quality strategy.
In this post, you’ve seen how to get up and running with Selenium Grid 4 with a step-by-step guide. You now have a simple, functional standalone grid you can build upon.
Before parting ways, here’s some food for thought. Though Selenium has positive qualities, it also has some serious drawbacks. For instance, it’s well known that Selenium’s approach to finding elements can result in fragile tests. For instance, think of what would happen with our example should a developer change the id of any of the elements we interacted with. That’s right: the test would break.
Also, never forget the cost of a testing tool. Since test automation is an investment, you should never forget about ROI. Just because something is free of cost doesn’t mean it’s really free. You have to consider the total cost of ownership, which includes factors such as the learning curve and difficulty maintaining a home-grown solution.
Sure, learn Selenium. But keep an open eye for alternatives, particularly tools that offer smarter ways to locate elements on the screen and create more robust test suites.


