


The software testing world has plenty of terms, expressions, and buzzwords, and the list keeps growing. On the one hand, this is a good sign of a vibrant and innovative field. On the other hand, it can be overwhelming for newcomers to keep up with so many concepts. In this post, we’ll help make your testing journey easier by covering another one of these terms: scriptless test automation.
What Is Scriptless Test Automation?
Let’s start with some fundamentals. We’ll define scriptless test automation and explain the role it plays in the general test automation scenario.
How Does Automated Testing Work?
The idea behind automated testing is simple. Using various tools, libraries, and frameworks, professionals in an organization create test cases that exercise and check the application under test in many different ways. It’s possible to test whether the app’s UI works as expected, if the application performance is adequate, or even if the features work correctly from the user’s perspective.
Once the test cases are ready, people can run them on their machines. Or, better yet, they can add the test execution as an additional step in the CI/CD pipeline. That way, the build breaks if the tests fail, dramatically reducing the risk of deploying code with regressions.
In short, automated testing is essential for organizations that want to go fast while keeping quality high.
Expand Your Test Coverage
Does Automated Testing Require Coding?
There are different types of automated testing. Some of them require coding skills. Unit testing is probably the most common example. However, it’s possible to perform automated testing in ways that don’t require you to learn how to code. And this is what we call scriptless—or codeless—test automation.
Scriptless vs. Scripted Tests
Different types of testing serve different purposes. You can’t replace UI testing with unit testing, for instance, since the feedback from each is different, but both are necessary. So, different types of testing aren’t interchangeable.
Also, keep in mind that different types of testing often have different target audiences. For instance, take user acceptance testing. This type of testing is meant to convince the user—or their proxy—that a given feature is working as expected and is ready to go. Unit testing is what developers use to check their assumptions about their code automatically. Developers write unit tests for developers, so it’s not a problem that unit tests require coding.
Ultimately, scriptless test automation isn’t “better” than tests that require coding, but it’s equally as important. Just as a solid QA strategy should have the right balance between manual and automated testing, you should strive for balance when it comes to coded vs. codeless testing.
Why Care About Scriptless Test Automation? Here Are the Main Benefits
In the previous section, we said that scriptless tests are an essential part of a solid QA strategy. But why? We’ll explain that now by listing some of the main benefits they bring to the table.
Faster Authoring of Tests
Consider tests that require interaction with elements on a web page, such as end-to-end testing. To create such test cases, you could employ an automated testing tool like Selenium WebDriver. Despite being very powerful, WebDriver requires knowledge in one of the languages supported, but luckily includes major languages such as Java, Python, and JavaScript.
Creating test cases by writing scripts is slower than doing it with a scriptless method like the record-and-playback method, for instance. So, that’s the first important advantage of scriptless automation: You can create your test cases faster.
It’s Cheaper Than the Alternative
If your test automation strategy requires coding skills, you have two ways to go about it. You can either teach testing and QA professionals to code or have your software engineers create test cases. Most organizations prefer the latter because it’s the fastest, but it costs them money. Think about it: They’re having well-paid programmers do a task that other (less expensive) professionals could do. They also incur an opportunity cost, forgoing the development of new features as they code tests.
So, there’s another benefit of codeless test automation: It’s way cheaper.
Lower Learning Curve
Scriptless test automation has a learning curve that is way lower than learning how to code. That means you can get people up to speed on creating test cases in a short amount of time, ensuring that your staff always includes people qualified to help with the test effort.
Scriptless Test Automation: a Practical How-To Using Testim, in Five Easy Steps
We couldn’t leave without showing you how easy it is to get started with codeless test automation. So, that’s what we’ll do now.
Step #1: Sign Up for Your Free Testim Account
Start by getting your free Testim account. Remember that you’ll need a custom domain e-mail for that; your Gmail address won’t work. As soon as you have your account, log in to Testim.
Step #2: Install Testim Chrome Extension
After you log in to your account, you’ll be asked to install the Testim browser extension.
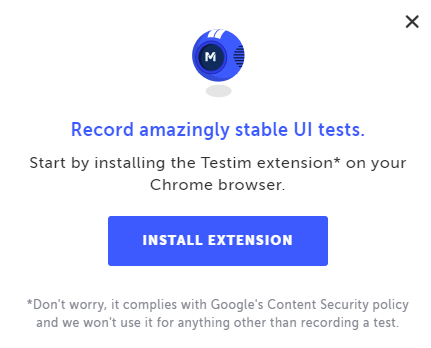
Click on the Install Extension button, follow the instructions, and finish the installation.
Step #3: Create Your First Test
For this test, we’ll use demoblaze.com, which is a sample site made for testing purposes.
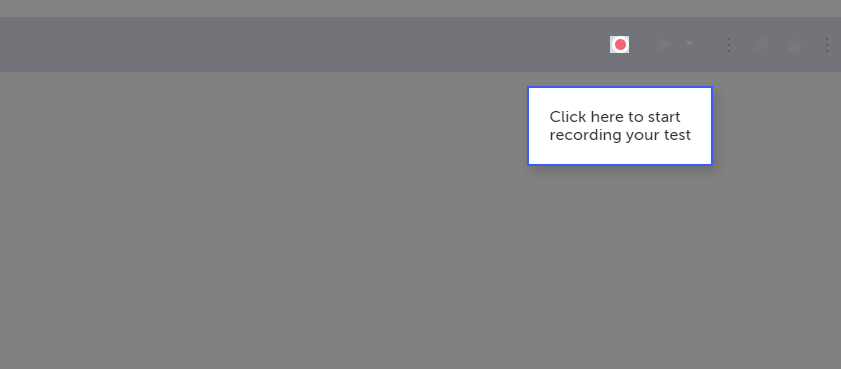
After you’re done installing the Chrome extension, go back to your open Testim tab. Testim will ask you to press the Record button to start creating your first test:
Then, Testim will prompt you again, this time asking for a base URL for the app you’ll test:
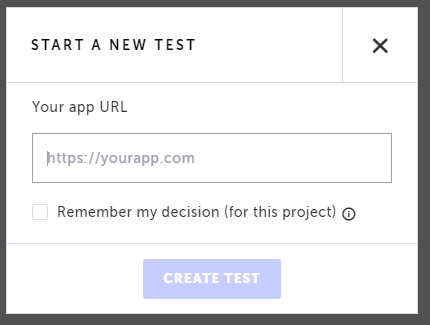
Type https://demoblaze.com and click on the Create Test button. A new Chrome window will open and access the demo site. You’ll see a message saying your actions are being recorded:
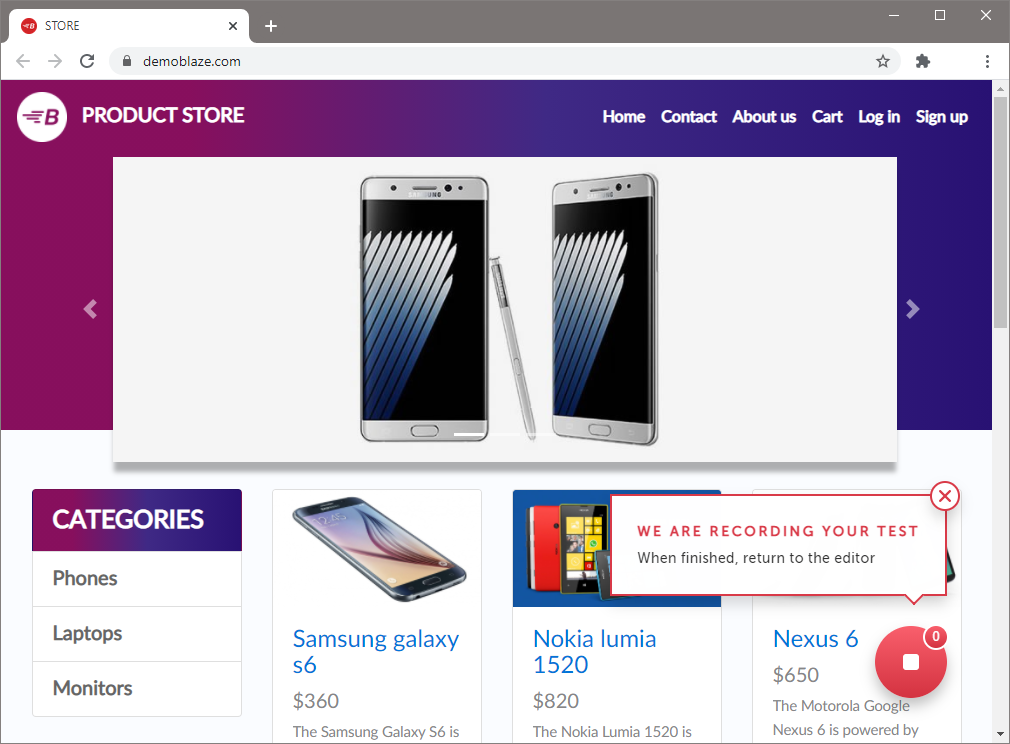
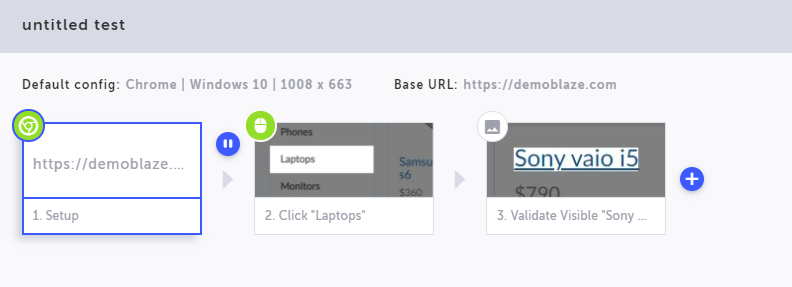
Click on Laptops, and see how the page updates to only show products in that category. Click on the red Stop button to finish recording, and go back to the Testim tab. You’ll see something like this:
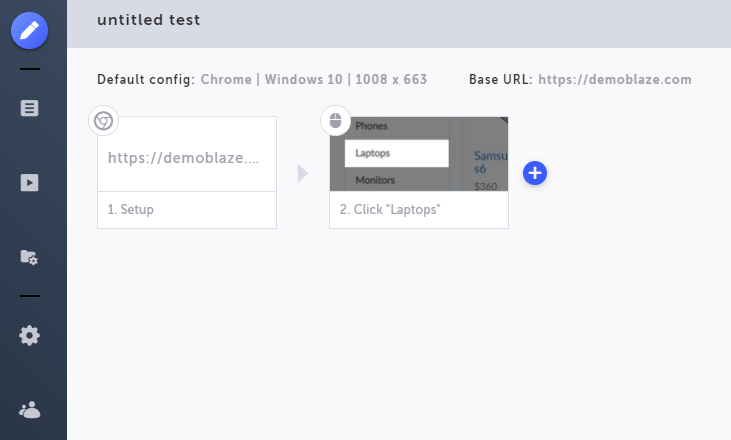
As you can see, the test contains two steps: First is the setup, in which the test navigates to the base URL. Then, the second and final step is to click on the Laptops link. Now it’s time to run this test.
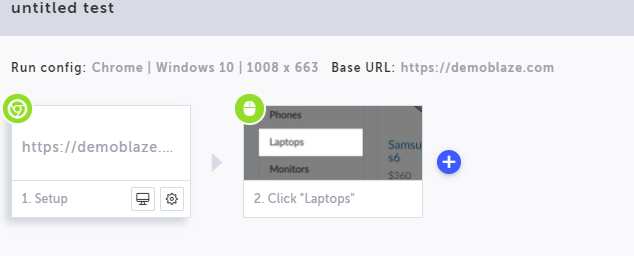
Step #4: Running Your Test
While still on the Testim tab, click on the Play Scenario button (the one with the play sign) to run your test case, as shown in the following image:

After clicking on the Play Scenario button, you’ll see a new Chrome window open, navigate to the target site, and click on Laptops. Then, you should see a message saying that the test was completed successfully.
Congratulations! You’ve just created your first test using Testim. I told you it was easy, didn’t I? But we’re not done yet. This simple test still lacks something fundamental.
Step #5: Adding a Verification to Your Test
As you may have noticed, the test you’ve just created doesn’t really test anything. It doesn’t verify or check any behavior or state of the application. It’s akin to a unit test with no assertions.
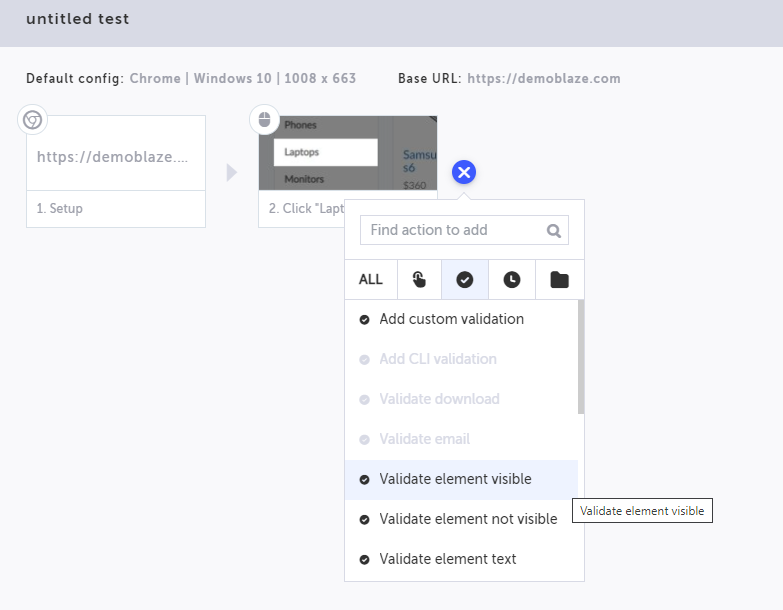
Let’s fix that by adding a verification to the test. Go back to the Testim tab and click on the blue + button beside the test’s second step:
A menu will appear. Click on the validation icon—the one with the checkmark—and then click on Validate element visible:
After that, you’ll see a message saying you must either open the base URL or run the relevant test step to select the element you want to validate:
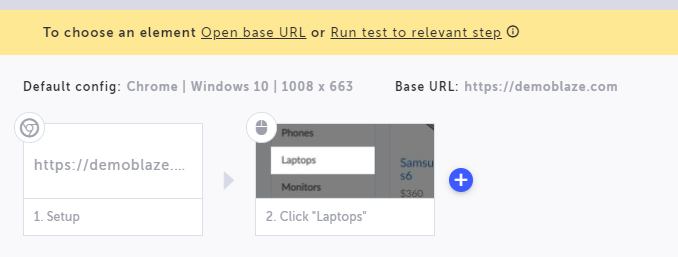
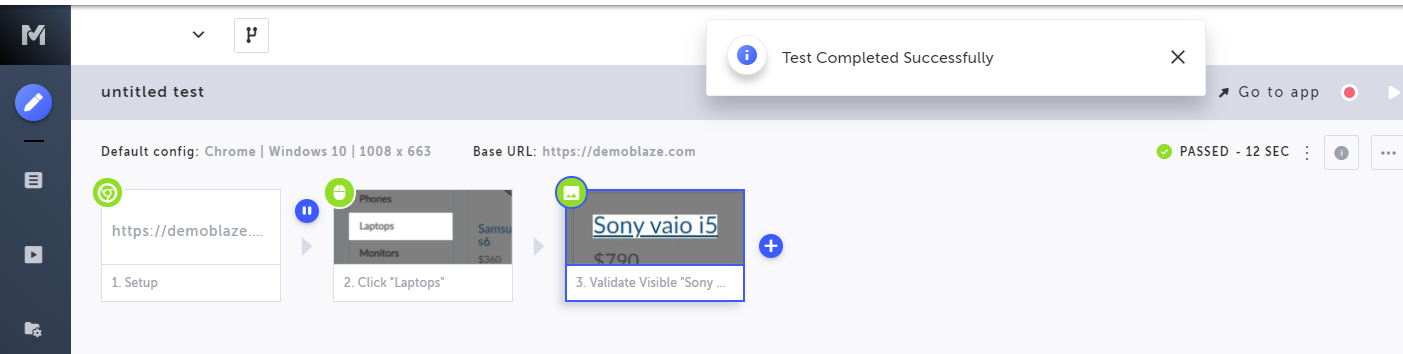
Click on the Play Scenario button again, so the test will run until we get to the relevant step. The test will run again and finish successfully. Go back to the Testim tab while keeping the Chrome window that just ran the test open and repeat the procedure to add the validation. You’ll be taken back to the test windows, where you’ll be able to select one element from the page. Click on the first product name (Sony Vaio i5) and then go back to the Testim tab. You’ll see that the test now has a third step:
If you rerun the test, you’ll see that it now validates the presence of the element you’ve picked:
Conclusion
Test automation is way more common today than it was a decade ago. There are new options like Puppeteer and Playwright to write coded, scripted tests, and there are amazing new AI-powered UI testing platforms like Testim.


