


Here we are again in our never-ending quest to spread the word about automated testing. Today’s topic is one we’ve already covered, but with a different spin: regression testing.
What is regression testing? Well, while the previous post was mainly about definitions—and we do recommend you check it out—we’ll offer a short version here nonetheless. Regression testing is a form of testing meant to prevent regressions. If you’ve been an engineer for a while, you’re probably somewhat familiar with the situation of fixing a bug only to see an old one return.
Or maybe you add a new feature to your application and another one stops working.
That’s what a regression is: we can say the application has regressed to a previous, undesirable state. Automated regression testing is a form of testing designed to warn you as soon as a regression is detected. That way, you can act quickly and fix the issue before it makes it to production, keeping quality and user satisfaction high.
In other words: regression testing is crucial in software development. It’s the only way to ensure that an application continues to work properly after each change made to it.
As I said, the previous post was mainly about definitions. It also covered repression testing best practices, which is yet another reason why you should read it. But unlike the previous post, this one will get more practical, featuring regression testing examples.
More specifically, we’ll offer three examples that, while simple, will give you insight into how testing takes place in real-world scenarios.
By the end of the post, you’ll understand more about the benefits of regression testing and the tools and techniques you might use to create them.
Getting the Requirements We Need
We’re about to start with our regression testing examples. If you want just to read the examples, you can skip this section entirely. However, if you’d like to follow along, you’ll need a few things we’ll list here.
Google Chrome
In our examples, we’ll use Automate, a test automation tool by Testim. To actually create the test cases, we use a Chrome browser extension. That’s why you need Google Chrome—though you might be able to use other browsers based on Chromium, such as Opera or the more recent Edge.
A Free Testim Account
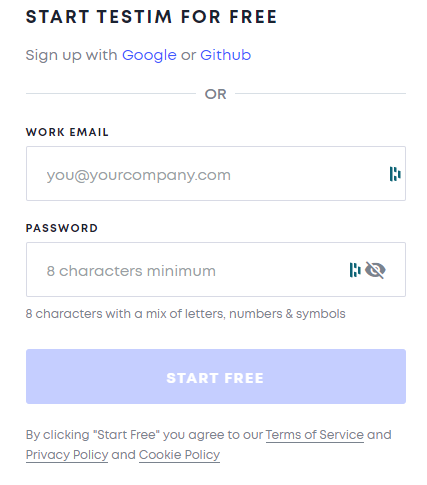
The next step is to sign up for a free Testim account. Start by accessing the signup page. Once there, sign up using your Google or GitHub account. Alternatively, create an account using a custom domain email address and a password.
Install the Testim Browser Extension
After signing up, you’ll be promptly asked to name your first three tests:
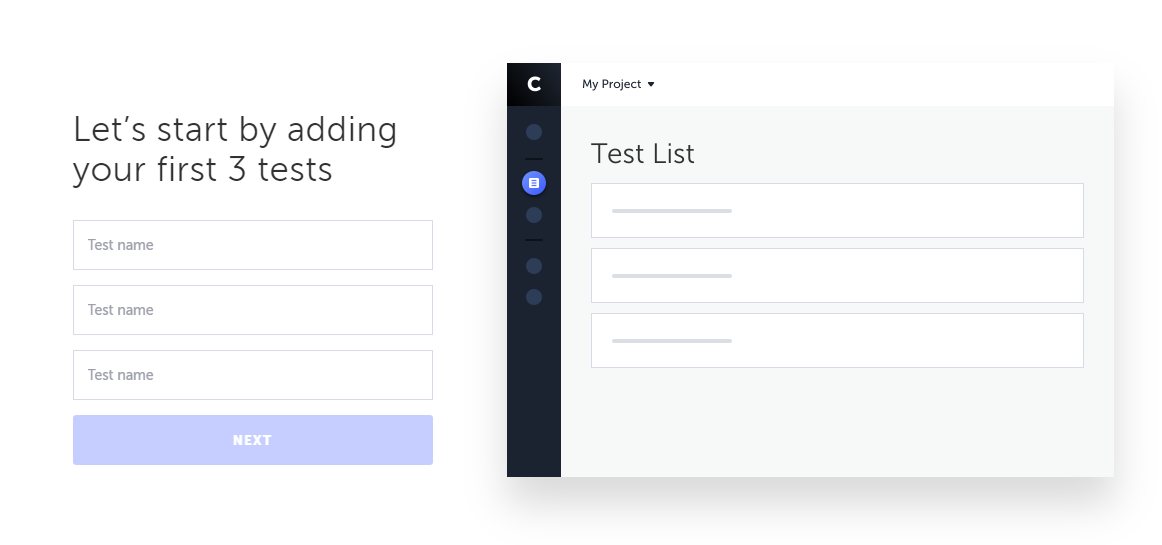
I’ll unimaginatively name mine “First regression test,” “Second regression test,” and “Third regression test,” but feel free to get more creative. When you’re done, hit Next. Then, Testim will take you through a sort of welcome tour, asking you to start recording your first test:
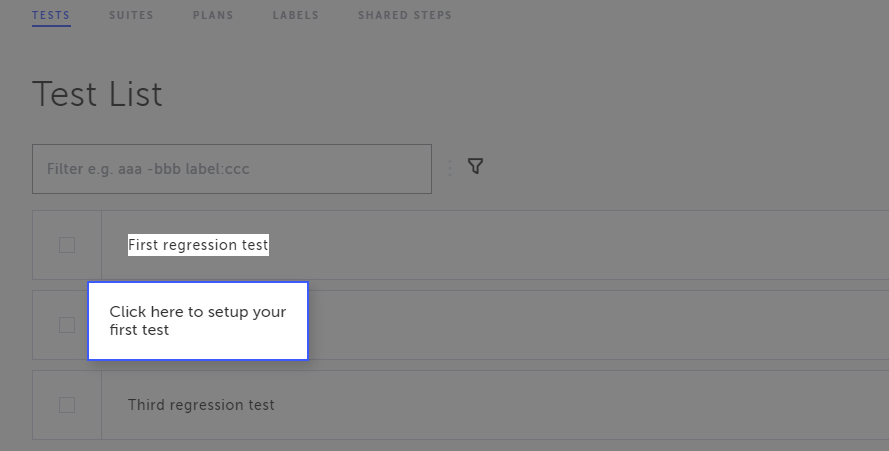
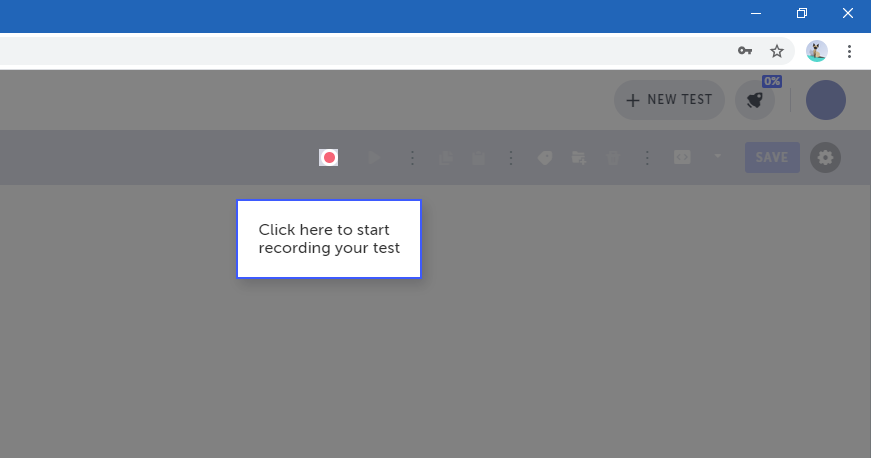
Click on First regression test—or whatever you named your test. You’ll see another step in the tour, in which Testim shows you the button you have to press to start testing:

Well, don’t stand on ceremony. Click that little red circle! After you click the button, Testim will inform you that you need to install the Chrome extension and invite you to do so:
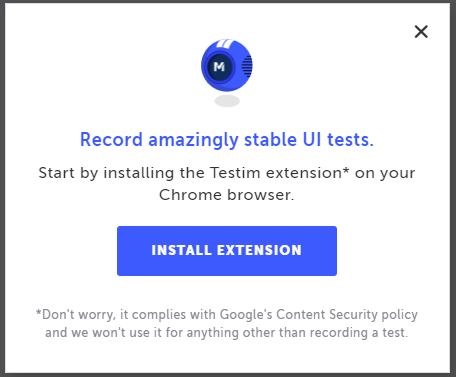
Clicking on Install Extension will take you to the Chrome Web Store, where you’ll be able to install the Testim Editor extension. Install it as you would any other extension; it shouldn’t take more than a few seconds.
Now that all of the ingredients are in place, it’s time to cook some delicious testing recipes.
Expand Your Test Coverage
Time To Roll Up Your Sleeves: Regression Testing Examples in Practice
Each of the tests added when you signed up to Testim will be an example of regression testing. Let’s get to it.
Example #1: Verifying the Workings of a Shopping Cart Functionality
E-commerce websites are a staple of life in 2022. For such sites, offering the user, a flawless shopping cart experience is essential. What if a recent change or bugfix causes the shopping cart to misbehave? That would be no fun at all, especially if the issue has to do with money. In our first example, we’ll create a test that verifies that the shopping cart’s total value is displayed correctly after adding a single product to it.
With the Testim Editor extension installed, you can go back to the previous tab to resume what you were doing. Click on the Start Recording button:
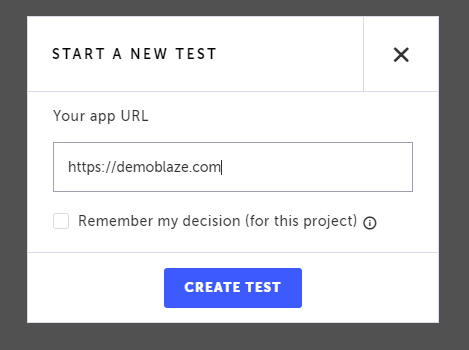
When you do that, Testim Automate will ask you for a base URL for your test. For this tutorial, we’ll use a demo site created specifically for testing purposes. Type in https://demoblaze.com and hit the CREATE TEST button:
After you click the button, a new browser window will open, featuring the site under test:
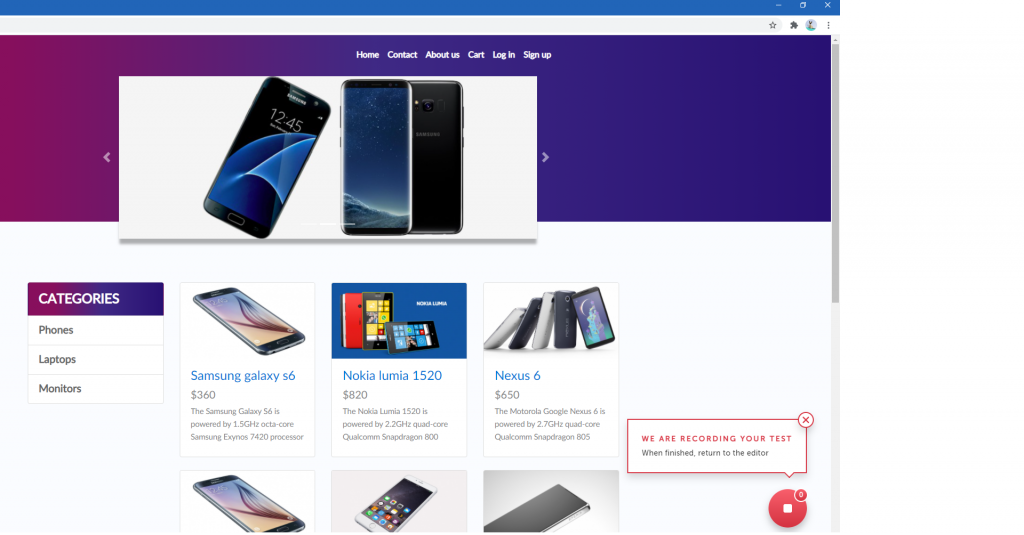
In the bottom right corner, you can see a message indicating that the test is being recorded. Now, you’re going to do three simple steps:
- Click on the first product, the Samsung Galaxy S6 smartphone.
- On the product’s page, click on Add to cart.
- Click on Cart, the fourth option in the main navigation menu. The cart’s page verifies that the added product is there, and the total value is indeed $360.
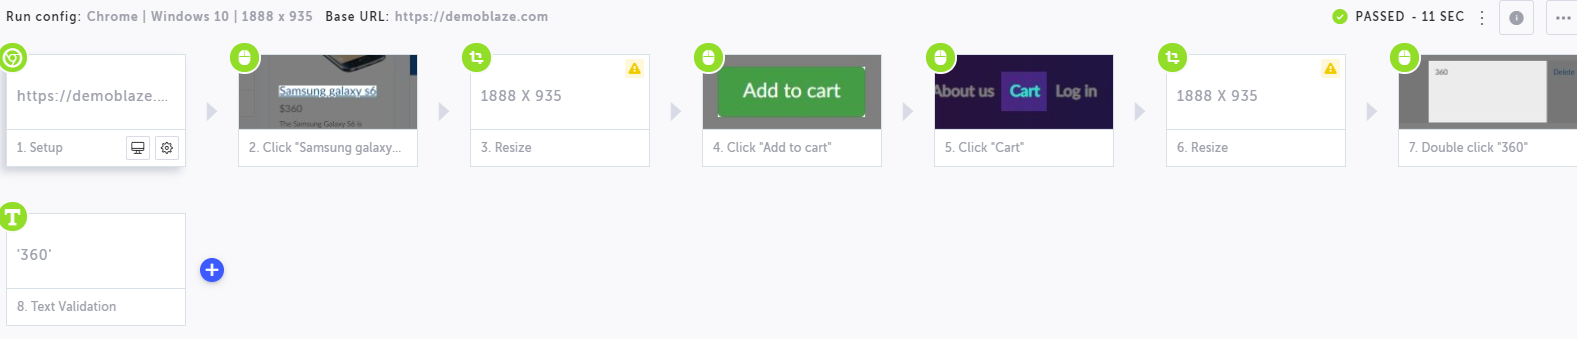
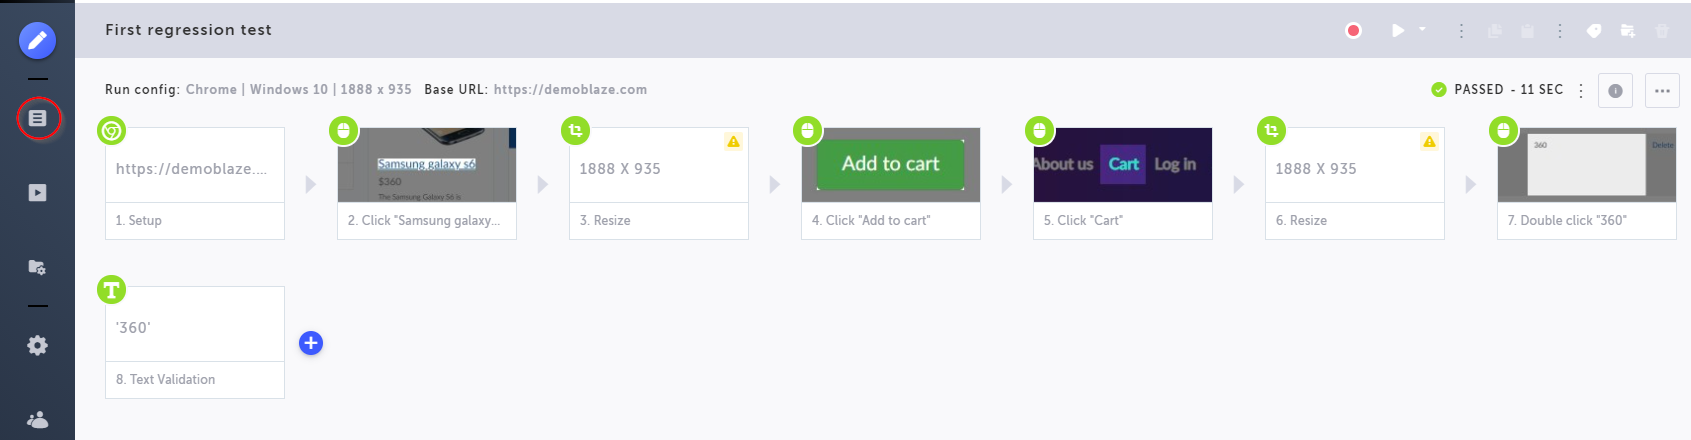
After that, click on the stop button in the bottom-right corner of the screen and return to the editor. You’ll see an image like the following one, featuring each step from your test and inviting you to play the scenario you’ve just recorded:
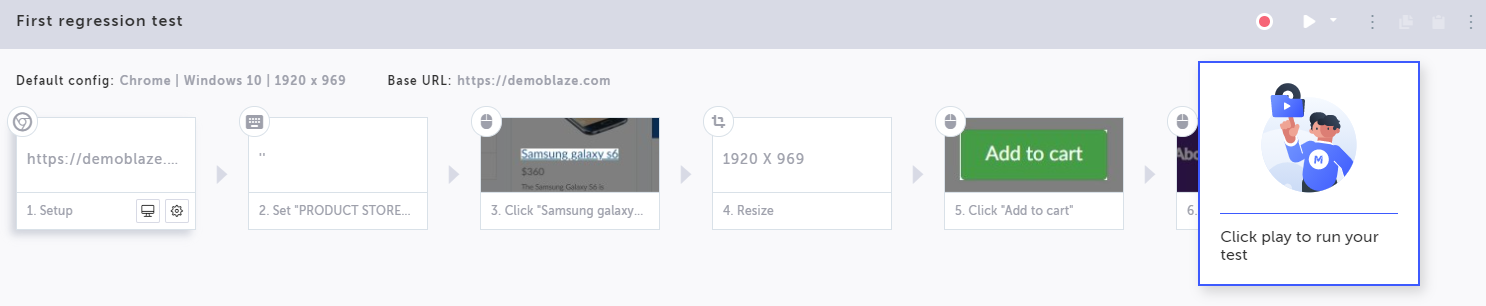
Click the Play Scenario button to play your recording. After it finishes, you’ll see a message saying the test was successful:
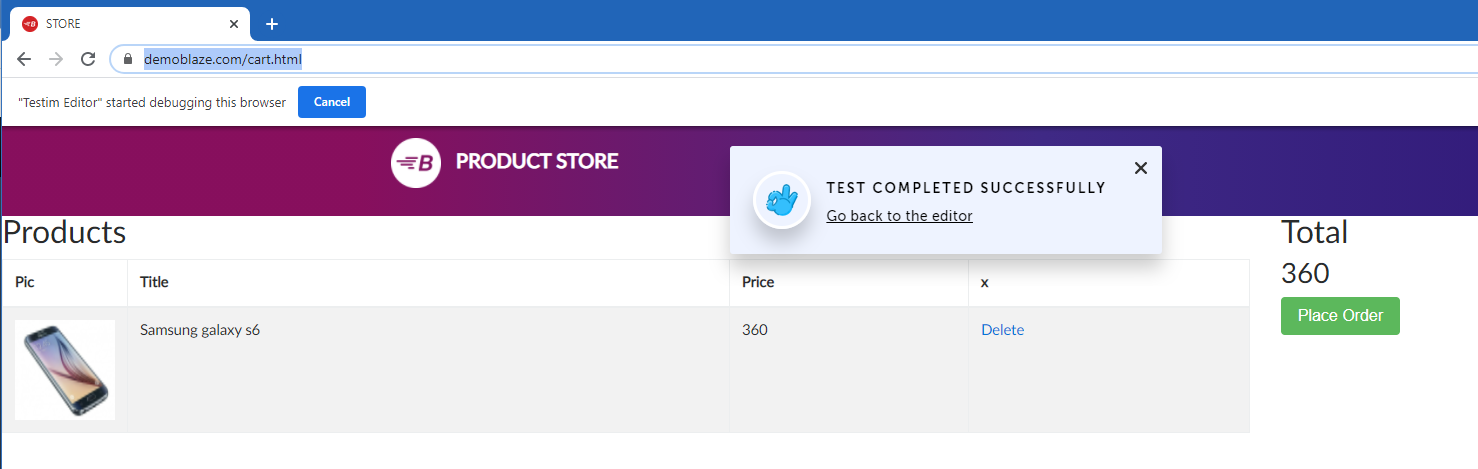
You have an automated test case that runs successfully. Congrats! But as it is, this test isn’t valuable. It doesn’t test or verify anything. If the shopping cart functionality had a bug that caused a wrong total value to display, the test would still pass. What can we do? Easy: let’s edit the test, adding a verification step to it.
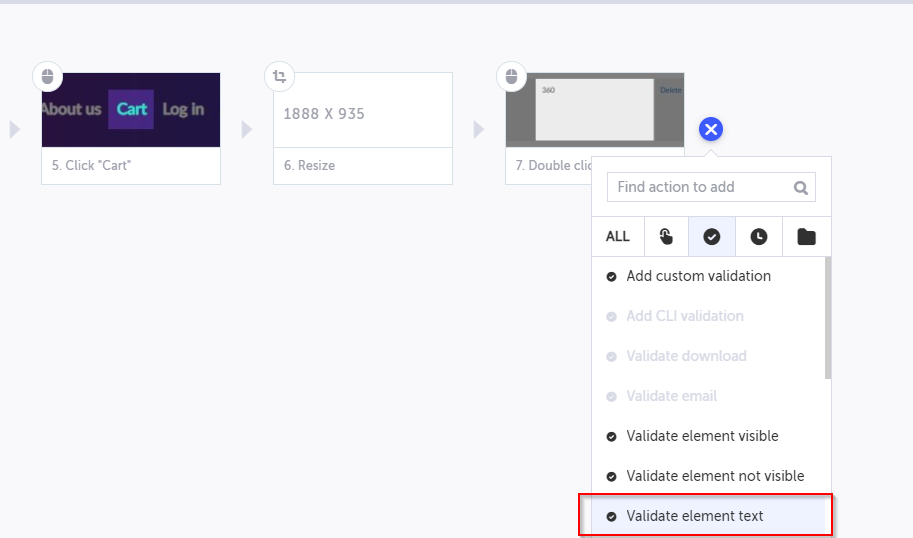
In the editor tab, go after the last step in your test and click on the Add (+) button. You’ll see a context menu. Choose validations—represented by a checkmark—and then click on Validate element text:
You’ll see a message saying you need to either open the base URL or play the test until the relevant step. Pick the latter option. You’ll see the browser window again, executing the scenario until the last step. Then, you’ll see a message saying that the test has hit a breakpoint.
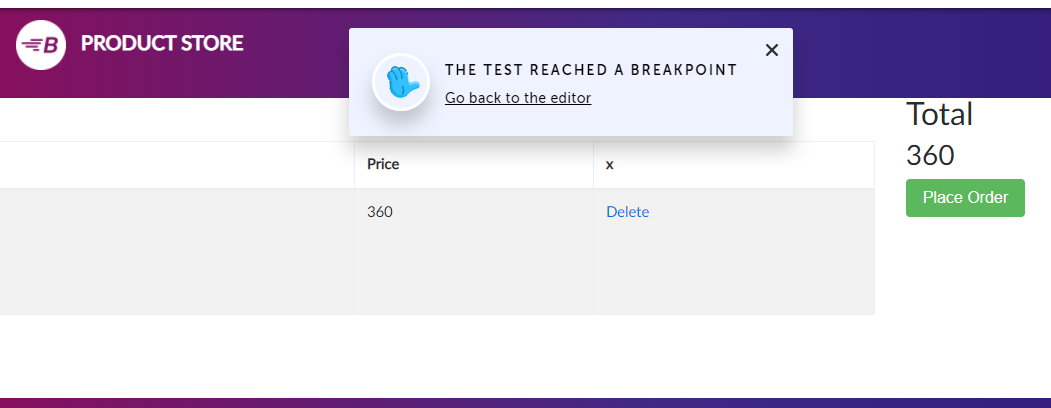
Go back to the editor and repeat the process of trying to add a validation step. You’ll then be taken to the test window again, where you’ll see you can select elements from the page. Click on the total value (360) and go back to the editor.
You’ll see that your test now contains an extra step, referring to the validation. Rerun the test. It should be successful:
This first test is straightforward, and that’s by design. It’s far from being as robust as it could be. For instance, if the product’s price changed, the test would fail. Testim Automate offers functionality that can make the test more reliable, such as extracting the value from the page and using that value as a variable when performing the validation. For simplicity’s sake, we won’t cover those functionalities today.
Example #2: Search Functionality on a Book Shop
For our second example, we’ll use a different demo site, but still in the realm of e-commerce: https://demoqa.com/books.
In the editor, click on the Test List button located on the left panel.
You’ll see the list containing your three tests. Click on Second regression test (or whatever you named your second test). You’ll be taken to the editor for this test, which currently contains no steps. Click on the Start Recording button and, when asked, type in https://demoqa.com/books as the base URL. After that, click on CREATE TEST. The recording will start. As you’ll see, this site features a simple fictional bookstore. You’ll see some titles listed below a search field.
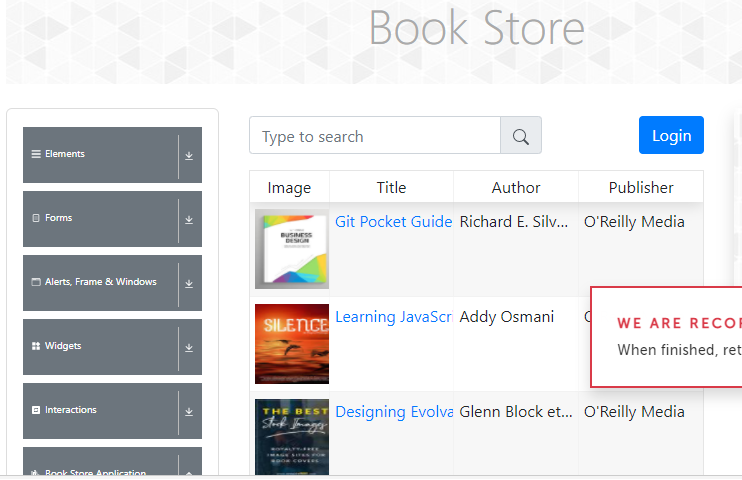
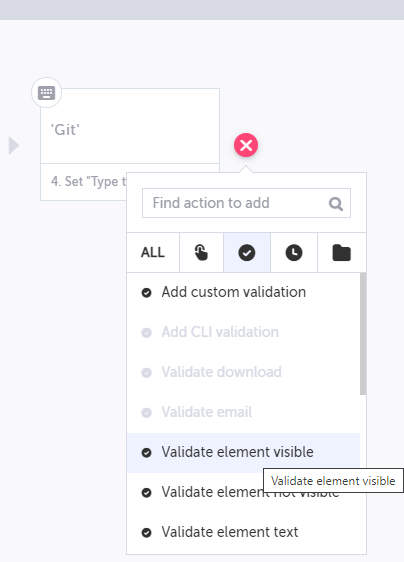
Go to the search field and type “Git.” The table containing the titles should be filtered, leaving only the Git book displayed. Now comes the essential part: without stopping the test, go back to the editor window. There, click on the add button after the last step and add a new validation. This time, instead of choosing to validate a text, we’ll validate the presence of an element by clicking Validate element visible:
After that, it’s back to the site under test. You should click on Git Pocket Guide to select that element. Then, stop the test. Going back to the editor, you’ll see its last step is the verification one. Play the test and check that it’s successful. Then, don’t forget to save your test before moving on to the last example.
Example #3: Login Functionality
Suppose you have an application with an authentication system. Wouldn’t it be awful to have bugs in the sign-in functionality? You could inadvertently block users from using the system. Or, even worse, let unauthorized users in!
So, it makes sense to cover your sign-in systems with regression testing as well.
By this point, you know the drill, so we’ll be even less didactic. We’ll provide you with the expected result and let you create the test on your own. Ready?
The base URL is https://orangehrm-demo-6x.orangehrmlive.com. It refers to the demo site for OrangeHRM, which is an open-source solution for human resources management. The task you’ll have to perform is to sign in using the user admin and the password admin123.
Once you’re logged in, you should see something like this:
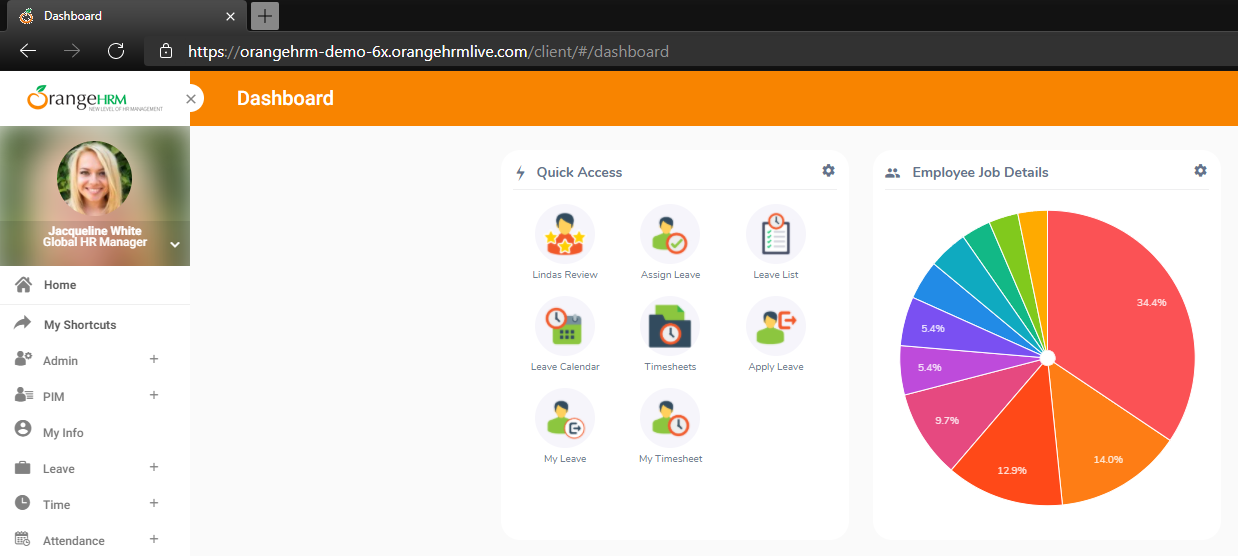
At this point, add a validation step to verify that the logged user is, in fact, Jacqueline White. Finally, click on the small arrow next to “Global HR Manager” and then log out from the website.
That’s it. You’ve completely created a test using Automate on your own.
Regression Testing: Further Tips
Before wrapping up, we leave you with some more tips and suggestions regarding what you should consider when thinking about regression testing:
- Types of testing. There are many forms of automated testing—unit testing, integration testing, end-to-end testing, and more. You can and should apply regression testing leveraging all parts of the test automation pyramid.
- Code-based vs codeless tools. When it comes to test automation, there are many types of tools at your disposal. Read about them, and most importantly, try them. But take into account the skills and characteristics of your team. Remember that nowadays testing is everyone’s responsibility, and don’t exclusively use tools that require coding skills.
- Likelihood of problems occurring. Remember that software testing is an economical activity. As such, you should evaluate its ROI constantly. That includes evaluating when a testing approach is adequate and when it’s not—for instance, testing for extremely low-probability scenarios.
Conclusion
Regression testing, rather than being a different type of testing, is a strategy that aims to cover the application with a safety net of tests. That way, if any change to the codebase results in a regression—i.e., an unintended consequence or issue—the team will be alerted right away.
In this post, you’ve seen three examples of how to create automated tests with Testim Automate. The tests were kept deliberately simple. Make no mistake, though: Automate is a powerful tool with lots of functionality. If you still haven’t created your account, we invite you to do so again. Thanks for reading.


