


Testing is a significant part of the software development process for several reasons. For example, by testing our code, we can verify each function’s integrity and how to improve it. However, when our software relies on APIs to receive and send data, testing these API services becomes challenging due to many factors.
One such factor is that an API service may limit how many times you can call it. Another challenge is that an external API can change and require a network connection to access. Usually, you do not have control over internal changes in an API. So, how can we ensure our code that uses API services won’t break on production by testing it? This is where MockWebServer comes into play.
What Is a Mock Web Server?
Generally, a mock web server is a library or program that mocks (imitates or mimics) the functionalities and behaviors of a real server but doesn’t make a request to the internet for fetching or sending data. Hence, a mock web server allows us to make HTTP requests (test APIs) without fearing hitting the request rate limits. It also eliminates issues like API changing or network issues because it intercepts the actual HTTP request, processes it offline, and returns the data we are very familiar with (because we specify the data).
Mocking a web server can be done in different applications (Android, Web Apps, etc.). This guide will walk you through how to use the MockWebServer library by developer Square.
Expand Your Test Coverage
MockWebServer Library
Like the name reads, this library (written in Java and Kotlin) makes it possible to mock HTTP calls in tests. The library offers many features that make testing functions that depend on HTTP calls easy and fun. For example, using this library, you can copy and paste real HTTP responses to mock them. This means you can test for a particular result without actually making multiple requests to an external API.
How to Use MockWebServer
In this section, we’ll discuss how to set up MockWebServer and see how it can make testing HTTP requests easier in a practical example.
For our example, we’ll be testing a small piece of Java code that makes HTTP calls to an external API. The external API will typically return JSON data. For example, our Java program can make requests to an API like https://api.ipify.org/?format=json, which returns a user’s current IP address. With that said, let’s dive into the actual steps for using MockWebServer.
Prerequisites
To follow along well, make sure to have the following:
- IntelliJ IDE or any other IDE for developing with Java.
- Basic knowledge of Java and Java syntax.
Step 1: Create a Java Project
First, you need to create a new project if you don’t already have one. For our example, we’ll be creating a project using IntelliJ. Here’s how to do that:
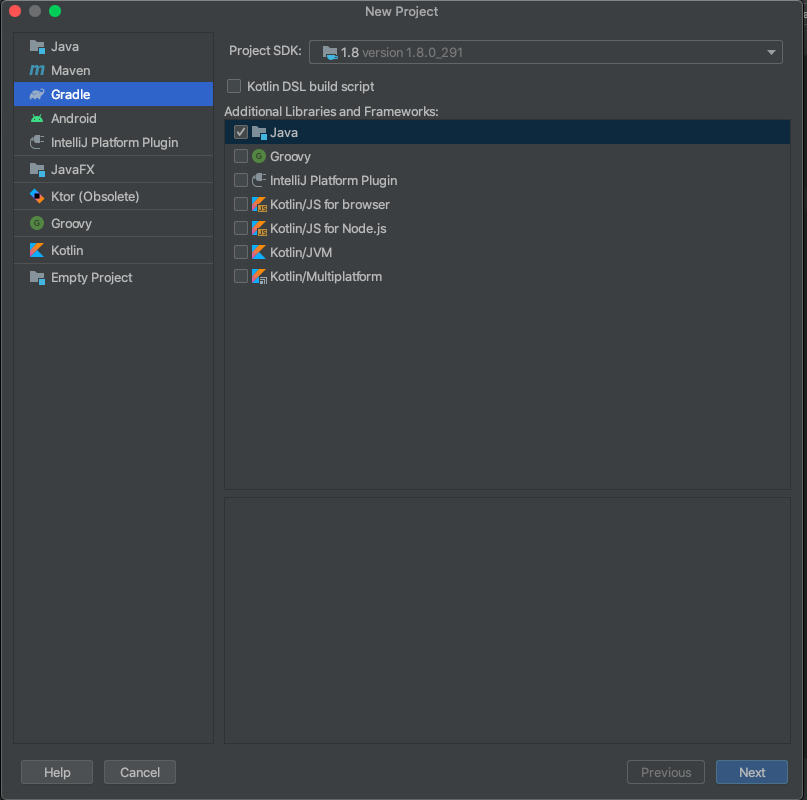
- Open IntelliJ and navigate to New → Project.
- Then select Gradle as the project type and check Java under Additional Libraries and Frameworks.
- After that, hit the next button to continue.
On the next screen, enter your project name and leave other options as default.
Step 2: Create Classes
Our example project will make use of two Java classes. Navigate to src → main → java and create the classes. The following code shows the content of each class:
Main.java
public class Main {
    public static void main(String[] args) throws IOException {
        HttpUrl url = new HttpUrl.Builder().scheme("https").host("api.ipify.org").addQueryParameter("format", "json").build();
        System.out.println(IpGetter.getIp(url));
        System.out.println("Hello world!");
    }
}
IpGetter.java
public class IpGetter {
    public static String getIp(HttpUrl apiUrl) throws IOException {
        OkHttpClient client = new OkHttpClient();

        Request request = new Request.Builder()
                .url(apiUrl)
                .build();

        try (Response response = client.newCall(request).execute()) {
            return response.body().string();
        }
    }
}
Step 3: Install MockWebServer
Next, let’s install the MockWebServer library using Gradle. You can add the following code to your project’s build.gradle file under the dependencies section:
testImplementation("com.squareup.okhttp3:mockwebserver:4.9.3")
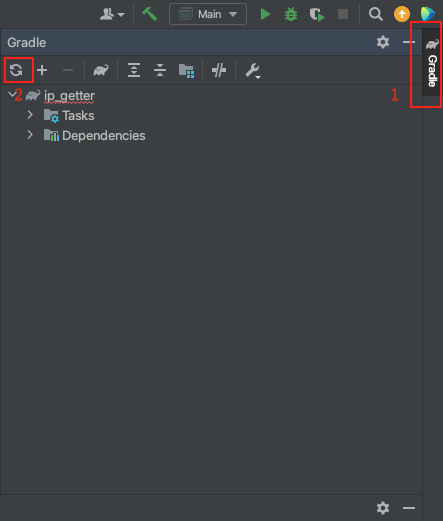
After that, hit the Gradle sync icon to install the library.
Also, install the OkHttp library, as our IpGetter class depends on it to make HTTP calls. Add the following dependency to build.gradle and sync again:
implementation("com.squareup.okhttp3:okhttp:4.9.3")
Step 4: Write a Test
Here, we are going to write a test for our IpGetter class. Click on the class name and press Alt+Enter. This should bring up a popup menu with an option to create tests. Select that option and complete the new test wizard.
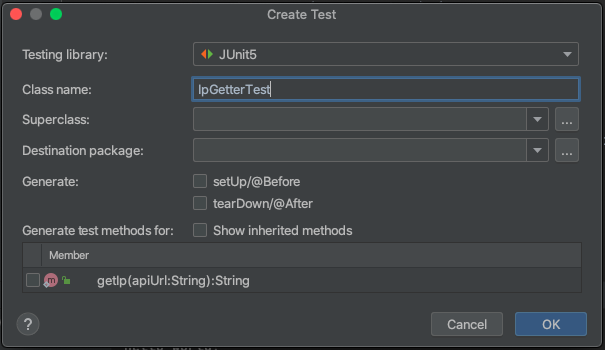
Once the test is generated, you’ll find a new test directory under src. This is where you’ll find the actual test file.
Now let’s write our test. First, we need to set up our MockWebServer. To do that, add the following code inside the IpGetterTest class:
@Test()
    public void test() throws Exception {
        MockWebServer server = new MockWebServer();
        MockResponse response = new MockResponse()
                .addHeader("Content-Type", "application/json; charset=utf-8")
                .setBody("{\"ip\": \"127.0.0.1\"}");

        server.enqueue(response);
        server.start();
    }
The above code creates a new instance of MockWebServer. It also creates a mock response. The header for the response has an “application/json” content type and returns a JSON response with the IP address 127.0.0.1.
Next, enter a new line just after the statement server.state(); and paste the following code:
HttpUrl baseUrl = server.url("/getIp");

IpGetter ipGetter = new IpGetter();
assertEquals("{\"ip\": \"127.0.0.1\"}", ipGetter.getIp(baseUrl));

server.shutdown();
This code gets the URL for our mock server and then creates a new instance of the IpGetter class. After that, it tests to verify that the response from MockWebServer is the expected value. And finally, it shuts down the mock server using the server.shutdown() method.
You can find the complete code for IpGetterTest below:
import okhttp3.HttpUrl;
import okhttp3.mockwebserver.MockResponse;
import okhttp3.mockwebserver.MockWebServer;
import org.junit.jupiter.api.Test;

import static org.junit.jupiter.api.Assertions.assertEquals;

public class IpGetterTest {
    @Test()
    public void test() throws Exception {
        MockWebServer server = new MockWebServer();
        MockResponse response = new MockResponse()
                .addHeader("Content-Type", "application/json; charset=utf-8")
                .setBody("{\"ip\": \"127.0.0.1\"}");

        server.enqueue(response);

        server.start();

        HttpUrl baseUrl = server.url("/getIp");

        IpGetter ipGetter = new IpGetter();
        assertEquals("{\"ip\": \"127.0.0.1\"}", ipGetter.getIp(baseUrl));

        server.shutdown();
    }
}
Step 5: Run the Code
There are two ways to run our code. The first option is to run the Main class. However, this will require making a real HTTP request to an external API. That means we may get an unexpected response due to changes to the API or poor internet connection. The second option is to run the test class. Since the test class uses our mock server, we have more control over the response to expect. In addition, we won’t hit any external API because it runs offline.
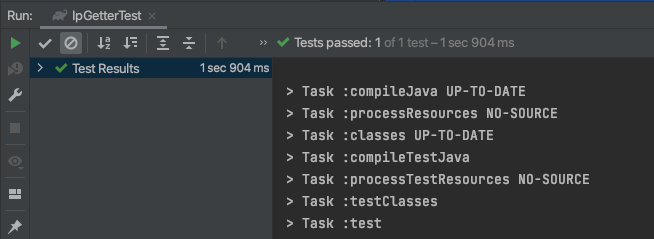
To run the test, go to the test class and hit the green play button, shown below.
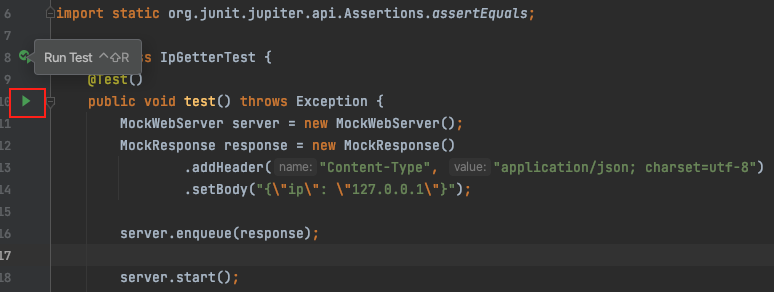
Once the test runs successfully, you will find a full report of the result in the IDE. And with that, you have successfully tested your functions that make HTTP calls without actually hitting an external API.
Summing Up
The use of MockWebServer makes testing the parts of your application that make HTTP calls easier. As a result, you catch bugs faster.
You can also use a MockWebServer on multiple platforms, irrespective of the framework or programming language. However, our example used the MockWebServer library by Square for the Java programming language. If you wish to mock a web server using another language, all you have to do is find the right library for your preferred language or framework. For example, Nock is a similar tool for Javascript. It is a mock server library for NodeJS that intercepts all requests made to a specified URL and then returns a specified response. You specify the response using methods provided by the Nock library.
We hope you enjoyed this guide on testing your application with MockWebServer. Until next time!
If you are thinking about mocking network services for your automated UI tests, check out Testim and Testim’s built-in network mocking.
What to read next:
Mocking in Testing: from zero to hero
Why Testim Should Be Your Preferred Codeless Automation Platform


